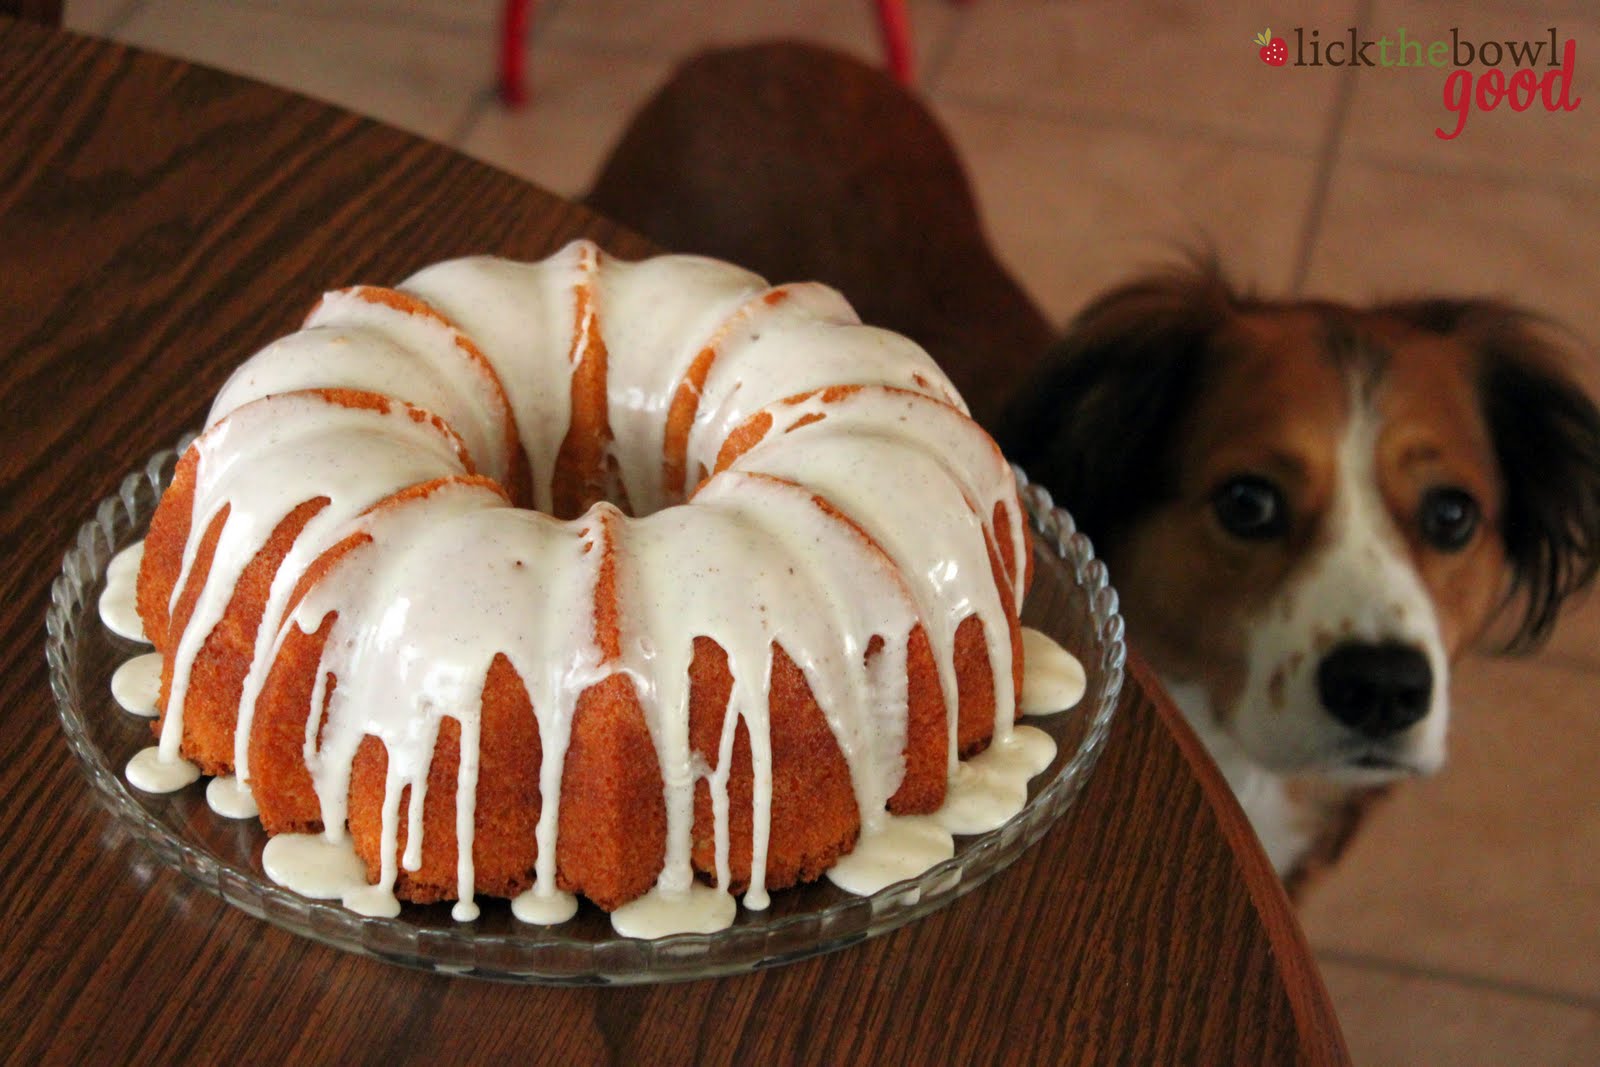
Showing posts with label Vanilla. Show all posts

Wednesday, October 16, 2013

Ice Cream Cone Cupcakes & The Pillsbury Giveaway Winner


Yesterday, October 15th, was Infant and Pregnancy Loss Awareness Day. It's a day to remember all the babies that left this world too soon. I lit a candle for my boys and set out a few things that remind me of them. In my cookbook, I shared my story about how I got into blogging, and my struggle with becoming a mom to a live baby. I questioned whether or not to add this to the book because I know many people are uncomfortable with death and some will think that it's irrelevant to baking. However, for me, this is my reality and I never would have started this blog or have written a cookbook if it weren't for the loss of my sons. Losing them made me see things differently, made me love deeper, and opened my life up to so many more opportunities. 

To stabilize the cones, line a cupcake pan with foil, cut a small hole in the center of each indention and place the cone snugly in the center. Don't make the hole too big or the cones will wobble. 
I made these ice cream cone cupcakes for my first born Sam's 6th angel birthday. I've always wanted to make cupcakes in ice cream cones for him and this was finally the year. I had some leftover vanilla buttercream that was tinted a lovely shade of sky blue from a previous project, so I used that to top them. The chocolate malted cupcakes come from Martha's Cupcakes. They were good but the malt flavor was very mild. A malted frosting would be nice on these, maybe even a few malted milk balls, if you're a fan of those. I opted for colorful sprinkles because I imagine any 6 year old boy of mine would love that. 

I love you Sam. Thinking of you and Jack, today and always.

Chocolate Malted Cupcakes 
from Martha's Cupcakes

  • 2 1/4 cups all-purpose flour
  • 3/4 cup unsweetened Dutch-process cocoa powder
  • 1/2 cup granulated sugar
  • 3/4 cup packed light brown sugar
  • 1 1/2 teaspoons baking soda
  • 1/2 teaspoon salt
  • 1 cup milk, at room temperature
  • 1 1/4 cups malted milk powder
  • 1 cup vegetable oil
  • 3 large eggs, at room temperature
  • 1 cup sour cream, at room temperature
  • 1 teaspoon vanilla extract

Preheat oven to 350 degrees F.  Line cupcake pans with paper liners.

In a medium bowl, whisk the flour, cocoa powder, both sugars, the baking soda and salt together.  Whisk the milk and malt powder in a measuring cup.

In the bowl of a stand mixer fitted with the paddle attachment, beat the oil, flour mixture and milk mixture until smooth.  Add the eggs, one at a time, beating well after each addition, and stopping to scrape the sides of the bowl once or twice.  Beat in the sour cream and vanilla, mixing just until combined.

Divide the batter among the prepared pans, filling each well about half full.  Bake for about 20 minutes, or until the tops of the cupcakes spring back when lightly pressed and a toothpick inserted in the center comes out clean.  Transfer the pans to wire racks and let the cupcakes cool for about 5 minutes before removing them from the pans.  Cool completely before frosting.

Makes 28 cupcakes.

NOTE: I made 1/3 batch of this cupcake recipe and yielded 10 ice cream cone cupcakes. To make the ice cream cone cupcakes, fill cones 2/3 full and bake til a toothpick inserted in the center comes out clean, about 15-18 minutes. 


The winner of the Pillsbury Celebrate More Fall Celebration Kit and $100 gift card is....


Commenter #4 Lisa Ghenne from The Cutting Edge of Ordinary. This is what she said she loves about Fall...

"EVERYTHING! I can't wait for autumn to arrive. Sweaters, cozy socks, pumpkins, apples, chilly nights by the fire pit, soups, stews, casseroles! I love it all! Thanks for the chance at this sweet prize! Pun intended!"

Congratulations Lisa! Please email me with your address to claim your prize!


Tuesday, August 13, 2013

Black Bottom Cookie Bars


Have you ever had a recipe on your "to-bake bucket list" for so long that when you finally make it, you're kinda disappointed? That's how I felt about these black bottom cookie bars. Don't get me wrong, these bars were quite tasty, but not at all what I was expecting. I bookmarked this recipe from Bake or Break back in 2011 and just now made them. They were very simple to throw together. You melt butter, mix it with other ingredients, then divide the batter in half and add cocoa powder and chocolate chunks to one half, then layer and bake. I appreciate the ease, because I'm sometimes lazy in the kitchen, but I didn't love the heavy texture. 

I was hoping for a soft, chewy sugar cookie consistency, instead they were kind of dense and fudgy. We ate half then they just kind of sat around on the counter for a few days til they got stale and I eventually threw them out. Then I realized there are no leavening agents in this recipe- no baking soda, no baking powder and that probably was the reason they were a little heavy. These had great flavor and I think with a little tinkering of the recipe they could be great. However, if you like dense and fudgy treats, then leave it as is and enjoy!


Black Bottom Cookie Bars from Everyday Food via Bake or Break

Printer Friendly Version

  • 1 cup unsalted butter, melted 
  • 1 cup packed light brown sugar
  • 1/2 cup granulated sugar
  • 2 large eggs, lightly beaten
  • 1 1/2 teaspoons vanilla extract
  • 2 cups all-purpose flour
  • 1/2 teaspoon fine salt
  • 1/4 cup unsweetened cocoa powder
  • 1 1/4 cups semisweet chocolate chips

Preheat oven to 350°. Lightly butter an 8-inch square baking pan. Line with parchment, leaving about a 2-inch overhang on two sides. Lightly butter parchment.

Whisk together butter and both sugars in a large bowl. Whisk in eggs and vanilla. Gradually add flour and salt, mixing just until moistened.

Divide batter in half, and transfer one half to a separate bowl. Stir in cocoa powder and chocolate chips until combined.

Place chocolate batter in baking pan. Spread evenly and smooth top. Spread plain batter on top of chocolate batter. Smooth top.

Bake 25-35 minutes, or until top is golden brown and a toothpick inserted in the center comes out clean (mine took longer to bake). Cool completely in pan on wire rack.

Little Bit was ready for that glass of milk :-)

Sunday, July 28, 2013

Boston Banana Cream Pie-lets


I just got back from taking a road trip across the great state of Texas with my mom, aunt, sister and Hayden. My cousin's 1st birthday was last weekend and my aunt asked if I would do the honor of baking his cake. If you're following me on Facebook or Instagram you've already seen The Cat In The Hat cake I made but I will share photos and the recipe I used very soon. I had so much fun making it for him. Now I'm trying to dream up ideas for Hayden's 2nd birthday cake in 5 short weeks. 

I hoped to share this recipe with you before I left but leave it to me to wait til the last minute to try and get things done. I was working with fondant and trying to pack until the wee hours of the morning before we left. I just ran out of time. Luckily The Cake Slice Bakers are forgiving and haven't kicked me out of the group yet even though I'm a week late with my version of Boston Cream Pie-lets. 
This cake uses no butter or oil, instead you whip up heavy cream and use that as the fat in this cake. There are several steps to this recipe but they're all simple. I added sliced bananas to this recipe since it reminded me of banana cream pie. This recipe is a little different though in that you assemble the mini "pies" in custard cups instead of  having a larger round cake that needs slicing. There's lots of extra vanilla bean pudding in there too, which is never a bad thing. If you're interested in this recipe or the others The Cake Slice Bakers have made this year, check out Vintage Cakes by Julie Richardson. 


Boston Banana Cream Pie-lets 
adapted from Vintage Cakes by Julie Richardson


Makes 8-10 servings

Cake:
  • 2 cups sifted cake flour
  • 2 teaspoons baking powder
  • 1 teaspoon salt
  • 1 ½ cups cold heavy cream
  • 1 ¼ cup sugar
  • 3  large eggs
  • 2 teaspoons vanilla extract

Pudding:
  • 1 vanilla bean
  • 4 cups whole milk
  • 1 cup sugar
  • 8 egg yolks
  • ½ teaspoon salt
  • ¼ cup cornstarch
  • 4 tablespoons unsalted butter, cubed

Ganache:
  • 1 cup heavy cream
  • 8 ounces semisweet or dark chocolate chips
  • 3-4 large bananas, sliced 1/4 inch thick


Center an oven rack and preheat to 350 degrees F. Line a 9x13-inch cake pan with foil. Do not grease the foil.

To Make The Cake: Sift together the cake flour, baking powder, and salt in a bowl, then whisk the ingredients by hand to ensure they are well mixed. 

Using the stand mixer fitted with the whisk attachment, whip the cream on high until soft, droopy peaks form. On medium-low speed, add the sugar in a steady stream and then return he mixer to high speed to continue to whip the cream until stiff peaks form. Return the mixer to low speed then add the eggs one at a time, followed by the vanilla. Stir in he flour mixture in three parts, adding the next addition, as soon as the flour has been incorporated. Turn off the mixer before all the flour has been mixed into the batter and finish mixing by hand with a rubber spatula. Pour the batter into the prepared baking dish and place it into the center of the oven until the cake springs back in the middle when slightly pressed, 28 -32 minutes. Cool the cake in it's pan on a wire rack until it reaches room temperature. 

While the cake is in the oven, make the pudding. 

To Make The Pudding: With a small paring knife, split the vanilla bean in half, lengthwise. Scrape out the seeds from the pod and put them along with the pod into the saucepan. Add the milk and 1/3 cup of sugar and place the pan over medium-low heat until the milk is hot but not boiling. While the milk is heating, in a small bowl, thoroughly whisk together the yolks along with the remaining 2/3 cup sugar and the salt, then blend in the cornstarch. Slowly whisk a third of the hot milk into the yolk mixture. Pour this mixture back into the saucepan with the remaining hot milk.Cook gently over medium-low heat, whisking steadily until the pudding just begins to thicken and has been bubbling for roughly one minute (you will need to stop whisking for a moment to see if it is bubbling). Strain he mixture through a fine mesh sieve into a clean bowl. Whisk in the butter until it is melted. 

To Make The Ganache: In a small sauce pan, bring cream to a simmer. Place the chopped chocolate or chips into a large, heat proof bowl. Add the hot cream to the bowl. Swirl the bowl to ensure even coverage of cream on the chocolate. Cover the bowl with a lid or plastic wrap for 5 minutes. Remove lid and whisk the chocolate from the middle and outwards. Start with small circles in the middle and move outwards until all the chocolate has melted. 

To Assemble The Pie-lets: Set aside 8-10 pudding cups (tea cups, juice glasses or small bowls will work just fine). Using a 2 1/2-inch round biscuit cutter, cut out 8 miniature cakes from the pan. Carefully remove the miniature cakes from the pan and using a serrated knife, cut them in half horizontally to create two equal layers per cake. Use the extra cake to snack on or make an extra pudding cup. 

Spoon 3 tablespoons of warm pudding into the bottom of each dish. Place 1 slice of cake over the pudding. Place banana slices over cake and cover with another 3 tablespoons of more pudding. Top with the second piece of cake. (Layers: pudding, cake, bananas, pudding, cake). Evenly divide the ganache over each slice of cake. Cover with plastic wrap and refrigerate until well chilled for at least 4 hours. 

Monday, February 20, 2012

Pie Or Cake?

I've been on a pie kick lately and I'm not sure why. Maybe because they're so versatile and can be sweet or savory, and can be served at any meal. Or maybe it's because they can be the meal and the dessert? I'm not sure, but I've been going through my cookbooks and bookmarking pies left and right. I hope you don't get tired of them because it seems that 2012 is the year of the pie. Move over layer cake! Did I just say that?

This month The Cake Slice Bakers chose to make Boston Cream Pie. I realize it's not actually a pie, but a cake, but who cares when you have vanilla cake sandwiched with thick pastry cream and topped with velvety chocolate ganache? I almost made this for my Pie Party, but I ran out of time so I made it for our Super Bowl get together. Classy right? Picture it- Spicy Buffalo Wings, Chips and Queso, Baked Corndogs, Veggies with Dip, Sausage and Pepperoni Pizza Puffs and Boston Cream Pie on a Pedestal. haha! It's a little contradictory but it's never a bad time to eat cake. Or pie. Which is it?

This cake is not hard to make, but you have to plan ahead when making it. It's a little laborious and time consuming, but it's rather simple as long as you read and follow the directions. Just be sure to make the custard ahead of time and have it well chilled so when you're ready to assemble this cake you're not having to wait on the filling. Now I'd love to say that this cake was a dream come true but to be honest I thought the actually sponge cake was a little dry. The filling and the topping were great though and I'd make those components again but I'd try a different recipe for the cake. I thought it dried out because I made it the night before but some of the other Cake Slice Bakers had the same issue. Keep that in mind if you give this recipe a try. If nothing else you'll end up with a very pretty dessert. And who doesn't love pretty?

Boston Cream Pie adapted from The Cake Book

Printer Friendly Version
  • 1 recipe Vanilla Custard Filling (make and chill prior to baking the cake)
  • 1 recipe Hot Milk Sponge Cake
  • 1 recipe Chocolate Glaze

For The Vanilla Custard Filling:

  • 3 large egg yolks
  • 1/4 cup granulated sugar
  • 2 Tablespoons cornstarch
  • 1 cup whole milk
  • 1 Tablespoon unsalted butter
  • 1 teaspoon vanilla extract
  • 1/4 cup heavy cream

In a medium bowl, whisk together the yolks, sugar and the cornstarch, set aside.

In a medium saucepan, bring the milk to a gentle boil. Remove the pan from the heat and whisk about 1/3 cup of the hot milk into the yolk mixture. Return the entire mixture to the saucepan, place over medium-high heat, and bring to a boil, whisking constantly, for 1 minute. Remove the pan from the heat, scrape the bottom of the pan with a spatula, and whisk until smooth. Whisk in the butter until melted.

Immediately strain the custard through a fine-mesh sieve into a medium bowl. Whisk in the vanilla extract. Cover the surface of the custard with plastic wrap, and let cool to room temperature, then refrigerate for two hours, or until well chilled.

Just before assembling the cake, transfer the custard filling to the bowl of an electric mixer. Add 1/4 cup heavy cream and using the whisk attachment, beat the mixture at high speed until it is light and forms soft peaks, about 1 minute.

For The Hot Milk Sponge Cake:
  • 1 1/2 cups sifted cake flour
  • 1 1/4 teaspoons baking powder
  • 1/4 teaspoon salt
  • 1/2 cup whole milk
  • 4 Tablespoons unsalted butter, cut into tablespoons
  • 3 large eggs, at room temperature
  • 3/4 cup granulated sugar
  • 1 teaspoon vanilla extract

Position a rack in the center on the oven and preheat the oven to 350 degrees F. Grease the bottom and sides of a 9-inch cake pan. Dust pan with flour.

Sift together the cake flour, baking powder, and salt two times. Set aside.

In a small saucepan, combine the milk and butter and heat over medium heat just until the butter is melted. Remove the pan from the heat and set aside.

In a bowl of an electric mixer, using the whisk attachment, beat the eggs at high speed until blended, about 1 minute. Gradually add the sugar and vanilla extract and beat until pale and tripled in volume, about 6 minutes.

Sift one-third of the flour mixture over the egg mixture and gently fold it in with a rubber spatula. Repeat with the remaining flour mixture in two more additions.

Reheat the milk mixture to just under a boil. Add it all at once to the egg mixture and gently fold it in. Scrape the batter into the prepared pan.

Bake the cake for 20-25 minutes, until it springs back when lightly touched and a cake tester inserted into the center comes out clean. Cool the cake in the pan on a wire rack for 10 minutes.

Run a paring knife around the edge of the pan and invert the cake onto the wire rack. Reinvert the cake, so that it is right side up.

For The Chocolate Glaze:

  • 3 ounces semi-sweet or bittersweet chocolate, finely chopped
  • 1/2 cup heavy cream
  • 1/2 teaspoon vanilla extract

In a small saucepan, bring the cream to a boil. Remove from the heat and add the chocolate to the pan. Stir until the chocolate is completely melted and the glaze is smooth. Stir in the vanilla extract. Transfer the glaze to a small bowl. Cover the surface of the glaze with a piece of plastic wrap and let cool for about 10 minutes before using.

Assemble The Cake: Using a long serrated knife, cut the cake horizontally in half to make 2 layers.

Save the smooth bottom layer for the top of the cake, and place the remaining cake layer cut side up on a serving plate. Scrape the filling onto the layer and, using a small offset metal spatula, spread it into an even layer. Top with the other cake layer, cut side down.

Glaze The Cake: Pour the warm glaze over the top of the cake, allowing some of it to drizzle down the sides. Serve the cake immediately, or refrigerate.

Store in the refrigerator in a covered container for up to a day. Bring to room temperature before serving.

I've been getting emails and comments asking where Hayden is. You guys are funny! Here he is with his daddy looking at himself in the mirror. He looks at himself, smirks at the good looking boy staring back at him then starts giggling. When he's feeling grumpy, this cheers him up everytime. Maybe he's laughing at his momma, because I like to sing to Michael Jackson's "Man In The Mirror" to him when he does this, except I sing "I'm looking at the boy in the mirror". :-) I wish you all could just hear his laugh. It's the best sound in the world.

Monday, February 6, 2012

Pie Party Recipes: Banana Cream Pie

Here's the Banana Cream Pie you've all been waiting for. I had to save the best for last! I think of all the pies I made for my Pie Party, this was my favorite. Though the key lime pie was a very close second. I love banana pudding, though I didn't always and I'll tell you why. I don't like artificial banana flavoring and as a kid when we had banana pudding, it was made with instant banana flavored pudding, not vanilla. I thought that was how banana pudding was supposed to be. I liked the bananas and the vanilla wafers, but not the icky banana flavored pudding.

It wasn't until I was an adult that I realized what banana pudding could/should be. For years I made Paula Deen's "Not Yo Mama's Banana Pudding" until I started making my own custard. I like Paula's recipe, but when I eat it now I can taste all the chemicals and artificial flavors in the boxed pudding and Cool Whip. Now I don't eat banana pudding often, but when I do, I have to do it right and making it in pie form is right up my alley. I also made a banana pudding pie from Southern Living that was quite amazing. They're both similar in flavor, but this one was easier to make.

I made the crust and the filling the night before I needed it, that way on the day of, all I had to do was assemble it and make the fresh whipped cream. The custard was interesting in that all the ingredients go into the pot at once. You just stir, and stir and stir and just when you think it's never going to thicken- wham! It gets super thick. My pudding actually got a little too thick. I'm not sure if it's because of the recipe or because I overcooked it, but I just thinned it out the chilled pudding with a little milk before I assembled the pie. The end result was creamy, sweet and addicting pie. I was sad when it was all gone. My stepdad has even offered to pay me to make another one. Will do!

Banana Cream Pie from Simply Suppers

Printer Friendly Version

For The Crust:

  • 2 cups vanilla wafer cookies (about 1 1/4 cups crumbs)
  • 1/4 cup granulated sugar
  • 4 Tablespoons unsalted butter, melted

For The Filling:

  • 2 cups heavy cream
  • 1/3 cup cornstarch
  • 1/4 teaspoon salt
  • 3 large egg yolks
  • 1/2 cup granulated sugar
  • 1 teaspoon pure vanilla extract
  • 2-3 ripe bananas

For The Topping:

  • 1 cup heavy cream, chilled
  • 1/4 cup powdered sugar
  • 1 teaspoon pure vanilla extract

Preheat oven to 325 degrees F.

To Make The Crust: In a food processor, finely grind the cookies. Add the sugar and pulse until combined. Slowly add the butter and pulse until well incorporated and moist clumps form. Transfer to a 9-inch pie pan. Press the crust evenly into the bottom and up the sides. Bake until set, about 8-10 minutes. Cool completely on a wire rack.

To Make The Filling: In a medium saucepan, combine the cream, cornstarch, salt, egg yolks, sugar and vanilla. Over medium-low heat, cook, whisking continuously, until mixture thickens, about 10 minutes. Remove from the heat and transfer to a large mixing bowl. Place plastic wrap directly onto the surface of the pudding and place in the refrigerator and cool completely, at least two hours or overnight.

Assembly: Spoon half the cooled pudding evenly over the bottom of the crust. (My pudding was very thick, so I thinned it out slightly with a little milk prior to assembling the pie). Peel the bananas and cut into 1/4-inch thick slices. Create a layer of banana slices, reserving some for garnish. Spoon the remaining pudding evenly over the bananas. Place the pie in the refrigerator to set while making the whipped cream topping.

To Make the Topping: In the large bowl, place the cream, sugar, and vanilla. Beat with an electric mixer until soft peaks form (You want the cream stiff enough to hold it's shape but not over whipped or it will curdle.) Spoon or use a pastry bag to pipe the whipped cream evenly over the pie filling. Chill the pie until set, at least 4 hours or overnight. Before serving garnish with extra vanilla wafers or bananas, if desired.

Sunday, December 11, 2011

M-I-C-K-E-Y

For the past 3 years, I have made the birthday cake for the boys I was a nanny for. I made a sea themed cake, a Wonder Pets cake, a Dinosaur cake and this year the theme was Pirate Mickey! In the past, I've spent countless hours thinking of the cake, drawing it out, then finally baking and decorating. Time was never as issue for me until this year. My mom came over to help out with Hayden, but a child needs his momma and I had to take frequent breaks to coo with him. Speaking of Hayden, my friend got mad at me for not sharing a picture of him a couple posts back, so here he is. This is one of my favorites.

The boys wanted a pirate ship cake complete with a flag, treasure chest, dolphin and sea turtle cupcakes. They wanted Donald Duck, Minnie and Pluto there too. Well I just couldn't commit to doing that this year so I did a dessert table instead. Yes, that's still a lot of work but it was broken up over the course of two days and I wasn't spending the bulk of my day decorating with mouse ears. I made a 9-inch Mickey Mouse cake as well as Oreo cupcakes, sugar cookie bars, a Giant m&m cookie and rice krispy treats. Today I will share the recipes for the cake and the cupcakes.

The main birthday cake was vanilla buttermilk cake with strawberry jam between the layers and iced in cream cheese frosting. The Micky decoration is made up of fondant. This is the same recipe I've made every year and the kids' mother just loves it and requests it every time. I've shared this recipe before but there's now a printable link below. The cupcakes start off with Hershey's "Perfectly Chocolate" cake recipe. I intended to put chopped up Oreos in the batter but forgot about it until I had already stuck them in the oven. Perhaps you can give that a try. The frosting was a basic buttercream with finely chopped Oreos in it. I used a mixture of shortening and butter for the frosting for flavor and stability. It was light and creamy, wasn't too sweet and really did taste like an Oreo. I'll be making these again!

Hershey's "Perfectly Chocolate" Chocolate Cupcakes

Printer Friendly Version

  • 2 cups sugar
  • 1 3/4 cups all purpose flour
  • 3/4 cup Hershey's Cocoa
  • 1 1/2 teaspoons baking powder
  • 1 1/2 teaspoons baking soda
  • 1 teaspoon salt
  • 2 eggs
  • 1 cup milk
  • 1/2 cup vegetable oil
  • 2 teaspoons vanilla extract
  • 1 cup boiling water

Heat oven to 350°F. Line muffin cups (2-1/2 inches in diameter) with paper bake cups and set aside.

Stir together sugar, flour, cocoa, baking powder, baking soda and salt in large bowl. Add eggs, milk, oil and vanilla; beat on medium speed for 2 minutes. Stir in boiling water (batter will be thin).

Fill cups 2/3 full with batter. Bake 22 to 25 minutes. Cool completely before frosting.

Makes about 24-30 cupcakes.

Oreo Buttercream from Monica H

  • 1/2 cup unsalted butter, room temperature
  • 1/2 cup shortening or butter
  • 1 teaspoon vanilla extract
  • 2 Tablespoons milk
  • 3-4 cups powdered sugar
  • 14 Oreos, finely crushed in food processor

In a large bowl, cream butter, shortening, vanilla, and milk.

Add powdered sugar until desired sweetness is achieved, anywhere between 3 and 4 cups. Mix in crushed Oreos until well combined.

If your frosting is too thick, add a tad more milk to thin. If it's too thin to pipe with, add more sugar until it's the texture you want.

This is enough buttercream to frost a layer cake or about 30 cupcakes.

Vanilla Buttermilk Cake from Sky High: Irresistible Triple-Layer Cakes

Printer Friendly Version

Makes an 8-inch triple-layer cake

  • 4 whole eggs
  • 2 egg yolks
  • 2 teaspoons vanilla extract
  • 1 1/4 cups buttermilk
  • 3 cups cake flour
  • 2 cups sugar
  • 4 1/2 teaspoons baking powder
  • 1/2 teaspoon salt
  • 2 sticks unsalted butter, at room temperature

Preheat the oven to 350 degrees. Butter the bottoms and sides of three 8-inch round cake pans or spray to coat with nonstick cooking spray. Line the bottom of each pan with a round of parchment or waxed paper and grease the paper.

Put the eggs and yolks in a medium mixing bowl, add the vanilla and ¼ cup of the buttermilk. Whisk to blend well.

Combine the flour, sugar, baking powder and salt in a large mixer bowl; whisk to blend. Add the butter and the remaining 1 cup buttermilk to these dry ingredients, and with the mixer on low, blend together. Raise the mixer speed to medium and beat until light and fluffy, about 2 minutes.

Add the egg mixture in 3 additions, scraping down the sides of the bowl and mixing only until thoroughly incorporated. Divide the batter among the three prepared pan.

Bake the cake layers for 28 to 32 minutes, or until a cake tester inserted in the center comes out clean and the cake begins to pull away from the sides of the pan. Let the layers cool in the pans for 10 minutes; then carefully turn out onto wire racks, peel off the paper liners and let cool completely.

NOTE: This can be made in 3 9-inch pans, but the baking times will vary slightly, so keep an eye on them.

Wednesday, May 25, 2011

Very Vanilla Bundt For My Baby Brother

My baby brother's birthday was a couple weeks ago. Only he's not a baby anymore, he's 16 years old! It's amazing how fast they grow up. I was looking at wedding photos the other day while cleaning out the guest room (preparing it for the nursery) and I saw this little boy who was my ring bearer. A sweet boy who was no more than 4 feet tall and now he's my height. His birthday fell on a weekday, but that didn't stop him from getting his birthday wish. He wanted all of his family to get together and have dinner together at The Olive Garden. And so we made it happen. I brought the cake.

I wasn't really planning on baking him a cake, but I had plenty of time that day to make it so I started texting my mom, asking what he'd like. I had several elaborate cakes in my head, some with tunnels of cheesecake running through it, others covered in a silky ganache. My mom said he mentioned something about a pineapple upside down cake a few days prior, I could do that. But then she said she'd just pick up a cake at the grocery store so I didn't have to bake anything. Um, no. Not gonna happen! So I text my brother while at school and asked him what his dream cake would be like. His response was not what I was expecting. It was only one word: vanilla.

It just so happens I made a vanilla bean cake for my old boss' mother about a week prior, only she wanted peaches in it, so I made it into a Peach Upside Down Cake. It looked and smelled great, the batter tasted amazing, but I didn't get a chance to taste the final product. I licked a beater, gave another to Mr. h and vowed to make that cake again. I just didn't think it would be so soon after the other. If I was going to make a vanilla cake, I wanted it to be loaded with vanilla flavor. The cake and glaze contains both vanilla extract as well as vanilla beans, speckled throughout. It is positively vanilla!

Mr. H is a huge chocolate fan and will pass up almost anything vanilla, but even he liked this cake. It was wonderfully aromatic and tasty to boot. It had a light, tender and moist crumb which I was thrilled about, because it seems so many "yellow" or butter cakes turn out dense or dry. I wanted a slightly larger cake so I increased the recipe by one and a half times and baked it in my 15 cup Anniversary Bundt. The birthday boy was pleased with his cake and even more thrilled that his family got together to celebrate his birthday. That just tells you the kind of young man that he is growing into, to wish for something like that. That's why I love him so much. Happy birthday Aaron!

Vanilla Bean Bundt Cake adapted from Bon Appetit

Printer Friendly Version

Cake:

  • 1 teaspoon bourbon
  • 1/2 teaspoon vanilla extract
  • 1 vanilla bean, split lengthwise
  • 1 1/2 cups all purpose flour
  • 2 teaspoons baking powder
  • 1/4 teaspoon salt
  • 1/2 cup plus 6 tablespoons unsalted butter (1 3/4 sticks), room temperature
  • 3/4 cup sugar
  • 1/4 cup (packed) golden brown sugar
  • 2 large eggs
  • 1 large egg yolk
  • 1/2 cup buttermilk

Glaze:

  • 1 cup powdered sugar
  • 2 teaspoons (or more) whole milk
  • 1 teaspoon vanilla extract
  • 1/2 vanilla bean, split lengthwise

For the cake: Position rack in center of oven and preheat to 325°F. Butter and flour a standard Bundt pan, then spray pan with nonstick spray. Pour bourbon and vanilla extract into small bowl. Scrape seeds from vanilla bean into bourbon-vanilla mixture; stir to blend well (reserve scraped vanilla bean for another use). (If you don't have or want to use bourbon, just substitute with vanilla extract).

Whisk flour, baking powder, and salt in medium bowl to blend.

Using electric mixer, beat butter and both sugars in large bowl until light and fluffy. Add eggs and egg yolk 1 at a time, beating until well blended after each addition. Beat in bourbon-vanilla mixture.

Add flour mixture in 2 additions alternately with buttermilk in 1 addition, beating just until blended after each addition. Transfer batter to prepared pan; smooth top evenly (batter will come only halfway up sides of pan).

Bake cake until tester inserted near center comes out clean, about 55 minutes. Cool in pan on rack 15 minutes. Invert cake onto rack and cool completely.

For the glaze: Whisk powdered sugar, 2 teaspoons milk, and vanilla in small bowl to blend, adding more milk by 1/4 teaspoonfuls if glaze is too thick to drizzle. If glaze is too thin, add a little more sugar until it's the consistency desired. Scrape the seeds from the vanilla bean into the glaze and whisk until the seeds are incorporated throughout the glaze.

Place cooled cake on serving dish. Using spoon, drizzle glaze over cake in zigzag pattern. Let cake stand at room temperature until glaze sets, about 15 minutes.

NOTE: Cake can be made up to 1 day ahead. Cover with cake dome and let stand at room temperature.

P.S. My fabulous friend gifted me with a new logo for my blog. I'll tell you all about it in the next post.

I hope everyone has a safe Memorial Day Weekend!

Monday, January 24, 2011

400th Post!

Today is my 400th post and I have a special cake for you today! I made this for the boys I nanny. They both have birthdays one week apart so for the last couple years they've shared a birthday party and cake. The oldest turned 4 years old and the youngest turned 2. Last year I made them a Wonder Pets Cake and this year they wanted to go with a dinosaur theme. raaar!

When I'm trying to design a cake, I google what I'm looking for then gather ideas I like or I sketch it out and let my imagination run wild. I was more concerned with the cake and how it tasted than the actual dinosaurs so I used toy dinosaurs the boys already had for decoration. The client requested vanilla buttermilk cake with instant fudge icing (from Sky High Cakes) for one tier and I chose chocolate cake with vanilla cream cheese icing for the other. The vanilla cake had a nice tight crumb and was firm but tender and the chocolate is my favorite go-to recipe. These are both of my favorite frostings too.

I didn't slice the cake so it's a little sloppy, but I wanted you to see the insides.

I made the palm trees by trial and error. I hope I never have to make them again. ha! I made the leaves out of fondant and for the trunks I used pretzel rods. Royal icing held it all together. I made enough leaves for 5 palm trees, many broke so I only had enough to make 4. Then as they dried overnight, I had 2 catastrophes and only 2 survived. I was hoping for 3, but I think it turned out fine. The border around the cake was done with chocolate rocks. They're chocolate chunks that are textured and colored to look like rocks. Fun stuff and the kids loved them!

The bottom tier is fudge frosting and the top tier was tinted with green coloring. It's also the same icing I used to pipe the "grass" border and the lettering on the bottom layer. And lastly the cake board was wrapped in white cake board paper, then I painted it with white royal icing and dusted it with a mixture of graham cracker crumbs and brown sugar to create the appearance of sandy soil. I wanted to wrap the edge of the cake board with ribbon but I didn't have enough to wrap all the sides and I ran out of time to go out and get some. Oh well, I'm pretty sure it would have wound up in the trash anyway :-) Hope you enjoy it and thank you for being here through all 400 posts!

Front of cake

I'm too lazy to type out the recipes, so here are the links:

Back of cake

Sunday, September 26, 2010

Crème Brûlée and My Torch!

Eeek! I'm running late in posting this! My cheeseball girlfriends Ingrid and Michelle were waiting on me to get this crème brûlée up- sorry to have you waiting ladies! Michelle chose this crème brûlée recipe to make together this month and it comes from Dorie Greenspan's book: Baking From My Home To Yours.

I've wanted to make crème brûlée for years! I even bought vanilla beans ages ago at Costco and never made it. I think I was waiting for a special occasion or maybe I was intimidated by the whole water bath thing. I'm not really sure, but I'm kicking myself now for waiting so long. This recipe could not be more straight forward and simple. You don't need a water bath, since it's baked in a low oven and you don't need expensive vanilla beans since it uses extract. And did I mention it's delicious?

Here's my torch- I named her Cali, short for Caliente! ha!

I've tried many crème brûlée in my life and I can't say it was the best one I've ever had, but it was right up there. This version was very silky and lighter than I expected. Most of the time, they're very thick and custardy, but this was pleasantly different. Don't get me wrong, it's loaded with calories but it doesn't feel as heavy going down :-). I made this twice, a vanilla version, with and without chocolate chunks on the bottom as well as an espresso version (I just added a couple teaspoons of instant espresso powder to the custard). I don't really have a favorite as they were all good, but I can tell you that the brûléed sugar on top is the best part!

Crème Brûlée from Dorie Greenspan

  • 1 1/4 c. heavy cream
  • 1/2 c. whole milk
  • 3 large egg yolks
  • 1/3 c. granulated sugar
  • 2 tsp. pure vanilla extract
  • granulated sugar for topping

Preheat the oven to 200 degrees F. Put the six baking dishes (gratin dishes or ramekins) on a baking sheet lined with parchment or a silicone mat.

Bring the cream and milk just to a boil. In a 1- or 2-quart glass measuring cup or in a medium bowl, whisk the egg yolks, sugar, and vanilla together until well blended but not airy. Still whisking, drizzle in about one quarter of the hot liquid to temper the yolks. Whisking all the while, slowly pour in the remainder of the cream and milk. Strain the custard into the baking dishes.

Bake the custards for 50 to 60 minutes* (see note), or until the center are set. Lift the dishes onto a cooling rack, and let the custards cool until they reach room temperature. Cover each custard with plastic wrap, and refrigerate for at least 3 hours, but up to 2 days.

To Caramelize the Sugar: Sprinkle the top of each custard with approximately 1 tablespoon (I used just enough sugar to coat the top of the custard) of sugar, or enough to cover the custard nicely. Brown the sugar with a torch until it bubbles and colors. Allow the bubbles to subside before serving.

NOTE: I used four larger ramekins rather than 6 smaller ones, so they took longer to bake. Rather than 50-60minutes, my crème brûlée took about 75 minutes to bake.

Autumn liked it! Go see how Michelle and Ingrid did!

Related Posts with Thumbnails