Showing posts with label Glaze. Show all posts

Friday, October 3, 2014

Lick The Bowl Good Cookbook- Celebrating The First Year


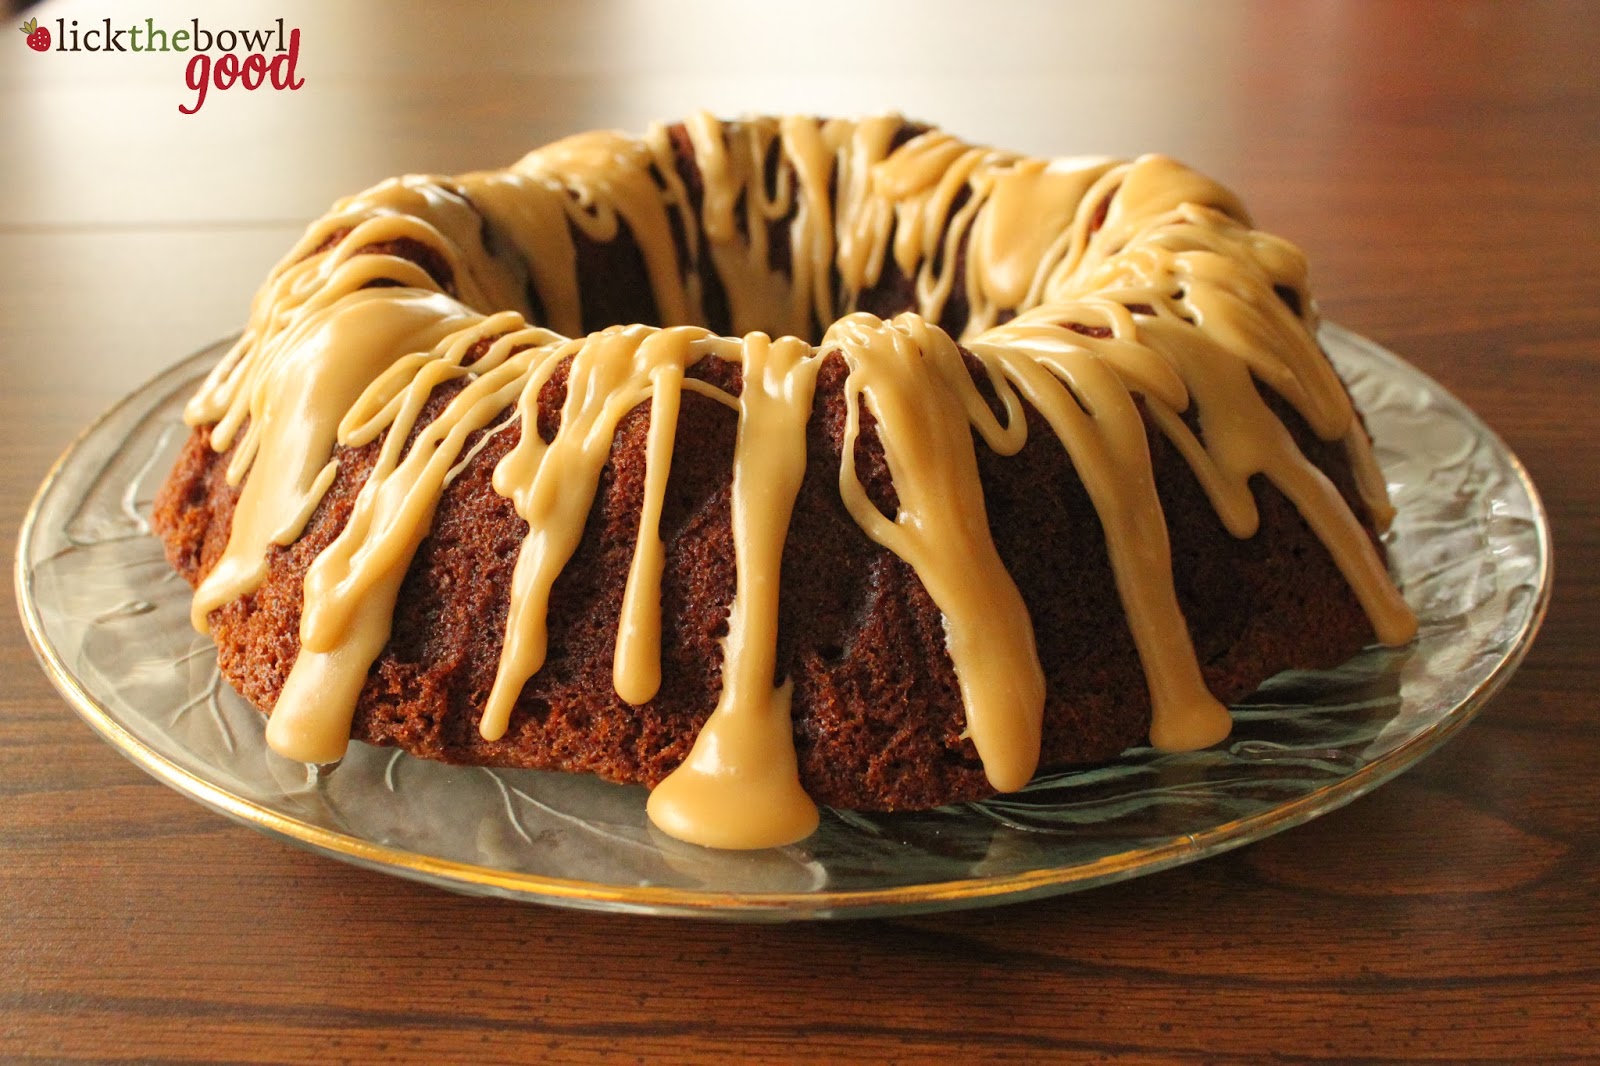
It's been one year since I released my cookbook Lick The Bowl Good so I thought I'd celebrate by sharing one of my favorite recipes from the book- Pumpkin Bundt Cake with Brown Butter Glaze. 

This is an adaptation of the Cinderella Cake that I have been baking for years. I swapped out the cream cheese icing for a deliciously nutty brown butter icing. I have been craving this cake for weeks and now that it's Fall and cooler, today was the perfect day to whip this up. As this cake sits cooling on the counter and the aromas of pumpkin and spice are floating in the air, I'm wishing I could share a slice with you all. 

Thank you all for your continued support of this blog and my cookbook. I hope you enjoy this cake!

Pumpkin Bundt Cake with Brown Butter Glaze

Pumpkin Cake: 
  • 2 cups granulated sugar
  • 4 large eggs
  • 1 cup canola oil
  • 1 teaspoon vanilla extract
  • 2 cups all-purpose flour
  • 2 teaspoon baking soda
  • 2 teaspoon cinnamon
  • 1/2 teaspoon salt
  • 1- 15 ounce can pure pumpkin 

Brown Butter Glaze: 
  • 1/4 cup unsalted butter
  • 1 1/4 cups powdered sugar
  • 2 Tablespoons milk
  • 1/2 teaspoon vanilla extract


For The Cake: Preheat oven to 350 degrees F.

Grease and flour a 9-inch Bundt pan and set aside.

In a large bowl, beat sugar and eggs until well blended and light in color. Add oil and vanilla and continue to beat.

Add the flour, baking soda, cinnamon and salt to the egg mixture and stir to combine.Add pumpkin puree and mix well. Pour into prepared pan.

Bake for 50 to 55 minutes or until a toothpick inserted into the center of the cake comes out clean.

Let stand in pan for 10 minutes, then turn out onto baking rack to cool completely.

Once the cake has cooled, place it on a serving platter and make the glaze.

For The Glaze: In a medium bowl add the powdered sugar and set aside while you make the brown butter.

In a small saucepan, melt the butter over medium heat. Continue to cook, swirling the pot occasionally until the butter boils and becomes foamy. It will turn golden brown and start to smell nutty. Once the butter stops sizzling and the foam subsides, it is ready. Keep an eye on it because you don't want it to burn. This could take 5 to 8 minutes.

Once the butter has browned, remove from the heat and pour the butter and the browned bits over the sugar. Add the vanilla to the butter and sugar and whisk until smooth.

Spoon the warm glaze over the cooled cake and allow the glaze to set before serving.

Store at room temperature.


Thursday, November 21, 2013

Apples and Spice


It's almost Thanksgiving, are you all ready? I'm always interested in what people are making. Ham or turkey? Stuffing or dressing? Cranberry sauce- fresh or jellied? Pumpkin or pecan? There are so many different foods, I want a buffet table so I can sample everything! What's on your Thanksgiving menu? Our family does Holiday gatherings pot-luck style so not everyone has to do the work on heir own. Less stress that way. I'm in charge of a side dish and chocolate pecan pies this year. 

I baked my cake in my Autumn Harvest Bundt that my hubby gave me years ago. It's such a pretty pan, but the detail didn't show up as much as I hoped it would. I'm thinking a pound cake would do well in a pan like this, with a light dusting of powdered sugar. 

If you like spice cake, you might like this cake. It was really moist and spicy. A little too spicy for me, if I'm being honest, but if spice is your thing you'll like this. In this applesauce cake was lemon zest too, which was a nice addition. It brightened the flavor and helped cut through the spice. If I made this again, I'd leave out the allspice all together, cut the amount of nutmeg in half and add more chopped apples. The glaze though, was delicious! I could eat the glaze straight out of the bowl with a spoon. Below is the recipe for the cake, as I made it. 

Stay tuned for a holiday pie recipe and a giveaway... coming soon! Click to see the other cakes made by the Cake Slice Bakers.


Apple Sauce Spice Bundt Cake 

  • 2 1/4 cups sifted unbleached all-purpose flour
  • 1 teaspoon baking soda
  • 1/2 teaspoon salt
  • 1 1/2 teaspoon ground cinnamon
  • 1/2 teaspoon ground allspice
  • 1/2 teaspoon ground nutmeg
  • 3/4 cup pecans, lightly toasted finely chopped (optional)
  • 1/3 cup butter, room temperature
  • 1 teaspoon grated lemon zest
  • 1/3 cup vegetable shortening
  • 3/4 cup granulated sugar
  • 2/3 cup light brown sugar, lightly packed
  • 2 large eggs
  • 1 medium sized Granny Smith apple, peeled and diced, about 1 cup
  • 1 teaspoon vanilla extract
  • 1 cup applesauce
Preheat oven to 350 degrees F. utter a 9" fluted tube pan, dust it lightly with flour and invert over the kitchen sink to tap out excess flour.

Sift together flour, baking soda, salt and spices in a triple sifter. Stir in chopped pecans, if using. Set aside.

Place the butter and shortening and lemon zest in large bowl of an electric mixer fitted with the beaters or paddle attachment. Beat over medium-high speed until creamy and smooth, about 2 minute. 

Add the granulated sugar, 1 tablespoon at a time, taking 3 to 4 minutes to blend it in well. Add the light brown sugar over an additional 3 to 4 minutes. Scrape the sides of the bowl occasionally.

Add the eggs, one at a time until well blended. Reduce speed to medium-low. Add the fresh apple and the vanilla. 

Reduce mixer speed to low. Add the flour/nut mixture alternately in three additions with the applesauce in two additions, starting and ending with the flour. Beat just until incorporated after each addition. Scrape the sides of the bowl occasionally.

Spoon the batter into the prepared pan and smooth the top. Center the pan on the rack and bake in the preheated oven for 35 to 40 minutes or until the cake begins to leave the sides of the pan and a toothpick inserted into the center comes out clean.
Remove from oven. Place the pan on a cake rack to set for 10 to 15 minutes, then invert the cake onto the rack and remove pan. While the cake is still warm you may want to pour Brown Sugar Glaze over the top, letting it drip naturally down the sides. Garnish the top with chopped pecans if you wish.


Brown Sugar Glaze
  • 3 Tablespoons butter
  • 3 Tablespoons brown sugar, packed
  • 3 Tablespoons heavy cream
  • 3/4 cup sifted powdered sugar
  • 1/2 teaspoon vanilla
In a small saucepan, melt the butter with the brown sugar over low heat. Then stir in the heavy cream and cook slowly until the mixture comes to a gentle boil. Simmer for 1-2 minutes.

Take the pan off the heat and gradually add the powdered sugar in three additions, whisking until smooth. Add in the vanilla and whisk to combine. 

If the icing is too thick, add another tablespoon of the cream. You want it thin enough to pour but not runny. It sets quickly so get it on the cake as quickly as possible.

My little barefoot donkey on Halloween :-)

Monday, October 7, 2013

Coffee, Donuts and an Awesome Pillsbury Giveaway! (CLOSED)


So...I made donuts! For the first time ever. I made these just the other day, and I still haven't gotten over how good they were. Just ask my mom and sister and Hayden how good they were. We ate one, then two and found ourselves reaching for a third, but stopped ourselves. Will power be darned. I've always wanted to make donuts but I'm not a fan of deep frying. Baked donuts are the perfect option and they're somewhat healthier, but I didn't have a donut pan. That's when my mom stepped in and saved the day. She surprised me with an electric Sunbeam donut maker on clearance from Target for $15. Yay! Thanks Momma!


Holy drippy glaze.....drool!

In my last post about Caramel Apple Fritter Cake, I mentioned that Pillsbury® sent me a few of their new Fall cake and cookie mixes. I couldn't wait to use the pumpkin mix but wasn't sure what to make, then it hit me- Pumpkin Donuts with Brown Butter Spice Glaze. I absolutely adore that combination of flavors, so much so that I shared a recipe for Pumpkin Bundt Cake with Brown Butter Glaze in my cookbook. Have you ordered your copy of Lick The Bowl Good yet? If you've never tried it before, make this glaze and pour it on something...anything, it is that good! Brown butter makes the world go round. mmm!

Stinky boy couldn't keep his fingers out of that glaze!


My sister is learning to bake and cook so she helped me whip these up. They were so simple and she did a great job. She also served as my hand model and helped me dip some of these bad boys in glaze. Thanks Sammy :-) As a thank you, I sent her and my mom home with some donuts and a few of the cake and cookie mixes that Pillsbury® sent me. My hope is that my sister will create something equally fantastic all on her own. How would you like to win all of these new Pillsbury® mixes for yourself? Scroll down to see how. 


Perfectly Pumpkin Donuts from Lick The Bowl Good


Pumpkin Donuts: 
  • 1- 15.25 oz. box Pillsbury Perfectly Pumpkin cake mix
  • 1- 15 oz. can pumpkin puree
  • 1 teaspoon vanilla extract
  • 1/2 teaspoon pumpkin pie spice

Brown Butter Glaze: 
  • 1/2 cup unsalted butter
  • 1/4 teaspoon cinnamon
  • 1 cup powdered sugar
  • 2 Tablespoons milk
  • 1/2 teaspoon vanilla extract

NOTE: I used an electric donut maker to make these. If you have one, preheat iron til hot. If baking them in an oven, follow the manufacturers instructions for baking. 

In a medium bowl, combine cake mix, pumpkin puree, vanilla and pumpkin pie spice. Mix until fully incorporated. Spray your donut pan with non-stick spray. Spoon batter into mold or transfer the batter into a pastry bag and pipe the batter into the mold, being careful not to let the plastic piping bag touch the hot iron. Bake until cooked throughout. 

Allow donuts to cool on a wire rack. Once all the donuts are baked and cooled, make the glaze. 

In a small saucepan, melt the butter over medium heat. Continue to cook the butter, swirling the pan until the butter becomes golden and fragrant. The butter solids will get dark, continue swirling being careful not to let it burn, about 5 minutes. 

Immediately pour the brown butter and all the brown bits into a small bowl. Add the cinnamon, and powdered sugar and whisk until it's smooth and lump free. Add the milk and vanilla and whisk until well incorporated.

Work quickly because this glaze sets up fast. Dip one half of the donut into the glaze, place on a rack and allow to set. 

Makes 24 donuts. 


Visit Pillsbury on FacebookPillsburyBaking.com and Pillsbury on Pinterest to learn more ideas about how you can "Celebrate More" with Pillsbury and their new Fall line. 


To win this "Celebrate More" Fall Celebration Starter Kit (a.k.a. All of these fabulous mixes!) and a $100 Visa or American Express gift card courtesy of Pillsbury®, simply leave me a comment on this post telling me what you love most about Fall. 

One entry per person. Open to U.S. residents only. 

*I was provided with product samples and compensation by Pillsbury®, though the opinions I express here are my own. ©/® The J.M. Smucker Company. Pillsbury is a trademark of The Pillsbury Company, LLC, used under license. 

Friday, August 2, 2013

A Special Anniversary- The Cake Slice Turns 5!


My boy turned 23 months today. That's exciting and terrifying all at the same time. One more month to go til his 2nd birthday! But that's not what I'm writing about today. August 1st is the 5th anniversary for The Cake Slice Bakers. I joined the the cake baking group in April of 2009 and have baked dozens of cakes through 5 different cookbooks and with many talented and amazing women. 

My very first cake that I baked with the group was Chai Cake with Honey-Ginger Cream from Sky High Cakes from Alisa Huntsman and Peter Wynne. I'm not a big fan of chai or ginger but I found this group helped me open my eyes and made me try different techniques and flavors that I wouldn't have otherwise tried. And I've made friends with these awesome women- we support and encourage each other, which is far better than cake. 

In celebration of our 5th anniversary, we decided to bake a special cake to help celebrate. I went back to the original and my favorite cake book of all and made a cake I've wanted to try for quite some time- Mocha Cake with Espresso Drizzle from Sky High Cakes. The cake is three delicious layers of dense, fudgey mocha cake, reminiscent of a flourless chocolate torte. In between the layers is a generous amount of a white chocolate, sweetened condensed milk, sticky espresso infused glaze. It was definitely a celebration cake. I'm so glad this baking group is around and I hope to bake along with them for many more years. 

Happy 5th Anniversary Cake Slice Bakers! If you're interested in keeping up with us, follow The Cake Slice Bakers on Facebook for baking tips, recipes and cake!


Mocha Cake with Espresso Drizzle 


Mocha Cake: 
  • 1 cup freshly brewed espresso or double-strength coffee
  • 2/3 cup unsweetened cocoa powder
  • 4 eggs
  • 2/3 cup buttermilk
  • 1 1/2 teaspoons vanilla extract
  • 2 2/3 cups cake flour
  • 2 2/3 cups sugar
  • 3/4 teaspoon baking powder
  • 1/2 teaspoon salt
  • 2 sticks (8 ounces) unsalted butter, at room temperature

Espresso Drizzle: (see note below)
  • 12 ounces good-quality white chocolate
  • 3/4 cup sweetened condensed milk
  • 6 tablespoons freshly brewed espresso or double-strength coffee

Preheat the oven to 350 degrees F. Butter the bottoms and sides of three 8-inch round cake pans or coat with vegetable cooking spray. Line the bottom of each pan with a round of parchment or waxed paper and grease the paper.

To make the cake: In a medium bowl, combine the hot espresso and cocoa powder, stirring to dissolve the cocoa. Let this mocha mixture stand until cooled to body temperature. Meanwhile, in another bowl, beat the eggs lightly.Whisk in the buttermilk and vanilla until well mixed.

Place the flour, sugar, baking powder, and salt in a large mixing bowl. With the mixer on low, evenly blend the dry ingredients. Add the butter and the mocha mixture, beating until well blended. Raise the mixer speed to medium and beat until light and fluffy, then add the buttermilk-egg mixture in 3 additions, scraping well and blending only to incorporate. Divide the batter among the 3 prepared pans.

Bake the cake layers for 35 to 38 minutes, or until a cake tester or wooden toothpick inserted in the center comes out almost clean but still moist. Let cool in the pans for about 10 minutes, then invert onto wire racks. Carefully peel off the paper liners and let the layers cool completely.

To make the espresso drizzle: (This makes a lot of glaze and could easily be halved- I had quite a bit leftover). Melt the white chocolate in a double boiler or in a medium heatproof bowl over a pan of very hot water.

Whisk in the sweetened condensed milk and espresso and continue whisking until smooth. Use while warm.

NOTE: The white chocolate didn't really want to melt and seemed rather stiff though it was still warm. Once I added the condensed milk and espresso it all came together. I had a few lumps but strained them out before pouring the glaze over the cake. I had a lot of glaze leftover. Next time, I would just make half a recipe.

To assemble the cake: Place one layer, flat side up, on a cake stand or serving plate. Pour 1/2 cup of the Espresso Drizzle onto the center of the layer and spread all the way to the edge, allowing it to drip slightly over the sides. Repeat with the second layer. Set the third layer in place, then pour the remaining drizzle on top and spread to the edges, making sure the glaze drips down the sides, covering all the edges.


Thursday, November 1, 2012

Why I Love Fall


I used to think that Summer was my favorite season. And maybe for a while, it was. After all, my birthday is in the Summer, and there was no school, and then there were trips to the beach! Yes, Summer is pretty great. But as I got older, I began to appreciate the beauty that is Autumn. The cooler nights, the changing of the leaves, warm colors and cozy sweaters, and of course the pumpkins! Pumpkins, in all their orange glory, make me smile. They make the season for me. And baking with it marks the start of the holidays. 

Let's be real, I live in Central Texas and I have yet to break out any kind of sweater, but it's my fantasy and I can dream, right? It's still in the 80's here and while I may still be wearing t-shirts and flip flops, I am drinking pumpkin spice lattes, wishing for the crunch of brittle leaves underfoot, and visiting the pumpkin patch. We took Hayden to the pumpkin patch last year, when he was just weeks old and he wasn't too thrilled, but this year he had a great time touching and patting all the gourds around him. We made it home with three mini pumpkins, one for each of my boys, and took a few family photos while we were there. Can you tell I was excited to be there?! 


Hayden likes to roll his pumpkin around the house and every now and again I'll catch him putting it in the back of his dump truck and pushing it through the kitchen. So cute, that boy! He loved these cookies too. I gave him a few without the icing and he just devoured them. In fact, while I was taking pictures of them, he kept grabbing them. Those hands get him in trouble sometimes! On their own, they are very much like pumpkin muffins, but with the brown butter icing, they are something special. They're spicy and sweet and have a nuttiness to them thanks to the browned butter. They're also soft and cake-like, unlike most cookies which makes them the perfect accompaniment to tea or coffee. I almost placed some of the icing in between two cookies and sandwiched them together like a whoopie pie. Oh that would have been a treat!


I received a package of butter in the mail a couple weeks ago. I love when that happens! The folks from Twisted Butter sent me an array of their new jazzed up butters. The blends include premium grade AA salted butter, canola oil, honey, fresh fruits, vegetables, herbs and bacon. Yes, bacon! The Bacon, Dijon Mustard & Chive butter was one of my favorites while my mom couldn't get enough of the Blueberry, Honey & Lemon Zest. I decided to use the Cinnamon, Honey & Brown Sugar butter in these cookies to make them extra special and it was a success. Visit the Twisted Butter website for more "infused" flavors and to print a coupon to use on your next purchase. Thank you Twisted Butter for allowing me to sample your product!


Pumpkin Cookies with Brown Butter Icing


For the Cookies: 
  • 6 Tablespoons Twisted Butter Cinnamon, Honey & Brown Sugar, at room temperature (unsalted butter may be used in place of the Twisted Butter)
  • 1 cup packed light brown sugar
  • 1 large egg
  • 3/4 cup (7 oz) canned pumpkin puree
  • 6 Tablespoons evaporated milk
  • 1/2 teaspoon vanilla extract
  • 1 1/3 cups all purpose flour
  • 1/2 teaspoon baking powder
  • 1/2 teaspoon baking soda
  • 1/2 teaspoon kosher salt
  • 3/4 teaspoon ground cinnamon
  • 1/2 teaspoon ground ginger
  • 1/2 teaspoon freshly grated nutmeg
For the Icing: 
  • 2 cups powdered sugar, sifted
  • 5 Tablespoons unsalted butter
  • 3 Tablespoons evaporated milk, plus more if needed
  • 1 teaspoon vanilla extract
Preheat the oven to 375 degrees F.

For the cookies:  In a large bowl, combine the butter and brown sugar. With an electric mixer on medium speed, beat until pale and fluffy, about 3 minutes. Mix in the egg, then reduce the speed to low and add the pumpkin, milk and vanilla. Mix until well blended, about 2 minutes. 

Slowly add the flour, baking powder, baking soda, salt, cinnamon, ginger and nutmeg. Mix until combined. 

Transfer half the batter to a pastry bag fitted with a 1/2-inch plain round tip. Pipe 1 1/2-inch rounds onto parchment paper-lined baking sheets, spacing the cookies 1 inch apart. (A small ice cream scoop may be used if you don't have a pastry bag). 

Bake cookies for 12 minutes or until the tops spring back when touched, rotating the sheets halfway through the baking process. 

Cool the cookies on the sheets on the parchment for 5 minutes before transferring them to wire racks. Allow them to cool completely for icing them. 

For the icing: Put the sifted powdered sugar in a medium bowl. Melt the butter in a small saucepan over medium heat, cooking and swirling the pot occasionally until the butter turns a golden brown, about 3 minutes. Be careful not to let the butter burn. 

Immediately, add the butter to the sugar, scraping any brown bits from the sides and bottom of the pot. Add the milk and vanilla and stir until smooth. Add a teaspoon more of the evaporated milk at a time, as needed if the icing gets too stiff to spread.

Spread about 1 teaspoon of icing onto the tops of each cookie using the back of a spoon or an offset spatula. Allow icing to set before serving. 

Store cookies in single layers, in an airtight container. 

Makes about 3 dozen


NOTE: I was not compensated by Twisted Butter in any way. The opinion I express here, is mine alone. I was simply sent a sampling of product and I chose to blog about it.


Saturday, April 28, 2012

Coca-Cola Memories


I've been drinking Coca-Cola ever since I was a wee one. Except I never called it Coca-Cola, it was just "Coke". In fact, I referred to all soft drinks as Coke. What do you call them? Soda, soft drinks, pop? It was as if Coca-Cola was the king of all soft drinks, to me. Maybe it was the red and white striking can, or the fact that we could drink the fizzy beverage out of bottles when I was a kid, and that was just kind of cool. Coca-Cola is still my go-to soft drink when I'm craving something carbonated and refreshing.

Here is a picture of my older brother, Joe, and I bonding over a Coke when we were kidlets. In case you're wondering, that is a pink Miami Vice shirt I'm wearing. And if I remember correctly, he is wearing a He-Man tank. Ahhh, the '80's! Don't be jealous :-)


I've had that picture of my brother and I on my fridge for some time now and I've been wanting to make something sweet and delicious using Coke, when the people at Coca-Cola contacted me and asked if I'd like to make a recipe using the beverage. It just seemed like perfect timing and I couldn't wait to get started. I had so much fun with these cupcakes and photographing all the shiny red accompaniments- from the can to the cherries that topped the mounds of whipped cream on top of the cupcakes. Fun, I tell you!


I perused the My Coke Rewards website for a recipe that I wanted to make and  I couldn't decide if I wanted sweet or savory. But you know me, sweet always wins! I ended up adapting a recipe from Nigella Lawson for Coca-Cola cake and turning it into Coke Float Cupcakes. A Coke float is one of my favorite indulgences. When we were kids and we wanted soda my grandma would pour us a glass half full of Coke, then fill the rest up with milk. Sounds strange, I know, but it was like a less sweet version of a Coke float and it got us to drink our milk. Sneaky Grandma.


These cupcakes were kind of like that too. I started off with a cocoa cupcake infused with Coca-Cola, then added a Coca-Cola glaze and topped it off with a healthy scoop of vanilla ice cream and/or lightly whipped cream. I was a happy camper! The Coca-Cola taste was subtle against the chocolate, but it was distinguishable. I liked the glaze under the cream because it kept the cupcake from getting soggy as the ice cream melted and remained nice and light and fluffy. The glaze also added a bit of sweetness and added another texture to the dessert.

I ended up making two different versions because I'm indecisive and I like having options. I liked the ones with ice cream but I have to say the cupcake version with whipped cream and a cherry were my favorite. It was just the perfect package all wrapped up in a red foil liner. It was creamy, sweet, fluffy and fun and I felt like a kid again sitting in my grandma's kitchen. After all my hard work in the kitchen I rewarded myself with a coke float. I was on a sugar high the rest of the afternoon, but it was well worth it. I hope you'll treat yourself to one too.


Coke Float Cupcakes adapted from Nigella Lawson

For The Cakes: 
  • 1 1/2 cups all-purpose flour
  • 1 cup + 2 Tbsp. granulated sugar
  • 1/2 tsp. baking soda
  • 1/4 tsp. salt
  • 1 large egg
  • 1/2 cup buttermilk
  • 1 tsp. vanilla
  • 1/2 cup (1 stick) unsalted butter
  • 2 Tbsp. cocoa
  • 3/4 cup Coca-Cola
For The Glaze: 
  • 1 1/2 cups powdered sugar
  • 2 Tbsp. unsalted butter
  • 1 Tbsp. cocoa
  • 3 Tbsp. Coca-Cola
  • 1/2 tsp. vanilla
Garnish: 
  • vanilla ice cream
  • whipped cream
  • maraschino cherries
  • sprinkles
Preheat the oven to 350F. Grease a 12-cup muffin tin or line with paper liners and set aside. 
For The Cupcakes: In a large bowl, combine the flour, sugar, baking soda and salt. Beat the egg, buttermilk and vanilla in a measuring cup and set aside. 
In a heavy-based saucepan, melt the butter, cocoa and Coca-Cola, heating it gently. Pour into the dry ingredients, stir well with a wooden spoon, and then add the liquid ingredients from the measuring cup, beating until it is well blended.
Pour into prepared muffin tin and bake for about 15 minutes or until a toothpick inserted in the center comes out clean.
For The Glaze: Sift the powdered sugar and set aside. In a heavy-based saucepan, combine the butter, Coca-Cola and cocoa and stir over a low heat until the butter has melted. Remove from the heat, add the vanilla, and spoon in the sifted sugar, beating as you do, until you’ve got a good, spreadable, but still runny, icing.
Carefully dip the top of the cupcakes into the glaze allowing the excess to drip off or simply spoon the glaze over the cupcakes while they are still warm, place on a wire rack and allow to cool completely.

Serving: Once the cakes have cooled and the glaze has set, serve with a scoop of vanilla ice cream, or lightly sweetened whipped cream, cherries and sprinkles.

Makes about 15 cupcakes
DrinkCompensation was provided by Coca-Cola, but Coca-Cola is not a sponsor, administrator, or involved in any other way with this post. All opinions expressed are my own and not those of Coca-Cola.

Drink Coke. Make Cupcakes. Be Happy. 

For more Coca-Cola recipes, head on over to My Coke Rewards for more inspiration. 

Monday, March 26, 2012

A Heavenly Cake for A Heavenly Birthday


A few weeks ago was, my sweet boy, Jack's Heavenly birthday. He would have been 5 years old on February 21st. It's hard to imagine a 5 year old running amok around this house, especially after having Hayden. I've always wondered what I was missing out on by not having him here and now I know. Even though he and his older brother, Sam, are not here in person, I still make a point to make their birthdays special. This year, in his memory, I made him this cherry almond cake.


Cherries and almonds are a perfect pair, add a little amaretto in there and you have a match made in Heaven, no pun intended. This is not really a cake suited for a small child, but we surely enjoyed it. The bright red cherries add a nice pop of color against the spongy white cake, making it visually appealing. I basically followed the recipe but I opted to add a little vanilla and almond extracts to punch up the flavor. I also added a glaze and more maraschino cherries and whole almonds for garnish.

Hayden with his Poppa visiting Jack at the cemetery for the first time. Happy birthday Jack- we love you!

This cake was was really light and almost spongy but it was moist and tender at the same time. It was a nice contrast from a heavily frosted layer cake. It would be perfect at a luncheon, tea time with the ladies or for a light dessert after a leisurely brunch. You could certainly omit the Amaretto and replace it with milk or water, just be sure to add a little more almond extract. It's that sweet aromatic nuttiness that makes this cake so pleasing. If you make this cake, I hope you enjoy it and I sincerely hope that you'll spare a moment and think of Jack.


Cherry Almond Cake adapted from Bundt Classics
Printer Friendly Version
  • 1 box white or vanilla cake mix
  • 3/4 cup milk
  • 1/4 cup Amaretto (almond liqueur)
  • 1 teaspoon vanilla extract
  • 1/2 teaspoon almond extract
  • 1/3 cup butter, softened
  • 4 eggs
  • 1- 10 oz. jar maraschino cherries, drained and chopped
  • Maraschino cherries, patted dry and almonds, for garnish (optional)
Heat oven to 325 degrees F. Grease and flour a Bundt pan and set aside.

In a large mixing bowl, mix all cake ingredients except cherries. Mix on medium speed for 2 minutes. Increase speed to medium high and mix for another 3 minutes. Stir in cherries by hand, spoon batter into prepared pan.

Bake for 50-55 minutes or until toothpick inserted in center of cake comes out clean. Cool 10 minutes, then remove from pan and cool completely on a wire rack.

Once cool, drizzle with glaze (recipe below) and garnish with more cherries and almonds, if desired.

Vanilla-Almond Glaze from Monica h
  • 1 cup powdered sugar
  • 1/2 teaspoon vanilla extract
  • 1/4 teaspoon almond extract
  • 1-2 Tablespoons milk, or more if needed
In a medium bowl, add sugar, vanilla and almond extracts. Stir or whisk until smooth. Gradually add milk until desired consistency is achieved. Drizzle over cooled cake.

Wednesday, March 14, 2012

Irish Cream Cake and My Little Helper


I didn't intend to be away from the blog for this long, but it's been a couple weeks since I shared a recipe with you guys. Luckily, Hayden stepped in and did a guest post for me about his new favorite foods. Thanks Boo Bear! I'd love to say I was on vacation but it has just been a busy couple of weeks for us. Today, though, I was able to get back in the kitchen and bake up this delicious cake.


Usually Hayden sits in his swing, exersaucer or the high chair and plays when I'm in the kitchen but today he wanted to help. With him in one arm, I picked up the baking powder tin and he put his hands around it while I measured out the needed 1/4 teaspoon. When it came time to pull out the mixer he held on to the handle and when I poured out the booze, he immediately tried to put it into his mouth. That's my boy!


I've made this cake before and was wanting to make it again for St. Patrick's Day. The only thing I did differently this time was to omit the Guittard Cappuccino Chips. I have a surplus of them because I bought out the supply from World Market a couple years ago when they were discontinued, but I realize you all don't have them hiding out in your pantry so regular chocolate chips can be subbed. This cake is tender and moist, but slightly dense at the same time. And it's boozy from the addition of Bailey's Irish Cream in the cake and the glaze. It's been awhile since I've eaten it but it's just as good as I remember. If you're not into baking dozens of leprechaun topped green frosted cupcakes for the 17th, maybe you'll try this "adult" cake instead. And before you start feeling too guilty, it only has 5 tablespoons of butter in it and that includes the glaze. It's practically low fat!


Glazed Irish Cream Cake previously seen HERE
Printer Friendly Version 

For the Cake:
  • 2/3 cup all purpose flour
  • 1/4 tsp. baking powder
  • 1/8 tsp. baking soda
  • 1/8 tsp. salt
  • 3 Tbsp. unsalted butter, softened
  • 1/2 cup sugar
  • 1 large egg
  • 1/2 tsp. vanilla
  • 1/4 cup Bailey's Irish Cream
  • 1/8 cup milk
For the Glaze:
  • 2 Tbsp. butter, softened
  • 3/4 cup powdered sugar
  • 1 Tbsp. Bailey's Irish Cream
  • 1 tsp. milk or half-n-half, or more if needed
  • Guittard Cappuccino Chips or chocolate chips for garnish (optional)
Preheat oven to 350 degrees F. Spray 8-inch pan with non-stick spray and set aside.

In a small bowl, whisk together flour, baking powder, baking soda and salt. In a large bowl, cream together butter and sugar until light and fluffy. Beat in egg, followed by vanilla extract. Mix in half of the flour mixture, followed by the Irish cream and milk, then the remaining flour mixture and mix til well blended. Pour batter into prepared pan.

Bake for approximately 24 minutes or until a toothpick inserted in the center comes out clean. Cool in pan on a wire rack until completely cool. Turn out cooled cake onto a platter and make the glaze.

To make the glaze, add all the ingredients in a small bowl and mix until smooth and pourable. Add more milk a half teaspoon at a time if needed. Garnish the cake with Cappuccino chips or chocolate chips before the glaze sets up, if desired.
Happy St. Patrick's Day!
Related Posts with Thumbnails