Showing posts with label Pudding. Show all posts

Thursday, September 12, 2013

Tastes Like Home


I don't remember my Grandma baking very much when we were kids. She was an excellent cook and made the best pot of beans, skillet fried chicken and potato salad, just to name a few. I always loved her potato salad just after she made it when the potatoes were still warm and soft. She always saved a bowl for me to enjoy at room temperature while the rest of it went into the refrigerator. In July, we took a road trip and visited my cousin for his 1st birthday and stayed at my grandparents house. On our last night there we had a cookout and I was able to enjoy her potato salad again. It's little things like that that take me back to my childhood. My mom still makes potato salad, and while it's similar (and delicious), it's not my grandma's. 

This little guy had a field day playing with the ice cream maker. When he thought I wasn't looking, he'd stick his fingers in the top and sneak a few licks of gelato. At one point he even climbed up onto the island and tried to put his face into the machine. You could say he's a fan of this rice gelato, just like his momma. 
When my grandma did make "dessert" it was often a bowl of atole de arroz, which is kind of like rice pudding but not as rich or creamy. It's more of a rice porridge, made with white rice, sugar, water, milk and cinnamon sticks. During the summer months, a man would walk all over town pushing a cart of Mexican popsicles, called paletas. We called him "The Paleta Man" :-). And just like the ice cream truck, we'd hear him ringing his bell, run outside and flag him down as he approached our house. We would make our requests and he'd reach into his mint green chilled chest and pull out colorful treats on sticks. I liked the fresh strawberry and the rice paleta the best. The rice paleta was milky, creamy, lightly sweetened and had a dusting of cinnamon on it. What made it different from the rest was that it had nibbly bits of rice in it. I loved that. 


When I came across this recipe for Rice Gelato from The Perfect Scoop, I knew it would be making an appearance in my future. The original recipe called for adding strips of orange zest to the rice mixture, but cinnamon sticks seemed more up my alley. It's what reminds me of home, so that's what I used. I also added a bit of ground cinnamon to the mixture after the rice was cooked. The smell of the sweet rice cooking filled the house like perfume. This gelato is much creamier and richer than anything my grandma ever made, but this is gelato after all, and it should be creamy. The rice softens and plumps up during the cooking process- half of it is blended really finely and the other half stays whole for optimal texture.While this dessert is frozen and is great on an end of summer day, there's something about it that comforts and soothes the soul. And that to me, is the best of both worlds. 

Rice Pudding Gelato 
adapted from The Perfect Scoop

  • 1/2 cup Arborio rice
  • 3 cups whole milk
  • 3/4 cup sugar
  • Pinch of salt
  • 1 vanilla bean, split in half lengthwise
  • 1 cinnamon stick
  • 5 large egg yolks 
  • 1 cup half-and-half or heavy cream
  • 1/4 teaspoon ground cinnamon
  • Pinch of freshly grated nutmeg

Preheat oven to 350 degrees F. 

In a 2 quart baking dish, mix together the rice, milk 1/4 cup of the sugar and the salt. Add the vanilla bean and cinnamon stick and cover the dish with aluminum foil. 

Bake for 1 hour. Remove the rice from the oven and remove the foil. Stir in the remaining 1/2 cup sugar, then continue to bake the rice, uncovered for an additional 30 minutes.

Remove the rice from the oven a second time, remove the vanilla bean and cinnamon stick and briskly whisk in the egg yolks at once. Then whisk in the half and half or cream, round cinnamon and nutmeg.

Puree half of the rice mixture in a blender or food processor until finely chopped. Then stir it back into the cooked rice.

Place the rice mixture in the fridge until completely chilled. Then freeze it in your ice cream maker according to the manufacturer’s directions.

NOTE: This gelato freezes really hard. Let it sit out at room temperature for about 10 minutes before serving, if necessary. 

Sunday, July 28, 2013

Boston Banana Cream Pie-lets


I just got back from taking a road trip across the great state of Texas with my mom, aunt, sister and Hayden. My cousin's 1st birthday was last weekend and my aunt asked if I would do the honor of baking his cake. If you're following me on Facebook or Instagram you've already seen The Cat In The Hat cake I made but I will share photos and the recipe I used very soon. I had so much fun making it for him. Now I'm trying to dream up ideas for Hayden's 2nd birthday cake in 5 short weeks. 

I hoped to share this recipe with you before I left but leave it to me to wait til the last minute to try and get things done. I was working with fondant and trying to pack until the wee hours of the morning before we left. I just ran out of time. Luckily The Cake Slice Bakers are forgiving and haven't kicked me out of the group yet even though I'm a week late with my version of Boston Cream Pie-lets. 
This cake uses no butter or oil, instead you whip up heavy cream and use that as the fat in this cake. There are several steps to this recipe but they're all simple. I added sliced bananas to this recipe since it reminded me of banana cream pie. This recipe is a little different though in that you assemble the mini "pies" in custard cups instead of  having a larger round cake that needs slicing. There's lots of extra vanilla bean pudding in there too, which is never a bad thing. If you're interested in this recipe or the others The Cake Slice Bakers have made this year, check out Vintage Cakes by Julie Richardson. 


Boston Banana Cream Pie-lets 
adapted from Vintage Cakes by Julie Richardson


Makes 8-10 servings

Cake:
  • 2 cups sifted cake flour
  • 2 teaspoons baking powder
  • 1 teaspoon salt
  • 1 ½ cups cold heavy cream
  • 1 ¼ cup sugar
  • 3  large eggs
  • 2 teaspoons vanilla extract

Pudding:
  • 1 vanilla bean
  • 4 cups whole milk
  • 1 cup sugar
  • 8 egg yolks
  • ½ teaspoon salt
  • ¼ cup cornstarch
  • 4 tablespoons unsalted butter, cubed

Ganache:
  • 1 cup heavy cream
  • 8 ounces semisweet or dark chocolate chips
  • 3-4 large bananas, sliced 1/4 inch thick


Center an oven rack and preheat to 350 degrees F. Line a 9x13-inch cake pan with foil. Do not grease the foil.

To Make The Cake: Sift together the cake flour, baking powder, and salt in a bowl, then whisk the ingredients by hand to ensure they are well mixed. 

Using the stand mixer fitted with the whisk attachment, whip the cream on high until soft, droopy peaks form. On medium-low speed, add the sugar in a steady stream and then return he mixer to high speed to continue to whip the cream until stiff peaks form. Return the mixer to low speed then add the eggs one at a time, followed by the vanilla. Stir in he flour mixture in three parts, adding the next addition, as soon as the flour has been incorporated. Turn off the mixer before all the flour has been mixed into the batter and finish mixing by hand with a rubber spatula. Pour the batter into the prepared baking dish and place it into the center of the oven until the cake springs back in the middle when slightly pressed, 28 -32 minutes. Cool the cake in it's pan on a wire rack until it reaches room temperature. 

While the cake is in the oven, make the pudding. 

To Make The Pudding: With a small paring knife, split the vanilla bean in half, lengthwise. Scrape out the seeds from the pod and put them along with the pod into the saucepan. Add the milk and 1/3 cup of sugar and place the pan over medium-low heat until the milk is hot but not boiling. While the milk is heating, in a small bowl, thoroughly whisk together the yolks along with the remaining 2/3 cup sugar and the salt, then blend in the cornstarch. Slowly whisk a third of the hot milk into the yolk mixture. Pour this mixture back into the saucepan with the remaining hot milk.Cook gently over medium-low heat, whisking steadily until the pudding just begins to thicken and has been bubbling for roughly one minute (you will need to stop whisking for a moment to see if it is bubbling). Strain he mixture through a fine mesh sieve into a clean bowl. Whisk in the butter until it is melted. 

To Make The Ganache: In a small sauce pan, bring cream to a simmer. Place the chopped chocolate or chips into a large, heat proof bowl. Add the hot cream to the bowl. Swirl the bowl to ensure even coverage of cream on the chocolate. Cover the bowl with a lid or plastic wrap for 5 minutes. Remove lid and whisk the chocolate from the middle and outwards. Start with small circles in the middle and move outwards until all the chocolate has melted. 

To Assemble The Pie-lets: Set aside 8-10 pudding cups (tea cups, juice glasses or small bowls will work just fine). Using a 2 1/2-inch round biscuit cutter, cut out 8 miniature cakes from the pan. Carefully remove the miniature cakes from the pan and using a serrated knife, cut them in half horizontally to create two equal layers per cake. Use the extra cake to snack on or make an extra pudding cup. 

Spoon 3 tablespoons of warm pudding into the bottom of each dish. Place 1 slice of cake over the pudding. Place banana slices over cake and cover with another 3 tablespoons of more pudding. Top with the second piece of cake. (Layers: pudding, cake, bananas, pudding, cake). Evenly divide the ganache over each slice of cake. Cover with plastic wrap and refrigerate until well chilled for at least 4 hours. 

Wednesday, June 20, 2012

Tall, Dark, Rich and Handsome


This past Sunday was Father's Day. And there's nothing better than a tall luscious chocolate cake to celebrate with so I was thrilled when The Cake Slice Bakers chose this cake to bake for the month of June. Mr. H is a true chocolate lover and this cake hit the spot on so many levels. There's light and fluffy cake loaded with cocoa, a fudgy chocolate pudding to fill the layers and then it's lovingly swathed in dreamy chocolate buttercream. And just to gild the lily, you take some of the cake, crumble it up and pat it into the frosting. This is a true man's cake. 

We celebrated Father's Day with my family at my mom's house this year. My aunt, uncle and cousin were there as well as my in-law's. In total there were about 12 of us and 5 dogs- it was a full house! We had 4 different kinds of quiche (because real men eat quiche), a fresh fruit salad, Parmesan roasted tomatoes, fresh squeezed orange juice, coffee, this Brooklyn Blackout Cake (click the link to read the history) and a cheesecake that my MIL made. I'll share that one later on! There was so much food and I ate a big honkin' piece of cheesecake that I filled up and didn't get to taste the cake until the next day. But the slice pictured in this post, was all mine :-)


It just dawned on me as I was thinking of past Father's Day celebrations and June 20th, that this day in 2004 is when Mr. H asked me to marry him. I had been working that day and was tired, my feet hurt and I was hungry. Mr. H picked me up from work to take me back to his parent's house for Father's Day dinner. I remember calling my Dad on the way over there to wish him a happy day when I realized that we weren't going to his parents house. Mr. H made a detour and we were headed to Mount Bonnell (click the link to read about it)- one of my favorite places and also the place where we went on our first date 13 years ago. Mr. H was very nervous and I had an idea of what he was going to do but I wasn't totally sure. Shortly there after, overlooking the lake and a beautiful sunset, he asked me to marry him. All these years later, we have a sweet boy named Hayden Bonnell. 

Mr. H, Hayden and GrandBob
Brooklyn Blackout Cake from The Cake Book 

For the Chocolate Blackout Cake:
  • 1½ cups (6.4 oz/181 g) all purpose flour
  • 1 cup (2.9 oz/85 g) natural (not Dutch-processed) cocoa powder
  • 1½ teaspoons baking powder
  • 1½ teaspoons baking soda
  • 1 teaspoon salt
  • 2 cups (14 oz/400 g) granulated sugar
  • 2 large eggs
  • 1 large egg yolk
  • 1 cup (240 ml) buttermilk
  • ½ cup (1 stick/4 oz/113 g) unsalted butter, melted
  • 2 teaspoons vanilla extract
  • 1 cup (240 ml) hot brewed coffee

For the Chocolate Pudding Filling:
  • 4 large egg yolks
  • 2/3 cup (4.6 oz/132 g) granulated sugar
  • 2 tablespoons plus ½ teaspoon cornstarch
  • 1/8 teaspoon salt
  • 1 cup (240 ml) water
  • 2/3 cup (160 ml) heavy cream
  • 3 ounces (85 g) semisweet or bittersweet chocolate, finely chopped
  • 1 teaspoon vanilla extract

For the Fudgy Chocolate Frosting:
  • 4 ounces (113 g) unsweetened chocolate, coarsely chopped
  • 11 tablespoons (5.5 oz/156 g) unsalted butter, softened
  • 1 2/3 cups (6.7 oz/191 g) confectioners sugar
  • 2 teaspoons vanilla extract

MAKE THE CAKE

1. Position a rack in the center of the oven and preheat the oven to 350°F. Grease the bottom and sides of two 9" round cake pans. (see me NOTE below.) Dust the pans with flour.

2. Sift together the flour, cocoa powder, baking powder, baking soda, and salt into the bowl of an electric mixer. Add the granulated sugar and, using the paddle attachment, mix at low speed until blended.

3. In a medium bowl, whisk together the eggs, egg yolk, buttermilk, melted butter, and vanilla extract. At low speed, add the egg mixture to the dry ingredients in a steady steam. Scrape down the sides of the bowl with a rubber spatula, then beat at medium speed until well blended, about 1 minute. Add the hot coffee, mixing just until blended. Remove the bowl from the mixer stand and stir the batter up from the bottom of the bowl a few times to thoroughly blend it. Scrape the batter into the prepared pans, dividing it evenly and smoothing the tops.

4. Bake the cakes for 30 to 35 minutes, until a cake tester inserted into the center comes out clean. Cool the cakes in the pans on wire racks for 10 minutes.

5. Invert the cakes onto the racks and cool completely.

MAKE THE FILLING

6. In the bowl of an electric mixer, using the paddle attachment, beat the egg yolks, sugar, cornstarch, and salt at medium speed until pale, about 1 minute.

7. In a medium heavy saucepan, combine the water and cream and bring to a boil over medium heat. Remove the pan from the heat and whisk about half of the hot cream mixture into the yolk mixture. Whisk this mixture back into the remaining cream mixture in the saucepan. Cook over medium heat, whisking constantly, until the mixture comes to a boil. Continue to boil, whisking, for 1 minute. Remove the pan from the heat and whisk in the chocolate until completely melted.

8. Pass the filling through a fine-mesh sieve into a small bowl. Stir in the vanilla extract. Cover the surface of the pudding with plastic wrap and refrigerate for at least 2 hours, until chilled.

MAKE THE FROSTING

9. Put the chocolate in a medium stainless steel bowl and place over a pot of barely simmering water. Heat, stirring frequently, until the chocolate is completely melted. Remove the bowl from the pot and set the chocolate aside to cool until tepid.

10. In the bowl of an electric mixer, using the paddle attachment, beat the butter at medium speed until creamy, about 1 minute. Add the confectioners’ sugar and beat at medium-high speed for 2 minutes, scraping down the sides of the bowl as necessary. Beat in the vanilla extract and melted chocolate, then beat until well-blended and creamy, about 1 minute.

ASSEMBLE THE CAKE

11. Using a long serrated knife, cut each cake layer in half horizontally, to make 4 layers. Reserve one layer. Place another cake layer, cut side up, on a serving plate. Whisk the chilled filling until smooth. Using a small offset metal spatula, spread half of the filling over the layer. Top with another cake layer and spread it with the remaining filling. Top with a third cake layer, smooth side up. (See my NOTE below.)

12. Break half of the reserved cake layer into large pieces and place them in the bowl of a food processor (save the remainder of the cake layer for snacking). Process the cake to fine crumbs, and set aside.

13. Using a narrow metal spatula, frost the top and sides of the cake with the frosting. Pat a generous amount of cake crumbs onto the sides of the cake, pressing them lightly into the frosting. Sprinkle the remaining cake crumbs over the top of the cake. Serve at room temperature or slightly chilled.

STORE in the refrigerator, loosely covered, for up to 2 days.


Yield : Makes one 9-inch cake, serving 10 to 12

NOTE: This recipe had you bake a cake in 2 9-inch layer then once baked and cooled, you slice them in half to make 4 equal layers. The cake uses 3 of those layers then half of the remaining cake layer is crumbled and patted into the frosting. Instead of having to cut the cake into equal layers and worrying about all the crumbs, I simply baked the cake into 3 layers and used about 1 cup of batter to make cupcakes for the crumbs on the outside of the cake. You can make it however you want, this was just simpler and less messy in my opinion and there wasn't any cake wasted. 

Hope you all had a delicious Father's Day!

Monday, February 6, 2012

Pie Party Recipes: Banana Cream Pie

Here's the Banana Cream Pie you've all been waiting for. I had to save the best for last! I think of all the pies I made for my Pie Party, this was my favorite. Though the key lime pie was a very close second. I love banana pudding, though I didn't always and I'll tell you why. I don't like artificial banana flavoring and as a kid when we had banana pudding, it was made with instant banana flavored pudding, not vanilla. I thought that was how banana pudding was supposed to be. I liked the bananas and the vanilla wafers, but not the icky banana flavored pudding.

It wasn't until I was an adult that I realized what banana pudding could/should be. For years I made Paula Deen's "Not Yo Mama's Banana Pudding" until I started making my own custard. I like Paula's recipe, but when I eat it now I can taste all the chemicals and artificial flavors in the boxed pudding and Cool Whip. Now I don't eat banana pudding often, but when I do, I have to do it right and making it in pie form is right up my alley. I also made a banana pudding pie from Southern Living that was quite amazing. They're both similar in flavor, but this one was easier to make.

I made the crust and the filling the night before I needed it, that way on the day of, all I had to do was assemble it and make the fresh whipped cream. The custard was interesting in that all the ingredients go into the pot at once. You just stir, and stir and stir and just when you think it's never going to thicken- wham! It gets super thick. My pudding actually got a little too thick. I'm not sure if it's because of the recipe or because I overcooked it, but I just thinned it out the chilled pudding with a little milk before I assembled the pie. The end result was creamy, sweet and addicting pie. I was sad when it was all gone. My stepdad has even offered to pay me to make another one. Will do!

Banana Cream Pie from Simply Suppers

Printer Friendly Version

For The Crust:

  • 2 cups vanilla wafer cookies (about 1 1/4 cups crumbs)
  • 1/4 cup granulated sugar
  • 4 Tablespoons unsalted butter, melted

For The Filling:

  • 2 cups heavy cream
  • 1/3 cup cornstarch
  • 1/4 teaspoon salt
  • 3 large egg yolks
  • 1/2 cup granulated sugar
  • 1 teaspoon pure vanilla extract
  • 2-3 ripe bananas

For The Topping:

  • 1 cup heavy cream, chilled
  • 1/4 cup powdered sugar
  • 1 teaspoon pure vanilla extract

Preheat oven to 325 degrees F.

To Make The Crust: In a food processor, finely grind the cookies. Add the sugar and pulse until combined. Slowly add the butter and pulse until well incorporated and moist clumps form. Transfer to a 9-inch pie pan. Press the crust evenly into the bottom and up the sides. Bake until set, about 8-10 minutes. Cool completely on a wire rack.

To Make The Filling: In a medium saucepan, combine the cream, cornstarch, salt, egg yolks, sugar and vanilla. Over medium-low heat, cook, whisking continuously, until mixture thickens, about 10 minutes. Remove from the heat and transfer to a large mixing bowl. Place plastic wrap directly onto the surface of the pudding and place in the refrigerator and cool completely, at least two hours or overnight.

Assembly: Spoon half the cooled pudding evenly over the bottom of the crust. (My pudding was very thick, so I thinned it out slightly with a little milk prior to assembling the pie). Peel the bananas and cut into 1/4-inch thick slices. Create a layer of banana slices, reserving some for garnish. Spoon the remaining pudding evenly over the bananas. Place the pie in the refrigerator to set while making the whipped cream topping.

To Make the Topping: In the large bowl, place the cream, sugar, and vanilla. Beat with an electric mixer until soft peaks form (You want the cream stiff enough to hold it's shape but not over whipped or it will curdle.) Spoon or use a pastry bag to pipe the whipped cream evenly over the pie filling. Chill the pie until set, at least 4 hours or overnight. Before serving garnish with extra vanilla wafers or bananas, if desired.

Tuesday, December 21, 2010

Think Harder Rum Cake

I know you're all busy, so I'll keep this short and sweet. I just wanted to share this cake with you that I made last Christmas that I'll be making again for this years' festivities. It was so good, that I'm pretty sure it will become a Christmas tradition. And it's a good one because it's loaded with booze- rum to be exact.

I also wanted to share with you a conversation that happened between Mr. h and I that made me laugh:

Mr. H: Remember that rum cake you made last year?

Me: Yes, why do you ask?

Mr. H: Because it was GOOD.

Me: Yeah, I know. I was thinking of making it again this year.

Mr. H: well you should really think harder.

Well if that wasn't a clue, I don't know what is. This cake was good, really good. It starts off with a cake mix and you add some yummies to make it extra tasty. It's simple and delicious, but it's the glaze that's the star. You brush the rummy glaze on and it soaks into the cake. When it sets, it turns to a flaky buttery crust- almost like a glazed cake donut...but better!

Golden Rum Cake adapted from All Recipes

Printer Friendly Version

  • 1 cup chopped walnuts, optional
  • 1 (18.25 ounce) package yellow cake mix
  • 1 (3.4 ounce) package instant vanilla pudding mix
  • 4 eggs
  • 1/2 cup water
  • 1/2 cup vegetable oil
  • 1/2 cup dark rum
  • 1/2 cup butter
  • 1/4 cup water
  • 1 cup white sugar
  • 1/4- 1/2 cup dark rum (I used 1/4 cup)

Preheat oven to 325 degrees F. Grease and flour a 10 inch Bundt pan. Sprinkle chopped nuts evenly over the bottom of the pan, if using.

In a large bowl, combine cake mix and pudding mix. Mix in the eggs, 1/2 cup water, oil and 1/2 cup rum. Blend well. Pour batter over chopped nuts in the pan.

Bake in the preheated oven for 60 minutes, or until a toothpick inserted into the cake comes out clean.

About 5 minutes before the cake is done, make the glaze. In a saucepan, combine butter, 1/4 cup water and 1 cup sugar. Bring to a boil over medium heat and continue to boil for 5 minutes, stirring constantly. Remove from heat and stir in desired amount of rum (1/4-1/2 cup).

While cake is still hot use a skewer to poke holes all over the top of the cake (which will become the bottom). Brush on glaze allowing some of it to soak down the sides, between the cake and the pan. Let sit for 10 minutes in the pan, then turn out onto serving plate. Brush glaze over top and sides. Allow cake to absorb glaze and repeat until all glaze is used, this may take up to 10 minutes.

Allow to cool completely before serving. Tastes best on day 2, so make it a day in advance if possible.

Store any uneaten cake in an airtight container at room temperature.

It's even good served on paper plates and eaten with a plastic fork :-)

Saturday, November 20, 2010

Cake x 35

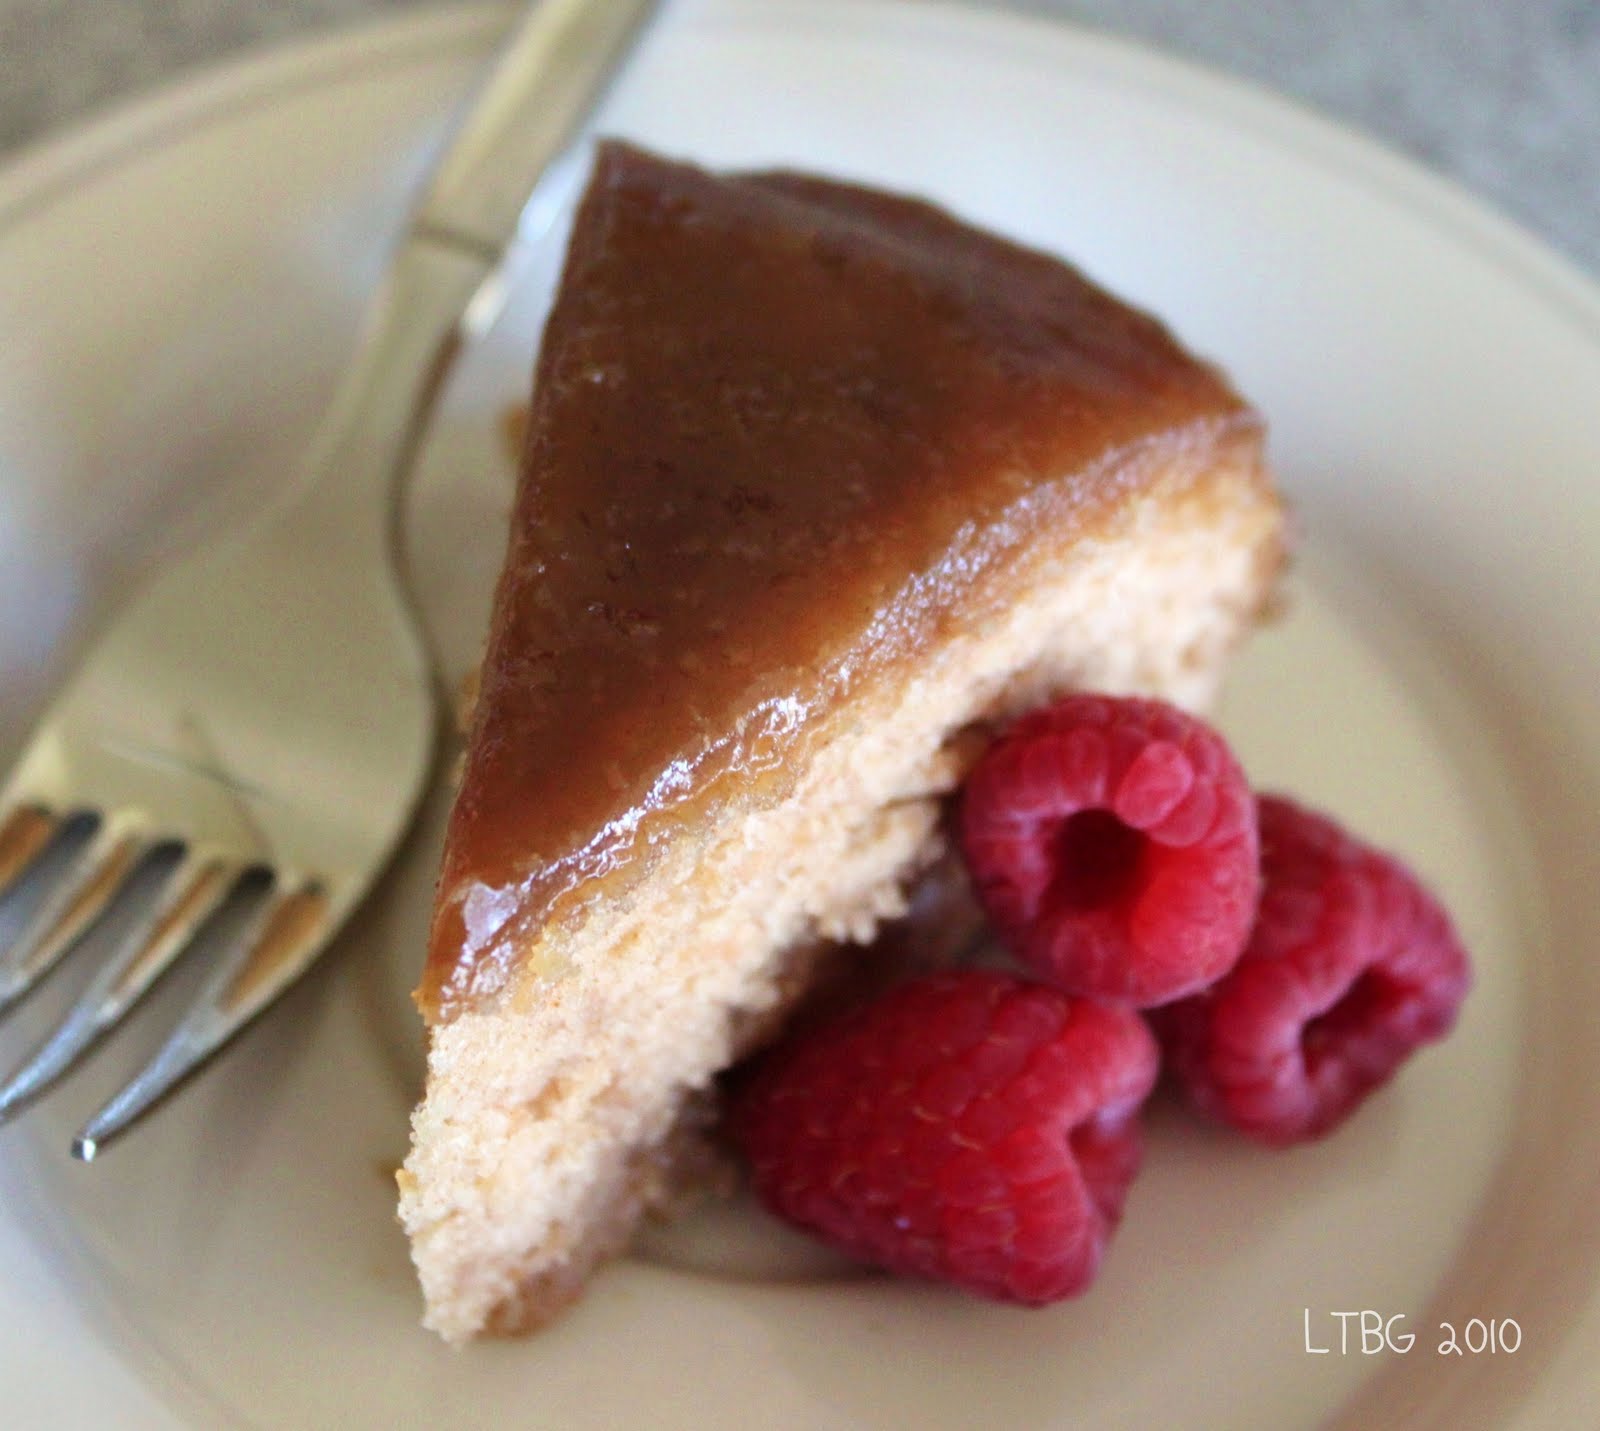
This is the second cake The Cake Slice Bakers have made from Cake Keeper Cakes by Lauren Chattman. Geez, how many times can you say "cake" in one sentence?! Cake. Cake. Cake. Cake. Cake. ha! The winning cake this month was Cinnamon Pudding Cake. I adore cinnamon so I was super excited about making this cake, but in the end I thought it was a little disappointing.

I've never had a pudding cake before so I wasn't sure what the end result would be like, but I was expecting something gooey- something with a molten center and this was not that. A lot of the bakers commented that it was very dry. My cake was not dry, but I also reduced the baking time by 10 minutes so I think that helped some. While the cake part was not gooey, the topping was. This cake starts off by pouring the caramel on top of the unbaked cake. As it bakes, the caramel seeps through the cake and making it's way to the bottom of the pan. It turns out like a 'self-frosting' upside down cake.

The cake was very much cinnamon flavored. But I felt it was kind of one-note. In my opinion, it was very one dimensional...it just lacked something. The caramel glaze saucy stuff on the bottom top of the cake was good but very sweet. All in all, I'm glad I made this cake. At least I can say I've made and eaten a pudding cake, but I don't think this is one that will make a repeat appearance in my kitchen. But I haven't given up, I will try another recipe...perhaps one with chocolate!

Cinnamon Pudding Cake slightly adapted from Cake Keeper Cakes

Printer Friendly Version

For the caramel topping:
  • 1 cup plus 2 Tablespoons packed light brown sugar
  • 3/4 cup water
  • 1 Tablespoon unsalted butter
  • 1/2 teaspoon salt

For the cake:

  • 2 cups all-purpose flour
  • 2 teaspoons baking powder
  • 2 1/2 teaspoons cinnamon
  • 1/2 teaspoon salt
  • 2 Tablespoons unsalted butter, softened
  • 1 cup sugar
  • 1 cup milk
  • 1 teaspoon vanilla

Preheat the oven to 350 degrees F. Spray the bottoms and sides of an 8-inch square baking dish with cooking spray. ( I used the kind with flour).

For the topping: Combine the brown sugar, water, butter and salt in a saucepan. Bring to a boil, stirring occasionally, then set aside to cool.

For the cake: In a medium bowl, combine the flour, baking powder, cinnamon and salt.

Combine the butter and sugar in a large mixing bowl and cream with an electric mixer on medium-high speed until fluffy, about 2 minutes.

Reduce the mixer speed to low, and add 1/3 of the flour mixture to the bowl. Add half of the milk and all of the vanilla. Add another 1/3 of the flour, mix til just combined, then add the remaining milk, then the rest of the flour. Scrape down the sides of the bowl and beat on medium speed for 30 seconds.

Scrape the batter into the prepared pan and smooth the top with a rubber spatula. Pour the topping over the batter (the pan will be very full). Carefully transfer the pan to the oven and bake until set, about 35-40 minutes. (The top of the cake might be slightly damp looking on top, but a toothpick inserted in the center should come out clean.)

Let the cake cool in the pan no longer than 5 minutes or the caramel will stick to the pan. Invert it onto a large rimmed platter. Serve warm.

Store cooled cake at room temperature for one day or up to 3 days in the refrigerator in an airtight container.

BTW, the word "cake" appears in this post 35 times. dang!

Tuesday, March 30, 2010

Where Do I Begin?


Oh my goodness. I don't even know where to begin with this pie. It was amazing! Let's see, first it's made with a vanilla wafer crust. Don't buy the premade crust for this, it's so easy to make your own and it's better and fresher. Then it's layered with bananas, homemade vanilla pudding and more vanilla wafers. The original recipe called for a meringue topping, but I opted for whipped cream!

I made this for my father-in-laws 69th birthday a couple weeks ago. We took a day trip to a small town here in Texas and ate at a kitschy cafe supposedly known for their pies. We had lunch then ordered their pie sampler complete with 4 slices of pie and 4 scoops of ice cream. As the waiter brought it out, we started singing and the whole restaurant joined in. It was completely gluttonous but the birthday boy was surprised and happy so that's all that matters.

Look at all those luscious layers!
I was afraid that my father-in-law would be "pied out" and that my little ol' homemade banana pudding pie wouldn't live up to the famous restaurants pie but it did and he wasn't! And I have to say it was much better and way cheaper than their pies. It's really hard to compare though because they didn't have any cream pies on their menu and all their pies were made with traditional pie crust. This one was creamy and dreamy, sweet but not too sweet. The crust still had great texture and the bananas stayed firm, while the wafers in the center softened. All the ingredients just complimented eachother perfectly.

This really was an excellent pie and I will definitely make this pie again. My grandpa is a banana pudding lover and I know he'd love this version too! The recipe may seem long but I broke it down in steps so it would be easier to follow. Please read the notes and the recipe before heading to the kitchen to make this. The original recipe I have was in Southern Living Best Ever Cake & Pies Magazine and it's different than the one online and it's confusing so I've done my best to make it easier for you so you'll make this pie. Like for this weekend, maybe or an upcoming birthday?


Banana Pudding Pie
adapted from Southern Living
  • Vanilla Wafer Crust (recipe below)
  • Vanilla Pudding (recipe below)
  • Whipped Cream (recipe below)
  • 3-4 medium bananas, cut into slices
  • 20 vanilla wafers plus more for decoration (see note)

Vanilla Wafer Crust:

  • 2 1/2 cups (about 30) crushed vanilla wafers
  • 1/2 cup butter, melted
Vanilla Pudding:
  • 3/4 cup sugar
  • 1/3 cup all-purpose flour
  • 2 large eggs
  • 4 egg yolks
  • 2 cups milk
  • 2 teaspoons vanilla extract
Whipped Cream:
  • 1 cup heavy cream
  • 1/4 cup powdered sugar
  • 1/2 tsp. vanilla
For the crust:
In a medium bowl, stir together crushed vanilla wafers and butter until blended. Firmly press on bottom and up the sides of a 9-inch pie plate.
Bake at 350° for 10 to 12 minutes or until lightly browned. Remove to a wire rack, and let cool 30 minutes or until completely cool.
For the pudding: Whisk together sugar, flour, eggs, yolks and milk in a heavy saucepan. Cook over medium-low heat, whisking constantly, 10-12 minutes or until it reaches the thickness of chilled pudding. (Mixture will just begin to bubble and will be thick enough to hold soft peaks when whisk is lifted. It must be thick and slightly bubbly to set up properly!) Remove from heat, and stir in vanilla.
Transfer to a medium bowl and cover with plastic wrap, making sure to press the plastic directly on top of the custard so it doesn't get a "skin" on it. Refrigerate til completely cool. (Can be made up to a day in advance.)
Whipped Cream: In a medium bowl, whip cream on medium high speed til soft peaks form. Slowly add the sugar and vanilla and continue to beat til thick and stiff. Don't overbeat or you'll have butter!
Assembly: Arrange half of the banana slices evenly over bottom of cooled crust. Spread 1/3 of cooled pudding over bananas, then layer with 20 vanilla wafers. Spread 1/3 more pudding over vanilla wafers, then add the remainder of the banana slices and cover them with the last of the pudding. Spread the whipped cream over the entire pie and decorate with more vanilla wafers if desired.
The layers from the bottom up should be: vanilla wafer crust, bananas, pudding, vanilla wafers, pudding, bananas, pudding, whipped cream
Refrigerate at least for 4 hours. Overnight is best. Consume within 2 days.
NOTE: It's best to prepare the pudding in advance to allow it to chill properly. If you prefer this pie be topped with a meringue then there's no need to refrigerate the filling. See the original recipe here.
Also I used an entire box of vanilla wafers for the pie. If you want to decorate with additional wafers then get a second box to be on the safe side.
Make me. Eat me. Be happy.
__________________________________________________
Oh and look at the newest addition to my cake stand collection. I have an obsession but I love them and I use them all. Well, except for one but I will eventually :-) I picked this one up at an antique market after we ate lunch for my FIL's birthday. It's so pretty and I'll be using it this weekend on my Easter buffet! It's the Harp design by Jeanette Glass in Ice Blue. ::sigh::

Wednesday, December 2, 2009

A Time For Firsts

I made this cake for one of the little boys I nanny for. He and his brother have birthdays only 6 days apart and I made them a larger cake for their party but I also wanted to have a cake for his 1st birthday. So the night before we left for the wedding I made this cake for him. And attempted the basket weave for the first time midnight. I was going a little crazy half way through the cake design but I think it turned out decent. If you want step by step instructions on how to pipe a basket weave, go here. It was also my first time to write on a cake. Not bad for an amateur, eh?

I wanted a simple cake because it was late and I didn't have a lot of time to spend on the cake so I used a souped up cake mix recipe that came from Bundt Classics. I also wanted something that would be seasonal in flavor and not too sweet but baby friendly. I settled on an Applesauce Spice Cake. The recipe called for butterscotch pudding but I used a box of pumpkin pudding that I found at Wal-Mart.

I didn't get to taste or take pics of the final product, but I can assure you that the cake was delicious! I tasted the scraps that I leveled off with a little frosting and I was wishing I had made a cupcake so I could have one! It was warm and slightly spicy, but you could definitely taste the apple flavor and the best thing is it didn't taste like it came from a box! I topped it off with my favorite cream cheese frosting but added some pumpkin pie spice for added flavor. Talk about good!

Applesauce Spice Cake

from Bundt Classics
  • 1 (18.25 oz.) package yellow cake mix
  • 1 (3.4 oz.) package instant pudding mix (vanilla, butterscotch or pumpkin)
  • 1 cup applesauce
  • 1/2 cup water
  • 1/3 cup vegetable oil
  • 4 eggs
  • 1 1/2 teaspoons apple or pumpkin pie spice

Heat the oven to 325 degrees F. Grease and flour a 12 cup bundt or 2 9-inch cake pans.

In a large mixing bowl, mix all ingredients. Mix on medium speed for 2 minutes. Spoon into prepared pans.

Bake for 55-65 minutes for the bundt and 35-45 for the cake pans or until a toothpick inserted comes out clean. Cool 10 minutes before removing from pan. Allow to cool completely on a wire rack.

Drizzle with a glaze or cover with your favorite frosting.

Vanilla Spice Cream Cheese Frosting

  • 2 sticks (1 cup) unsalted butter, room temperature
  • 1 package (8 ounces) cream cheese
  • 2 teaspoons vanilla extract
  • 1/2 vanilla bean, seeds scraped out
  • 1 teaspoon apple or pumpkin pie spice
  • 4-5 cups powdered sugar

Using an electric mixer, beat the butter at medium speed until creamy. Add the cream cheese and beat until combined. Then add the vanilla extract, vanilla seeds, apple or pumpkin pie spice and 3 cups of powdered sugar and beat at low speed, occasionally stopping to scrape the sides and bottom of the bowl, until light and fluffy. Add more powdered sugar to arrive at the consistency and sweetness you like.

NOTE: For this cake I used the full 5 cups because I wanted it stiff for piping.

Tuesday, October 27, 2009

Eat Dirt!

When I was a young child and I used to eat dirt with a neighbor friend. I also used to chew on crayons and paper, but that's a story for a different day :-) We used to make mud pies by compacting dirt from around the big trees in the backyard into a pie plate and then watering them down with the water hose. I don't really know what I was thinking back then but no one ever told me not to do it. Were they good? No, not really.

This is a different take on eating dirt that is actually tasty and it's fun for kids to make. In fact my 14 year old brother made these by himself with my supervision of course. He made the pudding while I crushed the cookie crumbs but he assembled them by himself. They're not supposed to be pretty or perfect so just let the kids be kids and get pudding on the side of the cup or spill dirt. There's not a wrong way to do this.

They're fun and they're creepy and they're perfect for kids to make for sleepovers or for parties this Halloween weekend. And the best part is that after you eat the pudding and the chocolaty cookie crumbs dirt you get to slurp on slimy worms!

I took this picture and Aaron said "that doesn't look very appetizing Nana". Well isn't that the point? It's dirt and worms! :-)

____________________________________________

Dirt Cups
  • chocolate pudding
  • chocolate cookie crumbs
  • gummy worms

Layer the pudding into a cup and top with crushed cookie crumbs. Insert gummy worms and eat!

NOTE: I used boxed pudding and Nabisco Wafers, but Oreos would work equally well.

If you don't like chocolate you could easily substitute butterscotch pudding and use graham crackers or gingersnaps cookies crumbs. You can use anything as long as it resembles dirt.

Worms are delicious!

Related Posts with Thumbnails