Showing posts with label The Cake Slice. Show all posts

Friday, December 20, 2013

Celebrating 6 Years Of "Lick The Bowl Good" With A Giveaway! (CLOSED)

Every year my blog anniversary comes and goes and I forget about it. I intend to do something special to celebrate the day (November 3rd) and time escapes me, stuff comes up and then the holidays hit and my blog birthday goes unmentioned again. Well this year, to say "thank you for sticking by me!" I have a giveaway for you. I've been blogging for 6 years and so much good has come out of it. I've connected with some amazing people, made and eaten lots of tasty treats and some not so great ones too. I've learned a lot about baking formulas, food styling and photography and I even wrote my own cookbook, gosh darn it! Such an amazing opportunity and accomplishment that was! Would you like to win a signed copy of Lick The Bowl Good


I'll tell you more about the giveaway in a moment, but first let me tell you about this cake, streusel squares to be exact. The recipe comes from Great Cakes by Carole Walter. The Cake Slice Bakers are baking from this new book. This was a good recipe, the cake had a soft tender center, lightly scented with vanilla. The topping was the best part though- those buttery, cinnamon-y crumbs were hard to resist. This would be a great one to share with a crowd or to give as gifts this Christmas. You can even play up the flavorings a bit and use rum, lemon, or almond extracts in the cake. 


Streusel Squares
Recipe from Great Cakes by Carole Walter
via All That's Left Are The Crumbs

Printer Friendly Version

Streusel Topping:
  • ⅓ cup (⅔ stick) unsalted butter
  • 1¼ cups unsifted all-purpose flour
  • ⅔ cup sugar
  • 1 teaspoon ground cinnamon

Cake:
  • 2¼ cups unsifted all-purpose flour
  • 2 teaspoons baking powder
  • ½ teaspoon salt
  • ¾ cup (1½ sticks) unsalted butter
  • 1 cup superfine sugar
  • 2 large eggs
  • 1 large egg yolk
  • 1½ teaspoons vanilla extract
  • 1 cup milk 
  • 1 large egg white

Position a rack in the lower third of the oven and preheat to 350⁰F. Butter a 9 x 13 x 2” pan.

To Make The Streusel Topping: Melt the butter, then cool slightly.

Add the flour, sugar and cinnamon all at once and stir with a fork until the mixture forms small crumbs. Take a handful of the crumbs and make a fist to press the mixture into a large clump, and then separate into smaller clusters, at least two or three times the size of the original crumbs.

Repeat until all of the crumbs have been reshaped, then set aside.

To Make The Cake: Sift together the flour, baking powder and salt, set aside.

Cut the butter into 1-inch pieces and place in the large bowl of an electric mixer fitted with the paddle attachment to soften on low speed. Increase speed to medium-high and cream until smooth and light in color, about 1½ to 2 minutes.

Add the sugar, 1 tablespoon at a time, taking about 6 to 8 minutes to blend it in well, scraping the sides of the bowl as necessary.

Add the eggs and additional yolk, 1 at a time at 1-minute intervals, scraping the sides of the bowl as necessary.Blend in the vanilla.

Reduce mixer speed to low and add the dry ingredients alternately with the milk, dividing the flour mixture into three parts and the milk into two parts, starting and ending with the flour. Mix just until incorporated after each addition, scraping the sides of the bowl and mix for 10 seconds longer.

Spoon the batter into the prepared pan and smooth the surface with the back of a tablespoon.

Beat the egg white lightly with a fork, and using a pastry brush, spread about half of the beaten egg white over the top of the cake batter. Discard the remainder - the egg white helps the streusel adhere to the top of the cake.

Sprinkle the entire surface of the batter generously with the streusel, gently patting the crumbs into the batter with the palm of your hand; do not press hard.

Center the pan on the rack and bake for 40 to 45 minutes, or until the cake is golden brown on top, begins to come away from the sides of the pan, and the streusel is crisp. A toothpick inserted into the center should come out dry.

Remove the cake from the oven and set on a cake rack to cool. When ready to serve, dust the top with powdered sugar and cut into squares.

Can be stored at room temperature for up to 5 days.


The Giveaway! 

1. A Signed Copy of Lick The Bowl Good
2. Red Striped Paper Straws
3. Kitchen Utensils Magnets
4. Magnetic Note Pad
5. Baker's Twine
6. "For You" Baker's Tags
7. Recipe Cards
8. Sticky Notes for Bookmarking Your Favorite Recipes :-)


Giveaway open to U.S. residents only. You have 4 chances to win. Please leave a separate comment per entry. 

Entry #1 (mandatory entry)- Leave me a comment on this blog post telling me about your favorite holiday traditions.

Entry #3- Follow monica_h30 on Instagram

Entry #4- Share this giveaway with your friends and family and help spread the word about Lick The Bowl Good

Please remember, if you enter more than once to leave me separate comments per entry. 

I will select and announce the winner using random.org on Monday, December 30th. 

~ ~ ~ ~ ~

Best of luck and Happy Holidays to you all. Thank you for your generosity and support over the last 6 years. My family and I are thankful for you.

~Monica Holland

Thursday, November 21, 2013

Apples and Spice


It's almost Thanksgiving, are you all ready? I'm always interested in what people are making. Ham or turkey? Stuffing or dressing? Cranberry sauce- fresh or jellied? Pumpkin or pecan? There are so many different foods, I want a buffet table so I can sample everything! What's on your Thanksgiving menu? Our family does Holiday gatherings pot-luck style so not everyone has to do the work on heir own. Less stress that way. I'm in charge of a side dish and chocolate pecan pies this year. 

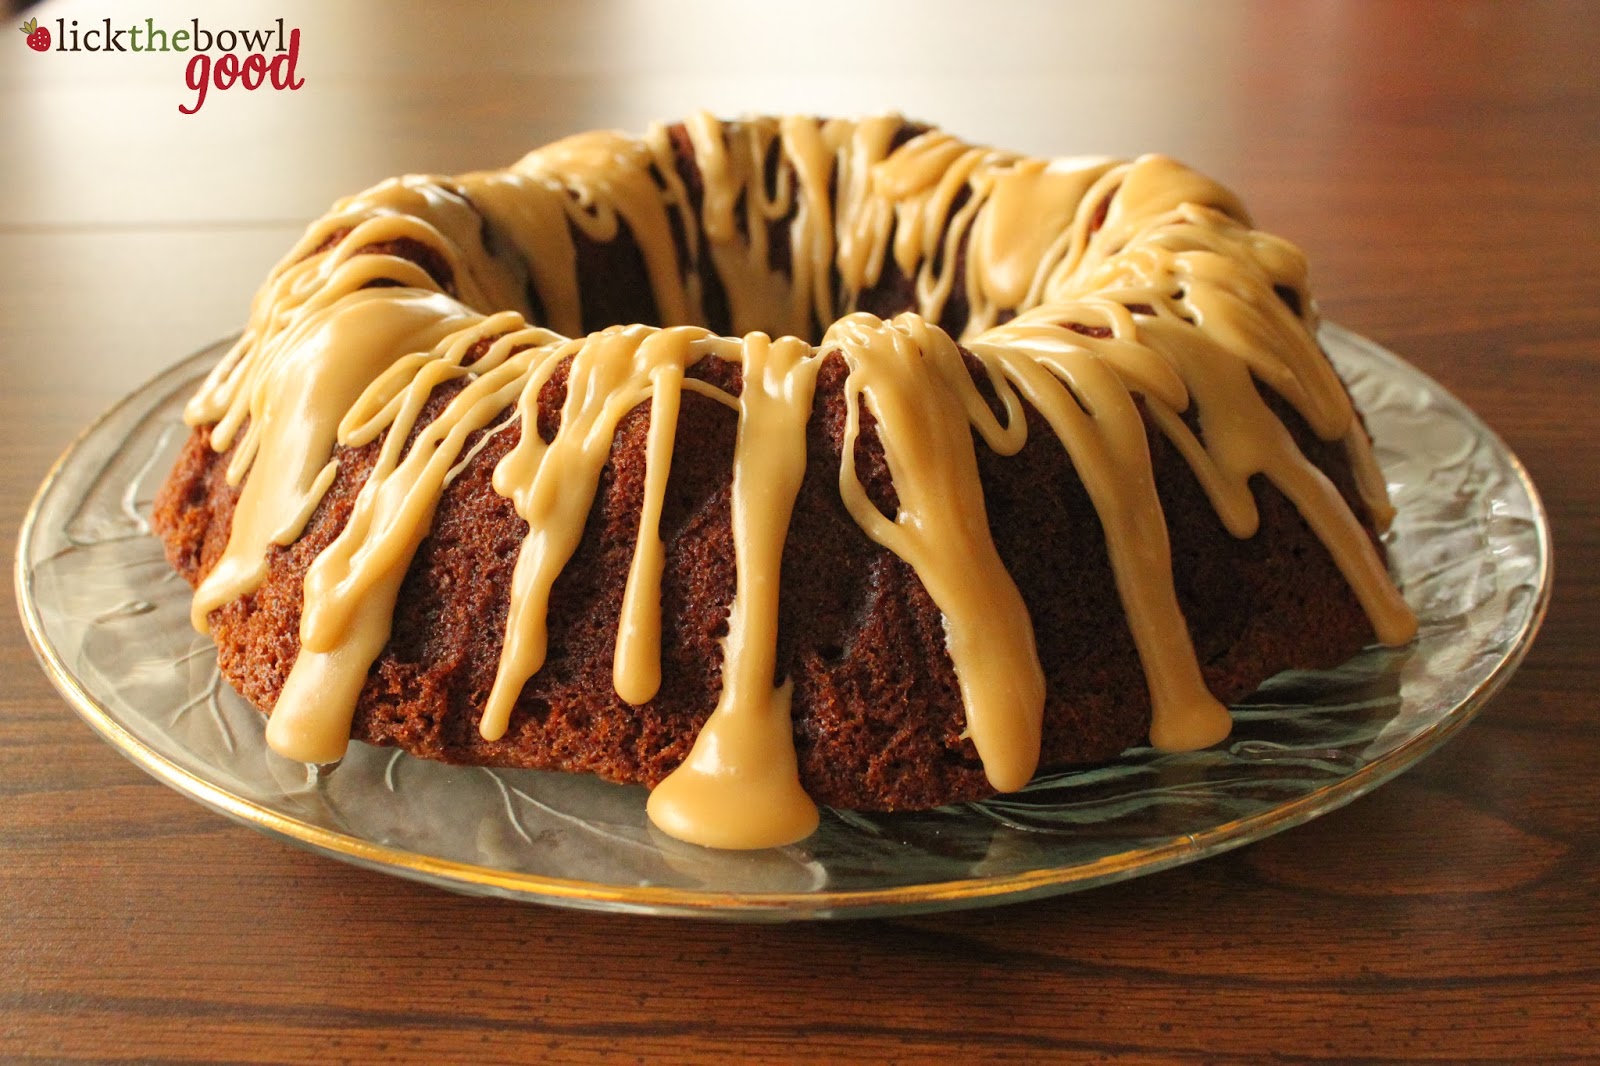
I baked my cake in my Autumn Harvest Bundt that my hubby gave me years ago. It's such a pretty pan, but the detail didn't show up as much as I hoped it would. I'm thinking a pound cake would do well in a pan like this, with a light dusting of powdered sugar. 

If you like spice cake, you might like this cake. It was really moist and spicy. A little too spicy for me, if I'm being honest, but if spice is your thing you'll like this. In this applesauce cake was lemon zest too, which was a nice addition. It brightened the flavor and helped cut through the spice. If I made this again, I'd leave out the allspice all together, cut the amount of nutmeg in half and add more chopped apples. The glaze though, was delicious! I could eat the glaze straight out of the bowl with a spoon. Below is the recipe for the cake, as I made it. 

Stay tuned for a holiday pie recipe and a giveaway... coming soon! Click to see the other cakes made by the Cake Slice Bakers.


Apple Sauce Spice Bundt Cake 

  • 2 1/4 cups sifted unbleached all-purpose flour
  • 1 teaspoon baking soda
  • 1/2 teaspoon salt
  • 1 1/2 teaspoon ground cinnamon
  • 1/2 teaspoon ground allspice
  • 1/2 teaspoon ground nutmeg
  • 3/4 cup pecans, lightly toasted finely chopped (optional)
  • 1/3 cup butter, room temperature
  • 1 teaspoon grated lemon zest
  • 1/3 cup vegetable shortening
  • 3/4 cup granulated sugar
  • 2/3 cup light brown sugar, lightly packed
  • 2 large eggs
  • 1 medium sized Granny Smith apple, peeled and diced, about 1 cup
  • 1 teaspoon vanilla extract
  • 1 cup applesauce
Preheat oven to 350 degrees F. utter a 9" fluted tube pan, dust it lightly with flour and invert over the kitchen sink to tap out excess flour.

Sift together flour, baking soda, salt and spices in a triple sifter. Stir in chopped pecans, if using. Set aside.

Place the butter and shortening and lemon zest in large bowl of an electric mixer fitted with the beaters or paddle attachment. Beat over medium-high speed until creamy and smooth, about 2 minute. 

Add the granulated sugar, 1 tablespoon at a time, taking 3 to 4 minutes to blend it in well. Add the light brown sugar over an additional 3 to 4 minutes. Scrape the sides of the bowl occasionally.

Add the eggs, one at a time until well blended. Reduce speed to medium-low. Add the fresh apple and the vanilla. 

Reduce mixer speed to low. Add the flour/nut mixture alternately in three additions with the applesauce in two additions, starting and ending with the flour. Beat just until incorporated after each addition. Scrape the sides of the bowl occasionally.

Spoon the batter into the prepared pan and smooth the top. Center the pan on the rack and bake in the preheated oven for 35 to 40 minutes or until the cake begins to leave the sides of the pan and a toothpick inserted into the center comes out clean.
Remove from oven. Place the pan on a cake rack to set for 10 to 15 minutes, then invert the cake onto the rack and remove pan. While the cake is still warm you may want to pour Brown Sugar Glaze over the top, letting it drip naturally down the sides. Garnish the top with chopped pecans if you wish.


Brown Sugar Glaze
  • 3 Tablespoons butter
  • 3 Tablespoons brown sugar, packed
  • 3 Tablespoons heavy cream
  • 3/4 cup sifted powdered sugar
  • 1/2 teaspoon vanilla
In a small saucepan, melt the butter with the brown sugar over low heat. Then stir in the heavy cream and cook slowly until the mixture comes to a gentle boil. Simmer for 1-2 minutes.

Take the pan off the heat and gradually add the powdered sugar in three additions, whisking until smooth. Add in the vanilla and whisk to combine. 

If the icing is too thick, add another tablespoon of the cream. You want it thin enough to pour but not runny. It sets quickly so get it on the cake as quickly as possible.

My little barefoot donkey on Halloween :-)

Monday, October 21, 2013

Our Last Vintage Cake


For the past year, The Cake Slice Bakers and I have been baking from Vintage Cakes by Julie Richardson. I missed a baking a few of the recipes when I was writing the cookbook, but the ones I did bake were quite tasty. This is a beautiful book and full of great recipes. If you're a cake fiend like I am, I would recommend you check this book out. 

Next month, we'll be baking from a new cake book so this month, rather than voting on and baking a specific cake, we had the choice to bake any cake we wanted from this book. I narrowed it down to two cakes but eventually decided on Texas Sheetcake because it's my hubby's favorite. The other cake I wanted to make was the Kentucky Bourbon cake. I still intend to make it, I just got busy and ran out of time. My friend Maranda from Jolts & Jollies made it and shared it on her blog if you're interested in the recipe. It looks delicious! 

It's not very often that Hayden falls asleep with Daddy on the couch- he hasn't done that since he was an infant. How sweet is this though? Those curls, my goodness!

This cake was very simple to put together and feeds a crowd. That's the beauty of sheet cakes. I divided the batter between to pans and took some to my mother-in-law. The cake was very moist although it was a little crumbly, in my opinion. Perhaps I could have baked it a couple minutes less or added a tad more oil or an extra egg next time??? There are so many recipes to try though, so I don't feel the need to remake this one. If you make it, I hope you'll let me know how you like it!


Texas Sheetcake from Vintage Cakes


Cake:
  • 1 cup unsalted butter
  • 1/2 cup lightly packed premium unsweetened natural cocoa
  • 3 tablespoons canola oil
  • 1 cup water
  • 2 cups all-purpose flour
  • 2 cups sugar
  • 1 teaspoon baking soda
  • 1/2 teaspoon fine sea salt
  • 2 eggs
  • 1/2 cup buttermilk
  • 2 teaspoons pure vanilla extract
Frosting:
  • 1/2 cup unsalted butter
  • 1/4 cup  lightly packed premium unsweetened cocoa
  • 1/3 cup whole milk
  • 2 teaspoons pure vanilla extract
  • 3 cups sifted powdered sugar
  • 1/2 cup toasted chopped nuts
Center an oven rack and preheat the oven to 375°F. Grease a 15 by 10 by 2-inch baking pan.

To make the cake, melt the butter in a large saucepan over medium heat. Whisk in the cocoa. Add the oil and water and bring to a rolling boil for 30 seconds. Remove the pan from the heat and set it aside to cool slightly. 

Meanwhile, sift together the flour, sugar, baking soda, and salt in a large bowl, then whisk the ingredients by hand to ensure they are well mixed. Pour the warm cocoa mixture into the sifted ingredients and whisk until just combined. In a small bowl, whisk together the eggs, buttermilk, and vanilla. With a rubber spatula, stir the buttermilk mixture into the batter. Pour the batter into the greased pan and place in the center of the oven. 

Bake until the top is firm and a wooden skewer inserted in the middle of the cake comes out with moist crumbs, 32 to 35 minutes.

While the cake is in the oven, make the frosting: melt the butter in a saucepan over medium heat. Whisk in the cocoa and bring the mixture to a rolling boil; boil for 30 seconds. Remove from heat and whisk in the milk and vanilla. Add the powdered sugar 1 cup at a time while whisking continuously. 

Immediately after the cake comes out of the oven, pour the frosting over the hot cake and sprinkle with the nuts. Try not to jiggle the cake before it sets or you'll leave waves in the frosting. Allow to cool before cutting into squares.

Well wrapped and stored at room temperature, this cake keeps for up to 5 days.

Want a bite?

Wednesday, September 25, 2013

Learning To Like New Things


I loathe making chiffon/angel food cakes and Swiss rolls so I was not so thrilled when this cake was chosen as the winning cake to be baked by The Cake Slice Bakers. In fact, my friend Maranda from Jolts & Jollies and I both held our breath and hoped this cake wouldn't be the winning cake because it seemed so labor intensive BUT in the end it was so much easier than I ever expected. Despite my reservations, this cake was a complete success and really quite DELICIOUS. It's also really pretty and that's always a plus. There are lots of photos in this post, bear with me. 

This is not your ordinary roll up cake. Firstly, you make your own butterscotch sauce (butter, sugar, cream) then you add some of that to freshly whipped cream to make the filling. It then gets spread on the cake and rolled up with sliced almonds scattered throughout. You cut the cake into four pieces and roll it up around itself until you have something that looks like a giant cinnamon roll. And who doesn't like giant cinnamon rolls, especially when the tender cake is the dough and it's filled with salted butterscotch cream?! 

I haven't always liked butterscotch. It wasn't until recently that I started to like it. I always assumed that butterscotch was nothing more than those little golden candies my grandpa used to carry around in his pockets. Why didn't anyone tell me it was like a cross between gooey, sticky toffee and caramel? Man, this stuff was good! The recipe below makes 1 1/2 cups of sauce but only one cup is needed for the filling. You can drizzle the remaining sauce over the cake or on ice cream, or in coffee or just stick your finger in it and lick it. oh yum! Make this! 

Butterscotch Cream Roll-Up 
from Vintage Cakes via Cooking By The Book


Butterscotch Sauce:

1/3 cup unsalted butter
1 cup firmly packed dark brown sugar
1 cup heavy cream
1 tablespoon whisky
1 ½ teaspoons pure vanilla extract
½ teaspoon fine sea salt

Cake:

1 cup sifted cake flour
1 cup sugar
1 teaspoon baking powder
½ teaspoon fine sea salt
½ cup canola oil
4 egg yolks, at room temperature
¼ cup water
1 teaspoon pure vanilla extract
6 egg whites, at room temperature
¼ teaspoon cream of tartar

Filling:

1 ½ cups cold heavy cream
½ cup natural sliced almonds, toasted plus more for this outside of the cake, if desired

To make the butterscotch sauce: Melt the butter over medium heat in a large heavy-bottomed sauce pan. Dump in the brown sugar all at once and stir with a wooden spoon to combine. Cook, stirring frequently, until the mixture begins to simmer and changes from a wet sand consistency to a liquid that fives off a lovely molasses smell and looks like taffy, approximately 3 minutes from the time it comes to a simmer. Drizzle ¼ cup of the cream into the mixture and vigorously blend the cram into the sugar and whisk in the remaining cream. Turn the heat up to medium-high and allow the sauce to boil, whisking occasionally, until it has darkened, about 8 minutes. Remove the pot from the heat and allow the sauce to cool for a few minutes before adding the whisky, vanilla, and salt. Refrigerate until cold.

To make the cake: Spray a 12 x 16 inch jelly roll pan with nonstick baking spray (with flour), line it with parchment paper, and then spray the parchment paper with more nonstick baking spray. Center a rack in the center of your oven and preheat the oven to 325⁰F.

Sift together the flour, baking powder, salt, and ¾ cup of the sugar in a large bowl, then whisk the ingredients by hand. In a small bowl, whisk together the oil, yolks, water and vanilla. Add the liquid mixture to the dry ingredients and briskly stir with a rubber spatula until just smooth.

In the clean bowl of stand mixer fitted with the clean whisk attachment, whip the egg whites on medium speed until frothy. Add the cream of tartar and gradually increase the speed to high, whipping until the whites just form a soft peak. With mixer on medium speed, gradually add the remaining ¼ cup of sugar in a slow stream. Return the mixer to high and continue whipping until the whites just begin to hold firm, shiny peaks.

With a rubber spatula, fold a third of the whites into he batter, using as few strokes as possible. Add the remaining whites, folding until incorporated. Pour the batter into the prepared pan and smooth the top with an offset spatula. Place the pan in the oven. Bake the cake until it springs back when lightly touched and is barely golden in color, 16 to 20 minutes. Cool the cake on a wire rack until it reaches room temperature.

To make the filling: Begin by placing the bowl of a stand mixer and its whisk attachment in the freezer for 5 minutes. Fit the cold bowl and whisk to the mixer and whip the 1 ½ cups of cold heavy cream and 1 cup of the cold butterscotch sauce together on low speed until the ingredients are blended. Gradually turn the mixer up to high speed and whip just until the cream holds soft peaks but is not yet stiff.

To assemble the cake:  Keep the cake in its pan and orient the pan so the longer side is closed to you. Cut the cake with a serrated knife into four equal pieces measure 4 by 12 inches. Cut through the underlying parchment paper with a pair of scissors in the same places that you cut the cake so you have four quarters of cake [with parchment paper attached] that can each move independently.

Leaving the cake in the pan, spread a bit more than half of the butterscotch cream evenly over the cake and sprinkle with the toasted almonds. Refrigerate the remainder of the cream while you roll up the cake.
Here comes the fun part: rolling the cake! With the pan still oriented with the longer side closest to you, lift up the nearest edge — both cake and paper — of one of your 4 strips. Using the parchment paper as the cake’s support, begin to tuck the cake into a roll and continue tucking [and peeling away the parchment paper] while gently rolling the cake away from you into a roll. Place the rolled cake upright on a serving plate, so the spiral of cake and filling is visible at the top. [Don’t worry, it gets easier from here.]Lift the next cake strip, using the parchment paper to support it, and wrap the strip around the roll on the serving plate, beginning where the outside edge of the first cake left off, in order to create a bigger roll. Continue with the next two strips, beginning the wrap where the last left off, to make one enormous rolled up cake.
Finish by frosting the sides with the reminder of the cream [you might need to give the cream a few turns with a hand whisk to stiffen it up], leaving he top free to show of the spiral of cake and cream. If you desire, you can pat more almonds into the sides of the cake. Refrigerate the cake for at least 1 hour and up to one day, lightly wrapped in plastic. Just before serving, warm the remaining butterscotch sauce and drizzle it over the individual servings.

Well wrapped and refrigerated, this cake keeps up to 3 days. 


Friday, August 2, 2013

A Special Anniversary- The Cake Slice Turns 5!


My boy turned 23 months today. That's exciting and terrifying all at the same time. One more month to go til his 2nd birthday! But that's not what I'm writing about today. August 1st is the 5th anniversary for The Cake Slice Bakers. I joined the the cake baking group in April of 2009 and have baked dozens of cakes through 5 different cookbooks and with many talented and amazing women. 

My very first cake that I baked with the group was Chai Cake with Honey-Ginger Cream from Sky High Cakes from Alisa Huntsman and Peter Wynne. I'm not a big fan of chai or ginger but I found this group helped me open my eyes and made me try different techniques and flavors that I wouldn't have otherwise tried. And I've made friends with these awesome women- we support and encourage each other, which is far better than cake. 

In celebration of our 5th anniversary, we decided to bake a special cake to help celebrate. I went back to the original and my favorite cake book of all and made a cake I've wanted to try for quite some time- Mocha Cake with Espresso Drizzle from Sky High Cakes. The cake is three delicious layers of dense, fudgey mocha cake, reminiscent of a flourless chocolate torte. In between the layers is a generous amount of a white chocolate, sweetened condensed milk, sticky espresso infused glaze. It was definitely a celebration cake. I'm so glad this baking group is around and I hope to bake along with them for many more years. 

Happy 5th Anniversary Cake Slice Bakers! If you're interested in keeping up with us, follow The Cake Slice Bakers on Facebook for baking tips, recipes and cake!


Mocha Cake with Espresso Drizzle 


Mocha Cake: 
  • 1 cup freshly brewed espresso or double-strength coffee
  • 2/3 cup unsweetened cocoa powder
  • 4 eggs
  • 2/3 cup buttermilk
  • 1 1/2 teaspoons vanilla extract
  • 2 2/3 cups cake flour
  • 2 2/3 cups sugar
  • 3/4 teaspoon baking powder
  • 1/2 teaspoon salt
  • 2 sticks (8 ounces) unsalted butter, at room temperature

Espresso Drizzle: (see note below)
  • 12 ounces good-quality white chocolate
  • 3/4 cup sweetened condensed milk
  • 6 tablespoons freshly brewed espresso or double-strength coffee

Preheat the oven to 350 degrees F. Butter the bottoms and sides of three 8-inch round cake pans or coat with vegetable cooking spray. Line the bottom of each pan with a round of parchment or waxed paper and grease the paper.

To make the cake: In a medium bowl, combine the hot espresso and cocoa powder, stirring to dissolve the cocoa. Let this mocha mixture stand until cooled to body temperature. Meanwhile, in another bowl, beat the eggs lightly.Whisk in the buttermilk and vanilla until well mixed.

Place the flour, sugar, baking powder, and salt in a large mixing bowl. With the mixer on low, evenly blend the dry ingredients. Add the butter and the mocha mixture, beating until well blended. Raise the mixer speed to medium and beat until light and fluffy, then add the buttermilk-egg mixture in 3 additions, scraping well and blending only to incorporate. Divide the batter among the 3 prepared pans.

Bake the cake layers for 35 to 38 minutes, or until a cake tester or wooden toothpick inserted in the center comes out almost clean but still moist. Let cool in the pans for about 10 minutes, then invert onto wire racks. Carefully peel off the paper liners and let the layers cool completely.

To make the espresso drizzle: (This makes a lot of glaze and could easily be halved- I had quite a bit leftover). Melt the white chocolate in a double boiler or in a medium heatproof bowl over a pan of very hot water.

Whisk in the sweetened condensed milk and espresso and continue whisking until smooth. Use while warm.

NOTE: The white chocolate didn't really want to melt and seemed rather stiff though it was still warm. Once I added the condensed milk and espresso it all came together. I had a few lumps but strained them out before pouring the glaze over the cake. I had a lot of glaze leftover. Next time, I would just make half a recipe.

To assemble the cake: Place one layer, flat side up, on a cake stand or serving plate. Pour 1/2 cup of the Espresso Drizzle onto the center of the layer and spread all the way to the edge, allowing it to drip slightly over the sides. Repeat with the second layer. Set the third layer in place, then pour the remaining drizzle on top and spread to the edges, making sure the glaze drips down the sides, covering all the edges.


Sunday, July 28, 2013

Boston Banana Cream Pie-lets


I just got back from taking a road trip across the great state of Texas with my mom, aunt, sister and Hayden. My cousin's 1st birthday was last weekend and my aunt asked if I would do the honor of baking his cake. If you're following me on Facebook or Instagram you've already seen The Cat In The Hat cake I made but I will share photos and the recipe I used very soon. I had so much fun making it for him. Now I'm trying to dream up ideas for Hayden's 2nd birthday cake in 5 short weeks. 

I hoped to share this recipe with you before I left but leave it to me to wait til the last minute to try and get things done. I was working with fondant and trying to pack until the wee hours of the morning before we left. I just ran out of time. Luckily The Cake Slice Bakers are forgiving and haven't kicked me out of the group yet even though I'm a week late with my version of Boston Cream Pie-lets. 
This cake uses no butter or oil, instead you whip up heavy cream and use that as the fat in this cake. There are several steps to this recipe but they're all simple. I added sliced bananas to this recipe since it reminded me of banana cream pie. This recipe is a little different though in that you assemble the mini "pies" in custard cups instead of  having a larger round cake that needs slicing. There's lots of extra vanilla bean pudding in there too, which is never a bad thing. If you're interested in this recipe or the others The Cake Slice Bakers have made this year, check out Vintage Cakes by Julie Richardson. 


Boston Banana Cream Pie-lets 
adapted from Vintage Cakes by Julie Richardson


Makes 8-10 servings

Cake:
  • 2 cups sifted cake flour
  • 2 teaspoons baking powder
  • 1 teaspoon salt
  • 1 ½ cups cold heavy cream
  • 1 ¼ cup sugar
  • 3  large eggs
  • 2 teaspoons vanilla extract

Pudding:
  • 1 vanilla bean
  • 4 cups whole milk
  • 1 cup sugar
  • 8 egg yolks
  • ½ teaspoon salt
  • ¼ cup cornstarch
  • 4 tablespoons unsalted butter, cubed

Ganache:
  • 1 cup heavy cream
  • 8 ounces semisweet or dark chocolate chips
  • 3-4 large bananas, sliced 1/4 inch thick


Center an oven rack and preheat to 350 degrees F. Line a 9x13-inch cake pan with foil. Do not grease the foil.

To Make The Cake: Sift together the cake flour, baking powder, and salt in a bowl, then whisk the ingredients by hand to ensure they are well mixed. 

Using the stand mixer fitted with the whisk attachment, whip the cream on high until soft, droopy peaks form. On medium-low speed, add the sugar in a steady stream and then return he mixer to high speed to continue to whip the cream until stiff peaks form. Return the mixer to low speed then add the eggs one at a time, followed by the vanilla. Stir in he flour mixture in three parts, adding the next addition, as soon as the flour has been incorporated. Turn off the mixer before all the flour has been mixed into the batter and finish mixing by hand with a rubber spatula. Pour the batter into the prepared baking dish and place it into the center of the oven until the cake springs back in the middle when slightly pressed, 28 -32 minutes. Cool the cake in it's pan on a wire rack until it reaches room temperature. 

While the cake is in the oven, make the pudding. 

To Make The Pudding: With a small paring knife, split the vanilla bean in half, lengthwise. Scrape out the seeds from the pod and put them along with the pod into the saucepan. Add the milk and 1/3 cup of sugar and place the pan over medium-low heat until the milk is hot but not boiling. While the milk is heating, in a small bowl, thoroughly whisk together the yolks along with the remaining 2/3 cup sugar and the salt, then blend in the cornstarch. Slowly whisk a third of the hot milk into the yolk mixture. Pour this mixture back into the saucepan with the remaining hot milk.Cook gently over medium-low heat, whisking steadily until the pudding just begins to thicken and has been bubbling for roughly one minute (you will need to stop whisking for a moment to see if it is bubbling). Strain he mixture through a fine mesh sieve into a clean bowl. Whisk in the butter until it is melted. 

To Make The Ganache: In a small sauce pan, bring cream to a simmer. Place the chopped chocolate or chips into a large, heat proof bowl. Add the hot cream to the bowl. Swirl the bowl to ensure even coverage of cream on the chocolate. Cover the bowl with a lid or plastic wrap for 5 minutes. Remove lid and whisk the chocolate from the middle and outwards. Start with small circles in the middle and move outwards until all the chocolate has melted. 

To Assemble The Pie-lets: Set aside 8-10 pudding cups (tea cups, juice glasses or small bowls will work just fine). Using a 2 1/2-inch round biscuit cutter, cut out 8 miniature cakes from the pan. Carefully remove the miniature cakes from the pan and using a serrated knife, cut them in half horizontally to create two equal layers per cake. Use the extra cake to snack on or make an extra pudding cup. 

Spoon 3 tablespoons of warm pudding into the bottom of each dish. Place 1 slice of cake over the pudding. Place banana slices over cake and cover with another 3 tablespoons of more pudding. Top with the second piece of cake. (Layers: pudding, cake, bananas, pudding, cake). Evenly divide the ganache over each slice of cake. Cover with plastic wrap and refrigerate until well chilled for at least 4 hours. 

Saturday, March 23, 2013

Sweet As Honey


Happy Spring Everyone! Wednesday was my father-in-law's 72nd birthday. Happy birthday Bob! I'm not quite sure why I associate pie and banana pudding with him, but a couple of years ago I made him a banana pudding pie and this year I conjured up a new creation of banana pudding cheesecake-- doesn't that sound amazing? It was a great way to celebrate the first day of Spring. And tomorrow if the weather cooperates, I'm heading out to find a patch of Texas bluebonnets to plop Hayden in the middle of to take his picture. It's what Texans do!

Grandpa Bob, Mr. H and Hayden

I've been baking so much lately, trying to get new pictures and recipes for the cookbook that I've neglected my fellow Cake Slice Bakers. This month's cake got so much praise that I just had to take a break from my regular schedule and make it. I like honey, but don't love it like I do cream cheese or chocolate. I use it in recipes, but it's never a major flavor component in anything I make. This cake was good, really good. There's honey in the cake, then after it's baked it get topped with a honey butter glaze, sliced almonds and even more glaze. After it cools slightly, the topping because somewhat chewy and crunchy, while the cake soaks up that glaze and becomes moist and sticky with a tight, tender crumb. I'm glad I made this cake and I hope you will too! Nothing says Spring like birthdays,  wildflowers on the side of the road and fresh local honey.

Honey Bee Cake adapted from Vintage Cakes
Cake:
  • 2 1/4 cups all-purpose flour
  • 2 teaspoons baking powder
  • 1 teaspoon fine sea salt
  • 3/4 cup plus 2 tablespoons unsalted butter, at room temperature
  • 3/4 cup sugar
  • 1/3 cup honey
  • 2 teaspoons pure vanilla extract
  • 2 eggs, at room temperature
  • 1 egg yolk, at room temperature
  • 3/4 cup buttermilk, at room temperature

Glaze:
  • 1/2 cup honey
  • 1/4 cup  firmly packed brown sugar
  • 1/4 cup unsalted butter
  • 1/2 cup natural sliced almonds

Center an oven rack and preheat the oven to 350°F. Grease a 9 by 2-inch round cake pan or 9 by 3-inch springform pan. Line the bottom with a parchment paper circle and set aside. 
To Make The Cake: In a bowl, sift together the flour, baking powder, and salt, then whisk the ingredients by hand to ensure they are well mixed.
In the bowl of a stand mixer fitted with the paddle attachment, combine the butter, sugar, honey, and vanilla on low speed until blended; increase the speed to high and cream until very light and fluffy, 5 to 7 minutes. As you make the batter, stop the mixer frequently and scrape the paddle and the sides of the bowl with a rubber spatula. Blend in the eggs and egg yolk one at a time, adding the next one as soon as the previous one has disappeared into the batter. With the mixer on low speed, add the flour mixture in three parts, alternating with the buttermilk in two parts, beginning and ending with the flour. After each addition, mix until just barely blended and stop and scrape the bowl. Stop the mixer before the last of the flour has been incorporated and complete the blending by hand with a rubber spatula to ensure you do not overbeat the batter.
Spread the thick batter evenly into the prepared pan. Tap the pan firmly on the counter to release any air bubbles. Place the pan in the center of the oven and bake for 45 minutes. The cake will turn a deep golden color and be firm on top, and a wooden skewer inserted in the middle will have moist crumbs attached. The cake might crack on the surface as it bakes; don’t worry, this simply provides a way for the cake to soak up more honey glaze.
To Make The Glaze: In a small saucepan combine the honey, sugar, and butter over medium heat, stirring until combined. Bring the mixture just barely to a simmer. Turn off the heat but leave the saucepan on the burner to keep warm.
Remove the cake from the oven and let it rest in the pan for 5 minutes before inverting it onto a serving plate, right side up. Be careful, the cake is hot! Poke holes all over the top of the cake with a wooden skewer. Pour half of the glaze over the cake, evenly sprinkle the cake with the almonds, and then pour the rest of the glaze over the almonds. Let cake cool slightly, but serve warm. 
The honey in this cake makes it a good keeper (5 days) when well wrapped and stored at room temperature.


Monday, December 3, 2012

Latte Cheesecake and Wacky Weather


Happy December! I always wondered what Christmastime in a tropical climate was like. Wondered if people decorated their palm trees with C-9 bulbs and tinsel garland while wearing flip flops and tank tops, stopping to take a break to beat the heat with an icy beverage. Then I realized that 2012 would be the year that I got to experience that, only I'm still in Texas! This weather is so strange. It was 80 degrees today and does not feel the least bit like winter. I had lunch with a friend today (hi L!) and went to pick up Hayden at my mom's house, only to find him wearing nothing but a diaper helping Grandma stick candy canes in the ground. It was a sweet image, but nekkid babies playing outside in December??? It's unreal!

Needless to say, I have yet to start  my holiday baking. There has not been a single cookie to grace my Silpat lined sheets but I will get there. In the meantime, I hope you'll enjoy this recipe for Brownie Latte Cheesecake.  I made it last month as part of the Cake Slice Bakers and it was delicious.  Cheesecake is holiday-ish, right? It probably won't be a part of any cookie trays this year but sometimes you need a nice centerpiece dessert and this is it. 


Instead of a typical cookie crumb crust, this cheesecake has a thick, dense, fudgy, chocolate rich base. In contrast, the filling is ultra creamy and light in texture. The flavors of chocolate, espresso, vanilla, and Kahlua compliment each other so well. This is definitely one for sharing and a little sliver goes a long way but that's what makes it ideal for holiday gatherings and celebrations, that and it can be made a couple days in advance. I'll get my act together, paint the windows with a can of fake snow and flip the switch on my fireplace to get me in the butter baking mood. If y'all have any great holiday cookie recipes for me, please share!

Brownie Latte Cheesecake adapted from The Cake Book


For The Brownie Layer: 
  • 4 oz. semisweet chocolate, coarsely chopped
  • 1/2 cup (1 stick) unsalted butter, cut into tablespoons
  • 1 Tablespoon instant espresso powder
  • 1 teaspoon vanilla extract
  • 1/4 teaspoon salt
  • 1 cup granulated sugar
  • 2 large eggs
  • 1/2 cup all-purpose flour
For The Latte Filling: 
  • 1 1/2 pounds (24 oz.) cream cheese, softened
  • 1 1/2 cups granulated sugar
  • 1 Tablespoon vanilla extract
  • 2 teaspoons espresso powder, dissolved in 1 Tablespoon hot water
  • 2 Tablespoons Kahlua
  • 1/8 teaspoon salt
  • 1/2 cup sour cream 
  • 1 Tablespoon cornstarch
  • 4 large eggs
To make The Brownie Layer: Position a rack in the center of the oven and preheat the oven to 325 degrees F. Lightly grease the bottom and sides of a 9x3-inch springform pan. Cut an 18-inch square of heavy duty aluminum foil and wrap around the outside of the pan. 

In the top of a double boiler, melt the chocolate with the butter over barely simmering water, stirring occasionally. Transfer the mixture to a medium bowl and stir in the espresso powder, vanilla extract and salt. Whisk in the sugar until combined. Whisk in the eggs one at a time, until blended. Stir in the flour until no traces remain. 

Scrape the batter into the prepared pan and smooth it into an even layer. Bake the brownie for 25-30 minutes, until a toothpick inserted into the center comes out with a few moist crumbs attached to it. Place the pan on a wire rack and let cool while you make the filling. Leave the oven on. 

To Make The Latte Filling: In the bowl of an electric mixer, using the paddle attachment, beat the cream cheese at medium-low speed until creamy and smooth, about 2 minutes. Gradually add the sugar and beat until blended. Add the vanilla extract, espresso mixture, Kahlua, salt, sour cream and cornstarch and mix until well blended. At low speed, add the eggs one at a time, mixing well after each addition and scraping down the sides of the bowl with a rubber spatula as needed. 

Scrape the batter onto the brownie layer and smooth the top. Place the springform pan in a roasting pan or a large baking pan. Pour enough hot water into the roasting pan to come about 1 inch up the sides of the springform pan. Bake the cake in the water bath for 70-80 minutes, until the center is set but slightly wobbly (the cheesecake will continue to set up as it cools). Turn the heat off and crack the door, allowing the cake to cool in the oven for about 30 minutes. Remove the cake from the water bath and place on a rack and cool to room temperature. 

Refrigerate the cheesecake for at least 4 hours or overnight before serving. 


Sleeping Beauty

Related Posts with Thumbnails