Showing posts with label Apples. Show all posts

Thursday, November 21, 2013

Apples and Spice


It's almost Thanksgiving, are you all ready? I'm always interested in what people are making. Ham or turkey? Stuffing or dressing? Cranberry sauce- fresh or jellied? Pumpkin or pecan? There are so many different foods, I want a buffet table so I can sample everything! What's on your Thanksgiving menu? Our family does Holiday gatherings pot-luck style so not everyone has to do the work on heir own. Less stress that way. I'm in charge of a side dish and chocolate pecan pies this year. 

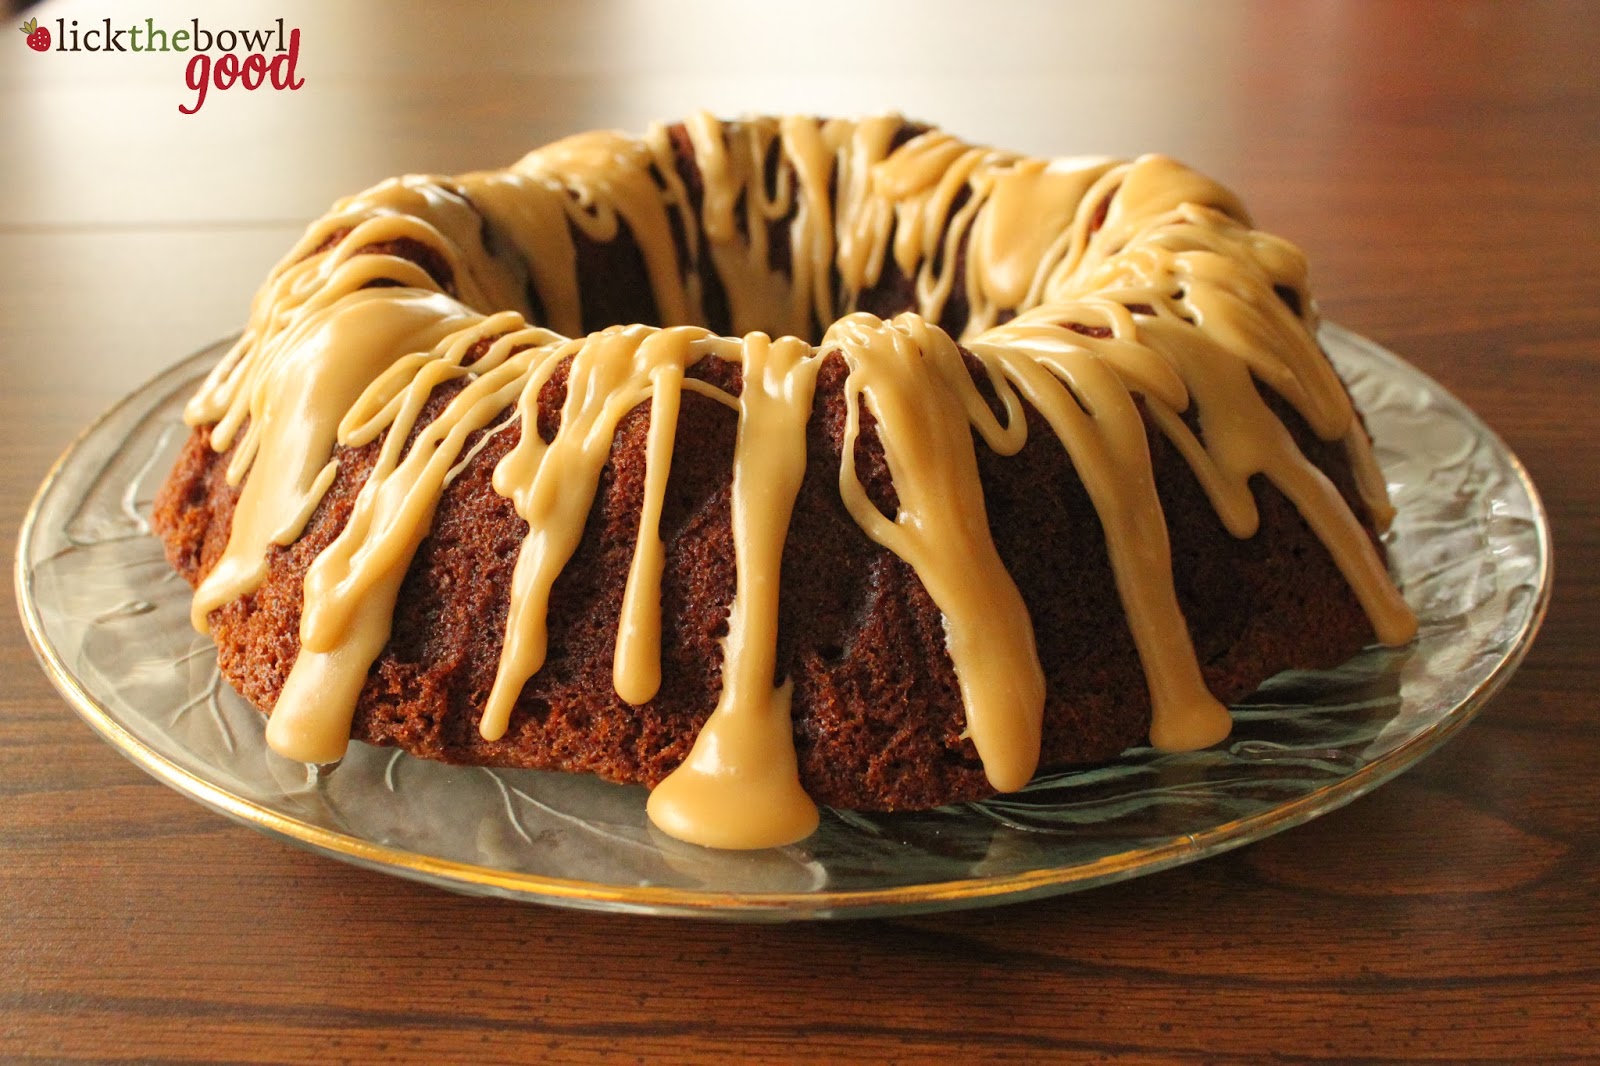
I baked my cake in my Autumn Harvest Bundt that my hubby gave me years ago. It's such a pretty pan, but the detail didn't show up as much as I hoped it would. I'm thinking a pound cake would do well in a pan like this, with a light dusting of powdered sugar. 

If you like spice cake, you might like this cake. It was really moist and spicy. A little too spicy for me, if I'm being honest, but if spice is your thing you'll like this. In this applesauce cake was lemon zest too, which was a nice addition. It brightened the flavor and helped cut through the spice. If I made this again, I'd leave out the allspice all together, cut the amount of nutmeg in half and add more chopped apples. The glaze though, was delicious! I could eat the glaze straight out of the bowl with a spoon. Below is the recipe for the cake, as I made it. 

Stay tuned for a holiday pie recipe and a giveaway... coming soon! Click to see the other cakes made by the Cake Slice Bakers.


Apple Sauce Spice Bundt Cake 

  • 2 1/4 cups sifted unbleached all-purpose flour
  • 1 teaspoon baking soda
  • 1/2 teaspoon salt
  • 1 1/2 teaspoon ground cinnamon
  • 1/2 teaspoon ground allspice
  • 1/2 teaspoon ground nutmeg
  • 3/4 cup pecans, lightly toasted finely chopped (optional)
  • 1/3 cup butter, room temperature
  • 1 teaspoon grated lemon zest
  • 1/3 cup vegetable shortening
  • 3/4 cup granulated sugar
  • 2/3 cup light brown sugar, lightly packed
  • 2 large eggs
  • 1 medium sized Granny Smith apple, peeled and diced, about 1 cup
  • 1 teaspoon vanilla extract
  • 1 cup applesauce
Preheat oven to 350 degrees F. utter a 9" fluted tube pan, dust it lightly with flour and invert over the kitchen sink to tap out excess flour.

Sift together flour, baking soda, salt and spices in a triple sifter. Stir in chopped pecans, if using. Set aside.

Place the butter and shortening and lemon zest in large bowl of an electric mixer fitted with the beaters or paddle attachment. Beat over medium-high speed until creamy and smooth, about 2 minute. 

Add the granulated sugar, 1 tablespoon at a time, taking 3 to 4 minutes to blend it in well. Add the light brown sugar over an additional 3 to 4 minutes. Scrape the sides of the bowl occasionally.

Add the eggs, one at a time until well blended. Reduce speed to medium-low. Add the fresh apple and the vanilla. 

Reduce mixer speed to low. Add the flour/nut mixture alternately in three additions with the applesauce in two additions, starting and ending with the flour. Beat just until incorporated after each addition. Scrape the sides of the bowl occasionally.

Spoon the batter into the prepared pan and smooth the top. Center the pan on the rack and bake in the preheated oven for 35 to 40 minutes or until the cake begins to leave the sides of the pan and a toothpick inserted into the center comes out clean.
Remove from oven. Place the pan on a cake rack to set for 10 to 15 minutes, then invert the cake onto the rack and remove pan. While the cake is still warm you may want to pour Brown Sugar Glaze over the top, letting it drip naturally down the sides. Garnish the top with chopped pecans if you wish.


Brown Sugar Glaze
  • 3 Tablespoons butter
  • 3 Tablespoons brown sugar, packed
  • 3 Tablespoons heavy cream
  • 3/4 cup sifted powdered sugar
  • 1/2 teaspoon vanilla
In a small saucepan, melt the butter with the brown sugar over low heat. Then stir in the heavy cream and cook slowly until the mixture comes to a gentle boil. Simmer for 1-2 minutes.

Take the pan off the heat and gradually add the powdered sugar in three additions, whisking until smooth. Add in the vanilla and whisk to combine. 

If the icing is too thick, add another tablespoon of the cream. You want it thin enough to pour but not runny. It sets quickly so get it on the cake as quickly as possible.

My little barefoot donkey on Halloween :-)

Wednesday, October 2, 2013

Fall, I Welcome You


A few months ago I was asked by Pillsbury® if I'd like to sample and review their new Spring/Summer flavors of Orange Creamsicle, Key Lime and Funfetti products. I wrote about them here and here, if you're interested. Well today, I'm enthusiastically sharing with you Pillsbury's new Fall line of Caramel Apple and Pumpkin cake and cookie mixes...and they are quite tasty! 

Vintage bakeware is the best!
Living in central Texas means that it feels like Summer for at least 8 months out of the year. It will more than likely be around 80 degrees until November and while it may not look or feel like Autumn outside, Fall is happening in my kitchen. When the season arrives, I like to start baking with apples and spices then I later progress to one of my favorite flavors, pumpkin!


My friend Ingrid from 3B's has made a cake with yellow cake mix called Cinnamon Roll Cake. This is a twist on that recipe using Pillsbury's Caramel Apple Premium Cake mix and frosting. I upped the apple flavor by adding cinnamon applesauce in place of some of the oil and used the caramel apple frosting to make the glaze. If Ingrid's cake tastes like a cinnamon roll, this tastes like a cinnamon apple fritter. The cake itself was very moist and apple-y (is that a word?) with a slightly crunchy caramelly sugar topping. The glaze is completely unnecessary, but it's so tasty you won't want to skip it. 

To learn more about these products, visit Pillsbury on Facebook, PillsburyBaking.com and Pillsbury on Pinterest

Thank you Pillsbury® for all these great new products and for having me be a Pillsbury blog Ambassador :-)


Caramel Apple Fritter Cake from Lick The Bowl Good 
loosely adapted from 3B's and Jolts &Jollies


Cake: 
  • 1- 15.25 oz. box Pillsbury Caramel Apple Premium Cake Mix
  • 4 large eggs
  • 1/2 cup oil
  • 1/3 cup sour cream
  • 3/4 cup cinnamon applesauce

Topping: 
  • 1 cup light brown sugar
  • 1 Tablespoon ground cinnamon

Glaze: 
  • 1/2 cup Pillsbury Creamy Supreme Caramel Apple Frosting
  • 2 Tablespoons milk
  • 1/2 teaspoon vanilla extract

Preheat oven to 325 degrees F. Spray a 9x13-inch OR two 8x8-inch pans with non-stick baking spray with flour and set aside. 

In a large bowl combine the ingredients for the cake and mix until well blended. Pour the batter into the prepared pan and set aside. 

In a small bowl, mix the brown sugar and cinnamon together and sprinkle evenly over the batter. Using a butter knife swirl the brown sugar mixture gently into the batter. 

Bake for 35-40 minutes or until a toothpick inserted into the center comes out clean. 

Once the cake is fully baked, place on a cooling rack and make the glaze. 

In a small bowl, whisk the frosting, milk and vanilla together until thin, free of lumps and is drizzle consistency. Using a spoon, drizzle the glaze over the cake and allow the cake to cool for at least 20 minutes before serving. 

I was provided with product samples and compensation by Pillsbury, though the opinions I express here are my own. 

©/® The J.M. Smucker Company. Pillsbury is a trademark of The Pillsbury Company, LLC, used under license. 

Wednesday, March 6, 2013

Musselman's #AppleSauceInstead and A Giveaway!

It's March! How are those New Year resolutions working for ya? I confessed a couple months ago that I don't make resolutions because I'm bound to break them, however I still care about my health and what I eat. I gained weight while pregnant then dropped 35 pounds after Hayden was born. Slowly, that weight has been creeping back on and it's frustrating.  I'm not a runner and I don't have a gym membership and I was not blessed with a teenage boys' metabolism, however I can still make smart decisions about the way I snack and that's where Musselman's applesauce comes in. 


I was sent 3 varieties of Musselman's applesauce (Original, Natural and Cinnamon) as part of their #ApplesauceInstead campaign. All you have to do is swap a snack for a cup of Musselman's applesauce- that's it! I'm not a big snacker but I do eat chips with sandwiches for lunch and I like my dessert. I'm trying to be healthier about my decisions and reach for applesauce instead. Mr. H has been packing it in his lunch and Hayden loves it too! The Natural applesauce only has 50 calories 4 oz. and the Original and Cinnamon (my favorite!) only has 90. It's naturally fat and cholesterol free and is very low in sodium. 


Along with my applesauce, I also received a Musselman's branded yoga ball. That thing is so fun! I have to be honest though and tell you I fell off several times and laughed along the way but you just gotta get back up and try again, right? Hayden likes to bounce on it too. So as the year progresses, rather than obsess about my weight I'll just think twice about grabbing the Cheetos or the Oreos and choose #AppleSauceInstead. 

Would you like to win a Musselman's prize pack? One winner will be chosen at random and will receive 3 varieties of applesauce along with a yoga ball. 

All you have to do is leave me a comment and tell me what you'll replace with Musselman's applesauce. One winner will be chosen at the end of the week. 


Visit Musselman's on Facebook for more info about healthy snacking.

Monday, September 10, 2012

Hayden's 1st Birthday Cupcakes

Hayden celebrated his 1st birthday last Saturday, September 1st. We went up to Mount Bonnell for an evening picnic and to watch the sunset over Lake Austin. We didn't have a birthday party for him until a week later, but I did make him a batch of kid friendly cupcakes. You can't have a birthday and not have a cupcake, right? For that matter, you can't have a birthday and not lick the beater either! 

I debated between pumpkin, banana, carrot or apple his cupcakes. Mr. H doesn't love the first two so that left carrot cupcakes or apple cupcakes, except Hayden is kind of funny about textures in his food so I wasn't sure he'd like shredded carrots in his cake. And I was out of apple sauce. Enter his baby food- Plum Organics carrot and apple puree. It's delicious and worked perfectly in this recipe. You could use all carrot or apple if you prefer, but this is what I had on hand and it was a success. You could taste both fruits, but overall it was just like a moist and moderately sweet spice cake topped with a brown sugar and spice cream cheese frosting. It doesn't get much better than that! 


Carrot and Apple Spice Cupcakes from Monica h

Printer Friendly Version
  • 1/4 cup (4 Tbsp) unsalted butter, room temperature
  • 1/2 cup granulated sugar
  • 1/4 cup packed light brown sugar
  • 1 teaspoon ground cinnamon
  • 1/2 teaspoon freshly grated nutmeg
  • 2 large eggs
  • 2 Tbsp. pure maple syrup
  • 1/2 teaspoon vanilla extract
  • 1 cup all-purpose flour
  • 1/2 teaspoon baking soda
  • 1/4 teaspoon salt
  • 3/4 cup carrot and apple puree (Plum Organics Baby Food)
Preheat oven to 350 degrees F. Line a cupcake tin with paper liners and set aside. 

In a large bowl, cream butter and sugars til fluffy and pale in color. Add the cinnamon and nutmeg and mix until the spices are fully incorporated. 

Add the eggs, one at a time, until well blended then add the maple syrup and vanilla and mix. 

Gently add the flour, baking soda and salt. Stir until just combined but avoid overmixing the batter. Scrape down the sides of the bowl with a rubber spatula then add the pureed carrot and apple mixture. Stir until combined. 

Divide batter into 12 cupcake liners, filling each about 3/4 full. 
Bake for 18-20 minutes or until a toothpick inserted into the center comes out clean. Allow cupcakes to cool slightly before removing to a wire rack to cool completely before frosting with Brown-Sugar and Spice Cream Cheese Frosting. 

Brown Sugar and Spice Cream Cheese Frosting
  • 1/4 cup (4 Tbsp) unsalted butter, room temperature
  • 6 oz. cream cheese, room temperature
  • 1/2 cup packed light brown sugar
  • 1/2 teaspoon ground cinnamon
  • 1/4 teaspoon freshly grated nutmeg
In a medium bowl, beat cream cheese and butter until creamy and smooth. Add the brown sugar and spices and beat on medium-high speed until fluffy. Use immediately. 

Makes 12 cupcakes. 

Our attempt at a family photo :-) Happy Birthday Hayden!

Sunday, November 13, 2011

Apple Or Cherry Pie? How 'Bout Both!

This is one easy peasy dessert. It literally comes together in minutes and bakes up in about half an hour. Pie in half an hour-that's awesome!

This recipe comes from a Pampered Chef cookbook titled, All The Best. My friend Maranda is now a Pampered Chef consultant and I snagged this recipe from her while at one of her cooking shows. It really is simple to throw together since all you basically do is layer ingredients then toss it in the oven. The hardest part is peeling and slicing apples but that really isn't difficult.

I liked this tart because it combines apple pie that my husband likes and cherry pie that I like. The two fruits come together and are topped with cinnamony crumbs- it's like three desserts in one! It really would have been great served with ice cream but I didn't have any. The only down side to this dessert is that the crust got soggy on the second day. So if you make it (and I highly recommend that you do) make sure you have enough mouths to feed and eat it while it's fresh!

Cherry Apple Crumb Tart adapted from Pampered Chef

Printer Friendly Version
  • 1 refrigerated pie crust
  • 2/3 cup all-purpose flour
  • 1/2 cup packed brown sugar
  • 1/2 teaspoon ground cinnamon
  • 1/3 cup butter
  • 2 large Granny Smith apples
  • 3/4 cup canned cherry pie filling (about 1/2 of a 21 oz. can)

Preheat oven to 400 degrees F. Let pie crust stand at room temperature 15 minutes.

In a medium bowl, combine the flour, brown sugar and cinnamon. Add butter and blend thoroughly using a pastry blender or two forks. Mixture will come together and form crumbs when squeezed in your hand. Set aside.

Roll out pie crust into a 13-inch circle and place on a baking stone or a cookie sheet lined with parchment paper.

Peel, core and cut apples into thin slices. Layer apples evenly over crust leaving a 1-inch border of crust.

Spread 3/4 cup cherry pie filling over the apples. Sprinkle flour mixture over apples and pie filling. Fold the outer edge of the pie crust up over the fruit to form a rim.

Bake 30-35 minutes or until crust is golden brown. Remove from oven and cool slightly. Serve warm.

I have a couple more Thanksgiving dessert recipes to share with you and I'm on a mission to get them blogged before Turkey day, so I'll see you back here in a few!

Thursday, October 20, 2011

Fall= Apples, Spices and L.L. Bean Catalogs

I love baking with apples and spices this time of year. And this cake incorporates chunky apples, cinnamon, cloves, ginger and nutmeg. It just makes me all warm and fuzzy inside thinking about them. Makes me think of crisp cooler days, the changing colors of leaves and mugs of warm spicy beverages. Fall is my favorite season, simply because the scenery is so beautiful. I dream of moving to the east coast and living in a scene out of LL Bean. Ahhh, yes! Anyone out there share the same dream?

Every year when the Fall and Winter LL Bean catalogs come out (Lands End too!) my friend and I head to the book store with a stack of catalogs, pens and pads of paper in hand to make our wish lists. My wish list is mostly comprised of mens stuff since I don't shop for myself much, which is fine since we both mentally shop for our husbands anyway. Sipping our pumpkin spice lattes, we go through page by page, ooh and ahh, and comment about our favorite colors and what we think our spouses would look good in. Only my husband gets to the catalog first and highlights and circles what he wants long before I ever get my hands on it, so that makes it easy for me. It's fun and it's cheap entertainment!

But part of the appeal for us both is the idealistic setting in Maine. Living in Texas, we don't get the changing of seasons. It still looks and feels like summer only it's in the 80's and 90's rather than 110 degrees! Texas will never look like Fall in the LL Bean catalogs, but that's okay because it gives me something to look forward to with my friend. And having a slice of this cake brought me a little closer to that feeling as well. I accidentally chunked my apples too large, but in the end it turned out fine, albeit rustic looking. This cake was a nice blend of spices and stayed moist in the fridge for several days, although it was best at room temperature. The maple in the frosting was a nice but subtle compliment to the cream cheese and the nuts (I choose pecans over walnuts every time!) added a nice crunch. If you're needing a little bit of Autumn in your life, give this cake a try. While I really liked this cake, the apple cake with brown sugar glaze is still my favorite.

To see other cakes baked by the Cake Slice Bakers, click here.

Apple Cake with Maple Frosting adapted from The Cake Book

  • 1 1/2 cups all-purpose flour
  • 1 teaspoon baking powder
  • 1 teaspoon ground cinnamon
  • 1/4 teaspoon ground cloves
  • 1/4 teaspoon ground ginger
  • 1/4 teaspoon baking soda
  • 1/4 teaspoon salt
  • 1/2 cup unsalted butter, softened
  • 1 cup firmly packed light brown sugar
  • 1 teaspoon vanilla extract
  • 2 large eggs
  • 2/3 cup buttermilk
  • 2 cups Granny Smith apples, peeled and chopped into 1/3-inch pieces
  • 1/2 cup coarsely chopped walnuts or pecans

Position a rack in the center of the oven and preheat the oven to 350 degrees F. Grease the bottom and sides of a 9-inch square baking pan. Dust the pan with flour, or spray with nonstick baking spray with flour. (I sprayed my pan, lined it with parchment, then sprayed the paper once again).

In a medium bowl, whisk together the flour, baking powder, cinnamon, cloves, ginger, baking soda, and salt; set aside.

In the bowl of an electric mixer, using the paddle attachment (I used a hand mixer) beat the butter at medium speed until creamy, about 1 minute. Gradually add the sugar and beat at medium-high speed until well blended and light, about 2 minutes.

Add the vanilla extract, then add the eggs one at a time, beating well after each addition and scraping down the sides of the bowl with a rubber spatula as needed. Reduce the speed to low and add the flour mixture in three additions, alternating it with the buttermilk in two additions and mixing just until blended (flour, buttermilk, flour, buttermilk, flour). Stir in the chopped apples and nuts by hand with rubber scraper.

Scrape the batter into the prepared pan and smooth the top. Bake the cake for 25-30 minutes, until it is golden and toothpick inserted into the center of the cake comes out clean. Cool the cake completely in the pan on a wire rack.

Frost the top of the cooled cake with maple frosting (recipe follows). Cut the cake into squares and serve it directly from the pan.

Store in the refrigerator, loosely covered, for up to 3 days. Bring cake up to room temperature before serving.

Maple Spice Cream Cheese Frosting

  • 8 ounces cream cheese, softened
  • 3 Tbsp. unsalted butter, softened
  • 1/2 teaspoon vanilla extract
  • 1/8 teaspoon maple flavoring or 1 Tbsp. real maple syrup
  • 1/8 teaspoon ground cinnamon
  • 1/8 teaspoon ground ginger
  • Pinch of freshly ground ginger
  • Pinch of salt
  • 1 cup powdered sugar, sifted

In a bowl of an electric mixer, using the paddle attachment, beat together the cream cheese and butter at medium speed until smooth.

beat in the vanilla, maple, spices and salt. Reduce the speed to low, add the powdered sugar and beat until well blended. Raise the speed to high and beat until light and creamy, about 2 minutes.

Happy Dreaming!

Saturday, August 27, 2011

The Easiest Apple Pie Ever and A Visit From The Fairy Hobmother


A few weeks ago I was on Lisa's blog, The Cutting Edge of Ordinary. It's a blog that I frequent but don't always comment on, but I enjoy her recipes and photography and it doesn't hurt she's got a cute little doggie named Moose- you know I have a soft spot for four-legged furry friends. Anyway, earlier in the month she was visited by the Fairy Hobmother. Ever heard of the Fairy Hobmother? I hadn't either until I stopped by her blog. The Fairy Hobmother grants wishes from ordinary hardworking people like you and me, and today is your chance to get a wish granted as well!

When it was my turn to make a wish, I selfishly wished for a healthy baby. Obviously I know that's something that can't be granted by the FH, so I asked that my wish be given to someone else. Just a couple days later, the Fairy Hobmother sent me an email and said that even if she couldn't make my wish come true, she was crossing her fingers for us. And that she still wanted to send me an Amazon gift certificate for me to spend on Baby Boy H, once he made his arrival. I really was taken aback by her generosity and graciously accepted her offer because I wanted to be able to do the same for one of you.

If you'd like a wish granted by The Fairy Hobmother, all you have to do is leave a comment on this post and make a wish. But please be reasonable, the FH is not Oprah and she will not be giving everyone in the audience a new car! She granted Lisa a new dutch oven because hers burned up and fellow friend and blogger, Girlichef, was granted a food processor after the motor went out on hers. Have you been wanting a new cookbook and didn't get it for your birthday? Or maybe you've had your eye on a new piece of cookware but can't justify the cost? Maybe you want new shelving for the family room to display your family photos and treasures on? Or perhaps you'd like to purchase a gift for someone else, but don't have the funds. Obviously your wish doesn't have to be kitchen related, just make a wish and see what happens. I will not be the one to choose the winner/winners. The Fairy Hobmother will read through the comments, select the winners and contact you via email if you win so be sure to leave your contact info, close your eyes and make a wish.

Now onto a quick blurb about this rustic apple pie. It's delicious. It's very simple. There are very few ingredients and don't need to own a pie plate to make it. There is something a little quirky about it though, as it calls for corn flakes in the filling along with the apples and cinnamon sugar. The cereal acts as a thickener and keeps the crust from getting soggy. I used premade refrigerated pie crusts but if you want to make your own, go right ahead. The whole idea is that you keep it simple and fuss free so you can hurry up and get to the pie- a la mode if you prefer. I liked it because I didn't even need a plate or fork to eat it. I just cut off a piece and ate it like a hand pie. I found it stayed fresh for a couple days, then on day three the crust got a little too soft for me. I chose to sprinkle mine with a little raw sugar before baking but you could easily add a maple glaze to it like Lisa did, if that floats your boat. If you have an apple pie lover like I do, then this is a MUST make!

Rustic Apple Pie adapted from The Cutting Edge Of Ordinary

Printer Friendly Version
Crust:
  • 1 double pie crust (homemade or store bought)
  • 1 teaspoon flour
Filling:
  • 1 1/2 cups corn flakes (don’t crush them!)
  • 6 cups thinly sliced Granny Smith apples, about 5 medium
  • 3/4 cup granulated sugar
  • 1 teaspoon cinnamon
Topping:
  • 1 egg, beaten
  • 1 tablespoon coarse sugar (I used Sugar In The Raw)
Heat the oven to 350.
Place one pie crust on a work surface and sprinkle with half a teaspoon of flour. Now rub the flour all over to coat the crust. Place the crust flour side down on an ungreased cookie sheet lined with parchment.
Sprinkle the corn flakes over the crust to within half an inch of the edge. Mound apple slices over cereal.
Combine the sugar & cinnamon in a bowl and then sprinkle over the apples. Brush the edge of the crust with the beaten egg.
Now take the other half of the crust and just slightly push the edges out with your fingers- you want it to be just about a half-inch bigger than the bottom crust.
Place the pie crust over the top of the crust on the cookie sheet. Fold the edge of the bottom crust over the top crust, pinch the edge to seal and flute.
Cut several slits into the top of the pie. Brush the pie with remaining beaten egg, then sprinkle the coarse sugar evenly over the crust.
Bake 45 to 55 minutes, or until crust is golden brown and apples are tender. Serve warm or at room temperature.
Happy pie eating and thank you Fairy Hobmother for making our wishes come true!

Friday, February 25, 2011

It's About Taste Not Looks

I made this awhile back when I first got my new camera in October. I didn't really know what I was doing with the camera so I just turned it on, adjusted a couple settings and started shooting. For the most part, the pictures turned out okay, but you could tell I was still practicing :-). The white balance on them is a little off and some of them were way blurry, but it was really good and that's what really matters, right? It's about how it tastes, not how it looks.

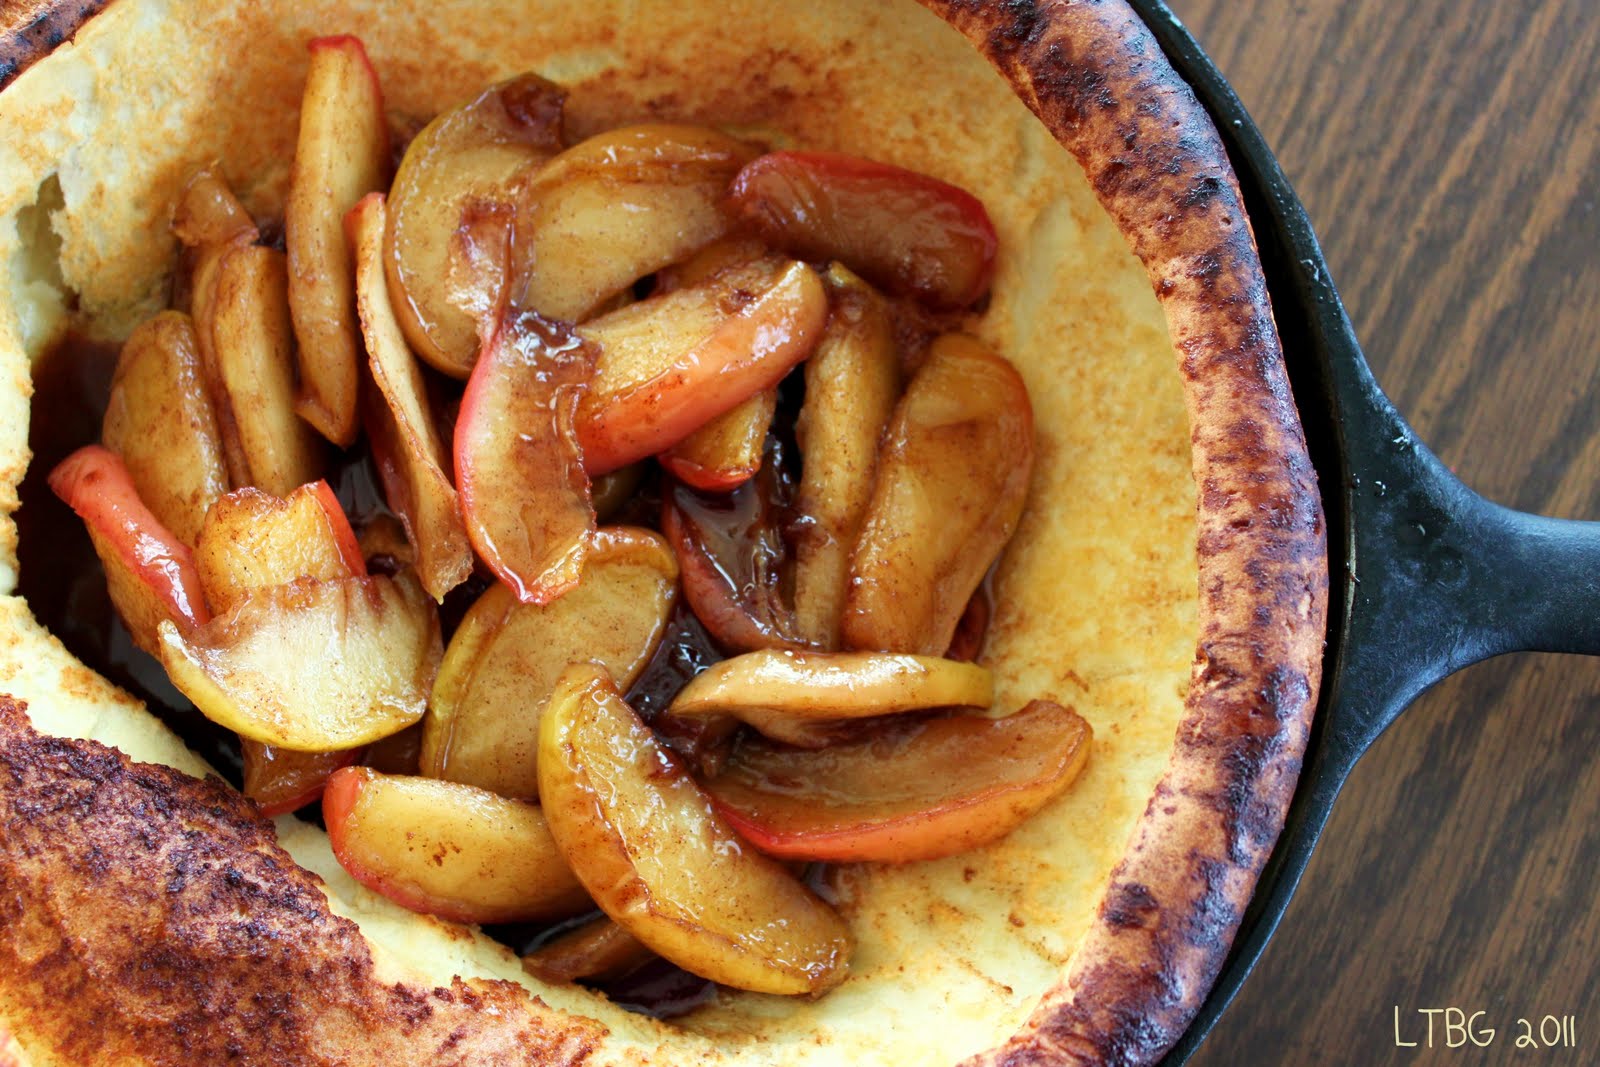
I had my first Dutch Baby Pancake at The Original Pancake House with my mom back in July for her birthday. I liked it, but it was different than anything I've ever had- it's a little custardy, and light, and served with lemon. That seemed strange to me, but it works. I wasn't sure my husband would really be fond of this, but if I served it caramelized, cinnamon-y apples??? Oh yes, he'd be delighted to eat it. And he was!

You can make this puffed apple pancake one of two ways. You can bake the fruit into the batter, or you can serve the fruit in the well of the pancake after it's cooked. I think any cooked stone fruit, apples or pears would be good with this, as well as fresh berries or bananas. We really liked this one and it was fairly simple to make. The only thing I would change next time would be to make more apples for topping. They were delicious! Hope you'll give it a try this weekend.

Puffed Apple Pancake adapted from Dinner With Julie

Printer Friendly Version

  • 2 apples or pears
  • 1-2 Tbsp. canola oil
  • 1-2 Tbsp. butter
  • 1-2 Tbsp. sugar
  • Pinch cinnamon
  • 3 large eggs
  • 3/4 cup all-purpose flour
  • 3/4 cup milk
  • Powdered sugar and lemon slices, for serving

Preheat the oven to 450°F.

Peel (if you want), core and slice the apples. In a large skillet (if you have an ovenproof one, use it), saute the apples in the oil and butter over medium heat for a minute or two. Sprinkle them with the sugar and cinnamon and cook until they start to turn golden and begin to soften. Remove the apples from the heat.

Whisk together the eggs, flour, and milk. Don’t worry about getting all the lumps out. Now you can proceed one of two ways: 1) Pour the batter over the apples in the skillet and put it in the oven. (If you don’t have an ovenproof skillet, pour the sauteed apples into a deep dish pie plate and pour the batter over them.) The apples will bake straight into the pancake, but it won’t rise quite as high with the fruit inside; or 2) Remove the apples and set them aside to serve on top, then pour the batter into the hot pan. This way the pancake will rise even higher and look more dramatic.

Bake for 20-25 minutes, until the pancake is puffed and golden. Cut it into wedges and serve warm with the fruit and a sprinkling of powdered sugar.

Serves 4.

Puffed Berry Pancake: Omit the apples altogether. Drizzle the ovenproof skillet with a little oil, and pop it in the oven for a few minutes to heat up. Pour the batter into the hot skillet and bake as directed. Fill the puffed pancake with fresh berries or other sliced fruit, and serve with syrup or vanilla yogurt for breakfast or for dessert with vanilla ice cream or whipped cream.

Related Posts with Thumbnails