Showing posts with label Sour Cream. Show all posts

Monday, December 3, 2012

Latte Cheesecake and Wacky Weather


Happy December! I always wondered what Christmastime in a tropical climate was like. Wondered if people decorated their palm trees with C-9 bulbs and tinsel garland while wearing flip flops and tank tops, stopping to take a break to beat the heat with an icy beverage. Then I realized that 2012 would be the year that I got to experience that, only I'm still in Texas! This weather is so strange. It was 80 degrees today and does not feel the least bit like winter. I had lunch with a friend today (hi L!) and went to pick up Hayden at my mom's house, only to find him wearing nothing but a diaper helping Grandma stick candy canes in the ground. It was a sweet image, but nekkid babies playing outside in December??? It's unreal!

Needless to say, I have yet to start  my holiday baking. There has not been a single cookie to grace my Silpat lined sheets but I will get there. In the meantime, I hope you'll enjoy this recipe for Brownie Latte Cheesecake.  I made it last month as part of the Cake Slice Bakers and it was delicious.  Cheesecake is holiday-ish, right? It probably won't be a part of any cookie trays this year but sometimes you need a nice centerpiece dessert and this is it. 


Instead of a typical cookie crumb crust, this cheesecake has a thick, dense, fudgy, chocolate rich base. In contrast, the filling is ultra creamy and light in texture. The flavors of chocolate, espresso, vanilla, and Kahlua compliment each other so well. This is definitely one for sharing and a little sliver goes a long way but that's what makes it ideal for holiday gatherings and celebrations, that and it can be made a couple days in advance. I'll get my act together, paint the windows with a can of fake snow and flip the switch on my fireplace to get me in the butter baking mood. If y'all have any great holiday cookie recipes for me, please share!

Brownie Latte Cheesecake adapted from The Cake Book


For The Brownie Layer: 
  • 4 oz. semisweet chocolate, coarsely chopped
  • 1/2 cup (1 stick) unsalted butter, cut into tablespoons
  • 1 Tablespoon instant espresso powder
  • 1 teaspoon vanilla extract
  • 1/4 teaspoon salt
  • 1 cup granulated sugar
  • 2 large eggs
  • 1/2 cup all-purpose flour
For The Latte Filling: 
  • 1 1/2 pounds (24 oz.) cream cheese, softened
  • 1 1/2 cups granulated sugar
  • 1 Tablespoon vanilla extract
  • 2 teaspoons espresso powder, dissolved in 1 Tablespoon hot water
  • 2 Tablespoons Kahlua
  • 1/8 teaspoon salt
  • 1/2 cup sour cream 
  • 1 Tablespoon cornstarch
  • 4 large eggs
To make The Brownie Layer: Position a rack in the center of the oven and preheat the oven to 325 degrees F. Lightly grease the bottom and sides of a 9x3-inch springform pan. Cut an 18-inch square of heavy duty aluminum foil and wrap around the outside of the pan. 

In the top of a double boiler, melt the chocolate with the butter over barely simmering water, stirring occasionally. Transfer the mixture to a medium bowl and stir in the espresso powder, vanilla extract and salt. Whisk in the sugar until combined. Whisk in the eggs one at a time, until blended. Stir in the flour until no traces remain. 

Scrape the batter into the prepared pan and smooth it into an even layer. Bake the brownie for 25-30 minutes, until a toothpick inserted into the center comes out with a few moist crumbs attached to it. Place the pan on a wire rack and let cool while you make the filling. Leave the oven on. 

To Make The Latte Filling: In the bowl of an electric mixer, using the paddle attachment, beat the cream cheese at medium-low speed until creamy and smooth, about 2 minutes. Gradually add the sugar and beat until blended. Add the vanilla extract, espresso mixture, Kahlua, salt, sour cream and cornstarch and mix until well blended. At low speed, add the eggs one at a time, mixing well after each addition and scraping down the sides of the bowl with a rubber spatula as needed. 

Scrape the batter onto the brownie layer and smooth the top. Place the springform pan in a roasting pan or a large baking pan. Pour enough hot water into the roasting pan to come about 1 inch up the sides of the springform pan. Bake the cake in the water bath for 70-80 minutes, until the center is set but slightly wobbly (the cheesecake will continue to set up as it cools). Turn the heat off and crack the door, allowing the cake to cool in the oven for about 30 minutes. Remove the cake from the water bath and place on a rack and cool to room temperature. 

Refrigerate the cheesecake for at least 4 hours or overnight before serving. 


Sleeping Beauty

Saturday, January 7, 2012

Chocolate and Gingerbread- They Just Go Together

Happy New Year! I know we're already one week into the new year, but this is my first post in 2012 and it's a good one. Usually on New Year's Eve, we are at home, watching the ball drop, drinking sparkling apple cider and sharing a kiss or two...with family. Party animals we are not! We don't like crowds and we don't drink much so we opt to stay home- it's cheaper and safer that way. This year was a little different though. My mom suggested we have a small get together at our house and it sounded like a good idea since we spent Thanksgiving at my in-laws and aunt's houses and my mom's for Christmas dinner.

Hayden and Mr. H posing next to one of the Christmas decorations. He looks so darn cute in those overalls!

It was a simple gathering and everyone brought a dish or two including the traditional black eyed peas, 7-layer dip, pork tenderloin sliders, crudite and dip, chocolate fondue and this chocolate gingerbread. It was a feast and no one went hungry. Ever had chocolate gingerbread? Ever heard of it? I hadn't. A couple weeks ago I was craving gingerbread, which is a rarity, because I tend to not like the stuff. In fact, the only gingerbread I've ever really liked is the one from Souper Salads and it comes from a mix (sad but true). I even went as far as buying ground ginger and molasses then the neighbor came over with a loaf as a Christmas gift so I didn't make any. It was good but I kept thinking it was missing something. That something was chocolate! I consulted Mr. Google and came across a few good looking cakes and they all pointed back to this recipe from Martha.

Autumn, Mr. H and Hayden- Hayden is wearing his daddy's Christmas outfit from 31 years ago. It was a little long, but it fit!

It is a simple recipe and it came together rather quickly. It baked up while Hayden and I showered together and when we got out, the house smelled divine. It doesn't look like much, mostly because it's brown on brown, but it was delicious. The cocoa adds a nice dimension to it, almost like a spiced chocolate cake but not as rich and decadent, afterall it's still bread. It's moist and tender, spicy and warm from the molasses, cinnamon, ginger and pumpkin pie spice and the chocolate chips add a bit of sweetness. I will definitely make this again. And if you like gingerbread and want something different, give this one a try. Heck, if you don't like gingerbread, try adding chocolate and see what happens. You might just change your mind.

Chocolate Gingerbread adapted from Martha Stewart

Printer Friendly Version

  • 4 tablespoons (1/2 stick) unsalted butter, melted
  • 1/4 cup unsweetened cocoa powder
  • 3/4 cup all-purpose flour
  • 1 teaspoon ground ginger
  • 1 teaspoon pumpkin-pie spice
  • 1/2 teaspoon ground cinnamon
  • 1/2 teaspoon baking soda
  • 1/2 cup packed brown sugar (light or dark)
  • 1/4 cup unsulfured molasses
  • 1 large egg
  • 1/4 cup sour cream
  • 1/2 cup semisweet chocolate chips

Preheat oven to 350 degrees. Butter an 8-inch square baking dish or spray with non-stick spray and set aside.

In a medium bowl, whisk together cocoa, flour, ginger, pumpkin-pie spice, cinnamon and baking soda and set aside.

In a large bowl, whisk together butter, brown sugar, molasses, egg, and sour cream until smooth. Add flour mixture and stir just until moistened, being careful not to overmix. Stir in chocolate chips. Transfer batter to prepared pan and smooth top.

Bake until a toothpick inserted in center comes out clean, 30 to 35 minutes. Transfer pan to a wire rack and let cool completely. Once cooled, cut into 16 squares and serve from directly from dish.

Yum!

Tuesday, September 20, 2011

No Clever Title, Just Good Cake

I made a cake today! No, it wasn't this one. I made this cake three weeks ago before Hayden was born. I was pretty exhausted and didn't think I'd have time to make it, but my mom offered to help so we did this together. I'm pretty sure she was only interested because it was full of booze! haha! Either way, I appreciated her help because she cleaned up after me and took over when I had to sit and take breaks, which was often. It's amazing how much energy a baby can suck out of you! :-) Thank you Momma for helping me complete this month's Cake Slice cake!

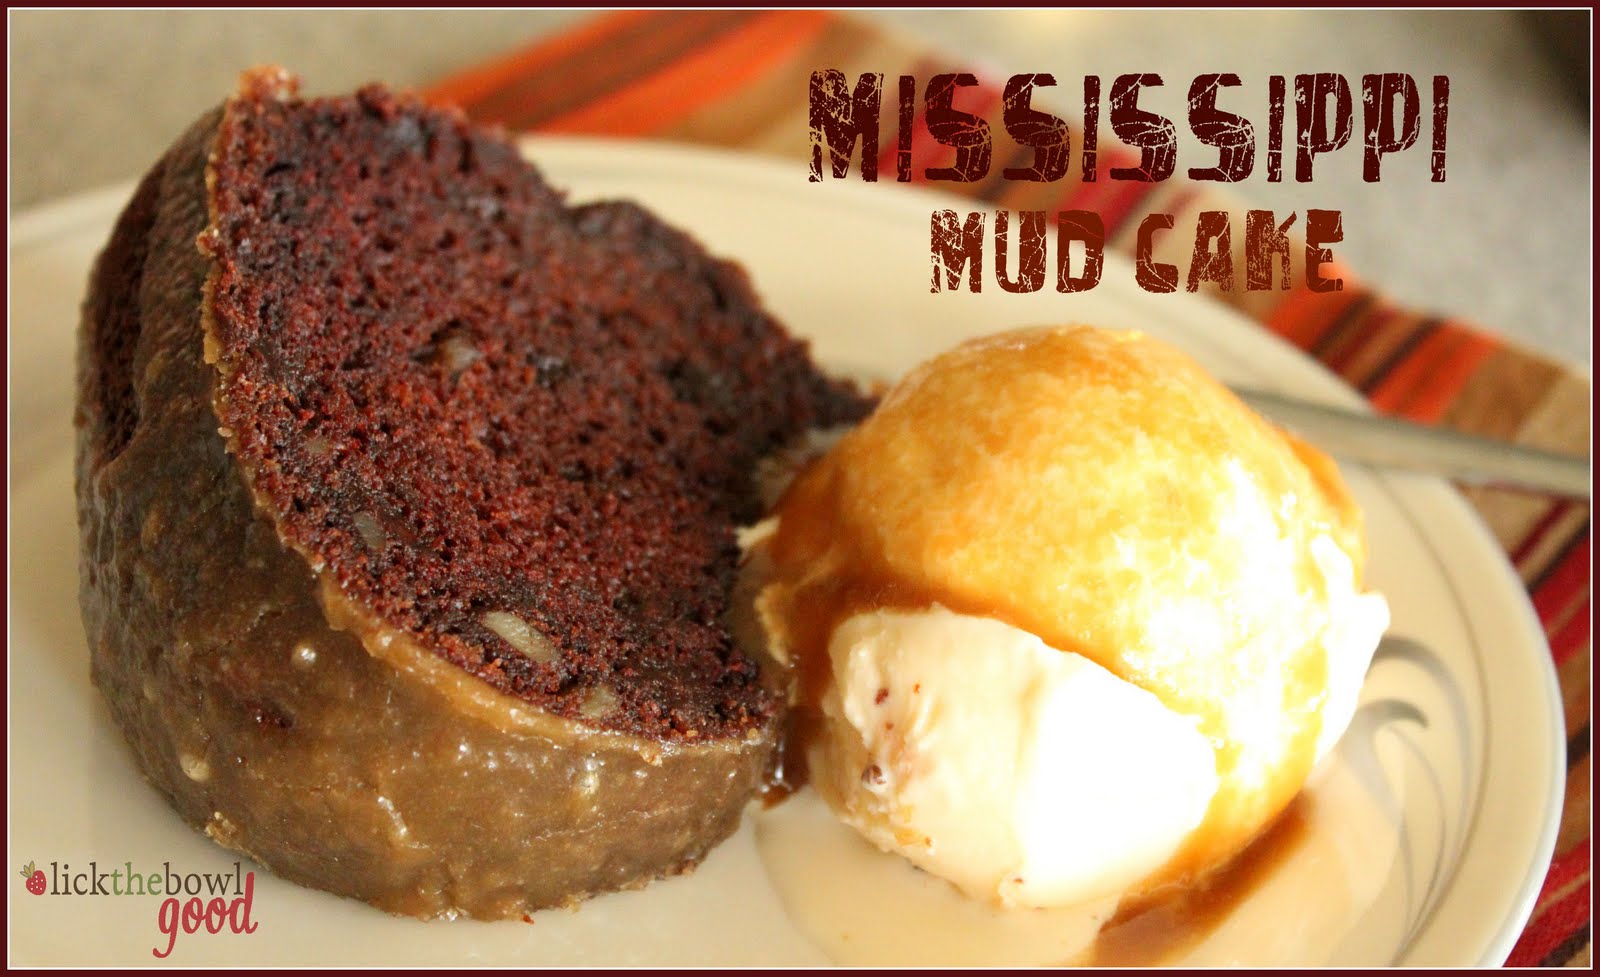
This is the last month we are baking from Cake Keeper Cakes by Lauren Chattman so rather than everyone making the same cake, we all got to choose which one we wanted to bake. It was tough narrowing down the list because there were many I was drooling over. But in the end I settled on Mississippi Mud Cake with a Bourbon Espresso Glaze. Despite it being one of the only cakes Mr. H wanted, it was loaded with flavor and full of chocolate, espresso, and booze. It really was a no-brainer.

Before I set off to make this, I remembered that my dear friend Debby from A Feast For The Eyes also made this cake. So I went back to read her post and she mentioned that while it was good it could have been more moist so I made a subtle change and added some sour cream to the batter. It was the perfect addition to this cake. It was dense, the espresso was obvious but not too strong- really it just intensified the chocolate flavor and the Bourbon shone through in the cake and in the glaze, but it wasn't overpowering. It was the perfect trifecta- like a kicked up after dinner coffee drink. Debby suggested pouring some of that glaze over some ice cream and that's just what I did. Great idea.

Mississippi Mud Cake with Espresso Bourbon Glaze adapted from Cake keeper Cakes

Printer Friendly Version

Cake:

  • 2 cups unbleached all-purpose flour
  • 2 teaspoons baking soda
  • 2 teaspoons instant espresso powder
  • 1/2 teaspoon salt
  • 1 cup unsalted butter, cut into pieces
  • 6 ounces unsweetened chocolate, finely chopped
  • 1/2 cup brewed espresso
  • 1 1/2 cups granulated sugar
  • 1/2 cup bourbon
  • 4 large eggs
  • 1 cup sour cream
  • 1 teaspoon vanilla extract
  • 3/4 cup mini chocolate chips
  • 3/4 cup chopped pecans or walnuts

Glaze:

  • 6 Tablespoons unsalted butter, cut into pieces
  • 6 Tablespoons packed light brown sugar
  • 2 teaspoons instant espresso powder
  • 6 Tablespoons heavy cream
  • 1 1/2 cups powdered sugar
  • 2 Tablespoons bourbon

For The Cake: Preheat oven to 350 degrees. Grease a 12-cup Bundt and dust with flour. Combine the flour, baking soda, espresso powder, and salt in a medium mixing bowl.

Combine the butter, chocolate, and espresso in a medium saucepan. Heat over medium, stirring until the butter and chocolate are melted. Remove from the heat and stir in the granulated sugar and bourbon.

Place the eggs, sour cream and vanilla in a large mixing bowl and beat with an electric mixer on low to break up the eggs. Beat in the chocolate mixture. Add the flour mixture and stir until just combined. Stir in the chocolate chips and pecans (if using).

Scrape the batter into the prepared pan and smooth the top with a spatula. Bake until a toothpick inserted into the center of the cake comes out clean, about 45 minutes. Let the cake cool in the pan for 5 minutes and then invert it onto a wire rack to cool completely.

For The Glaze: Stir the butter, brown sugar, and espresso powder together in a small saucepan over medium heat until the butter is melted. Whisk in the cream and bring to a simmer. Cook for 1 minute, remove from the heat, and whisk in the powdered sugar until smooth. Mix in the bourbon. Let cool for 10 minutes.

Place the cake, still on the wire rack, over a baking sheet (or parchment paper). Slowly drizzle the glaze over the cake, letting it run down the sides of the cake and covering as much of the cake as possible. Let stand until the glaze is set, about 1/2 an hour. Slice and serve.

Store uneaten cake on a cake keeper or wrap in plastic and store at room temperature for up to 3 days.

Thursday, August 18, 2011

A Booze Cake For My Doctor!

Last week, I asked you all to guess how big the Mister would be at my appointment this week and I intended to come home and blog about it, but my doctor put me back in the hospital. I didn't even have the option to come home, I went straight there from my appointment. She was concerned about my protein levels because they spiked, but after 24 hours of urine collection and observation in the hospital, everything turned out fine and I was able to come home again.

This past time was very different though because it's been 3 weeks since I was last there and baby Boy H has grown plenty! I'm no longer concerned with him being so tiny. According to his measurements on Tuesday, he weighs approximately 5 pounds, 11 ounces! Holy moly! I was not expecting him to gain that much weight, but he's packing on the weight. Maybe he could sense my worry so he thought he'd eat more to please me??? ha ha! Either way, he is good to go in that department. Out of 45 comments, not one person guessed his weight correctly. But the one person who was the closest without going over was Bonnie who writes From A Writer's Kitchen. Her guess was 5lbs. 9oz. Bonnie, I'm not sure what your prize is yet, but please email me your address and I'll send something over to you! Congrats!

My doctor scheduled my c-section for September 1st. Can you believe it?! The little man (who doesn't have a definitive name yet) will be here in 2 weeks or less! Ahhh! I'm not quite prepared for that, but I'm not sure I'll never be. I can't wait to see his face and smell his feet. LOVE. Because my doctor and staff have been so wonderful, thorough and caring I wanted to make them a cake to say 'thank you'. And who doesn't like a little booze at lunchtime? I decided to make them a chocolate Kahlua cake, that I experimented with back in December. I remember it being really good and moist, though I didn't get a slice of it this go round. I didn't think it would be very polite to deliver a cake with a slice cut out of it. :-) From what I could tell, they really enjoyed it though.

Chocolate Kahlua Cake from Monica H

Printer Friendly Version

  • 1 box chocolate cake mix
  • 1 small box instant chocolate pudding
  • 2 tsp. instant espresso powder
  • 4 large eggs
  • 1 cup sour cream
  • 1/2 cup vegetable/canola oil
  • 3/4 cup strong brewed coffee or water
  • 1/2 cup Kahlua
  • 1 tsp. vanilla extract

Preheat oven to 350 degrees F. Grease and flour a Bundt pan and set aside.

In a large mixing bowl, place cake mix, pudding mix and instant espresso powder and mix together with a whisk.

In a large measuring cup, mix the remaining wet ingredients together and blend til well mixed.

Pour the wet ingredients into the dry and mix until well combined with an electric hand mixer or a large whisk. Mix until well combined and lump free.

Pour cake mix into prepared Bundt pan and bake for 55-65 minutes or until a toothpick inserted in the center comes out clean.

Allow to cool in pan for 15 minutes before inverting onto a cooling rack. Once completely cooled, top with glaze (recipe below).

Kahlua Glaze

  • 1 cup powdered sugar
  • 1/2 tsp. instant espresso powder
  • 1 Tbsp. Kahlua
  • 1/4 tsp. vanilla extract

In a small bowl, combine all ingredients til smooth and pourable. If too thick and a few drops of water. If too thin, add more powdered sugar until the desired consistency is reached.

Pour or spoon glaze over the entire cake. Garnish with mini chocolate chips if desired. Allow glaze to set before slicing into cake.

My mom and little brother brought me a basket of Begonias when I was in the hospital the first time. They're such a pretty color and so delicate, don't you think?

Wednesday, January 12, 2011

Ripe Banana Remedy

What do you do with speckled overly ripe bananas? I'm sure many of you are thinking banana bread, right? I don't love banana bread (gasp!) so I usually toss them into fruit smoothies or make this strawberry Jell-o salad. I like bananas as a snack, but I like them firm with a little green still on them. Once they turn brown, I'm out! Usually if they're really black they get thrown away. Don't hate me banana bread lovers! I've tried freezing them with and without the peel but wasn't not a pretty site, in fact it made me dislike ripe bananas even more.

This is one recipe that I don't get tired of though and it calls for 2 overly ripe mashed bananas. Since I usually only buy 3 at a time, this works out perfectly so I can eat one and not worry about the others turning colors. And my husband loves it and requests it all the time so it's a win-win situation. I featured this Jell-O salad before on LTBG a couple years ago but it had one lone picture and it was ugly so no one ever commented. ha ha! I'm sharing it again because it really is good and I think you'd like it.

I usually make this in a Pyrex bowl, but I've made them in small clear glasses for a prettier, single-serving presentation as well. Either way you serve it, it tastes the same. The gelatin is more substantial and has body from the banana and crushed pineapple that are mixed into it. The frozen strawberries kinda break things up a bit so not everything is too smooth and baby food like. But it's the sour cream layer that I love. It's not sweetened at all but when you eat it with the strawberry Jello it almost tastes like cream cheese. I hope you'll give this one a try- it's nothing fancy, just good stuff.

Strawberry Jell-O Salad previously seen HERE

Printer Friendly Version

  • 1 6 oz. box strawberry jell-o
  • 1 1/2 c. boiling water
  • 8 oz. can crushed pineapple, drained
  • 2 ripe bananas, mashed without lumps
  • 10-12 whole frozen strawberries
  • 1 c. sour cream

In a medium bowl pour boiling water over strawberry jello. Mix til gelatin is fully dissolved. Add in crushed pineapple, and bananas. Add in strawberries and mix.

In a small bowl, stir sour cream til creamy and loosened a bit.

In a medium bowl, pour half the gelatin mixture (see note). Carefully ladle the sour cream over the jell-o, then pour the rest of the mixture over the sour cream.

Cover and refrigerate for at least 3 hours.

NOTE: To help the jello set up a bit quicker, I put the bowl in freezer for 5 minutes before adding the sour cream layer and the additional jello on top. This just helps keep the layers separated but it's not necessary.

____________________________________________

And just because I think it's funny, here's a picture of Mr. H and Autumn sharing a father/daughter moment while taking a break from varmint hunting in our backyard*.

*No animals were harmed in the making on this Jello :-)

Monday, October 18, 2010

Breaking Bread & Finlandia Cheese Winners

Once upon a time, I disliked banana bread. I mean, I ate it if it was the only thing around and I was desperate, but it was certainly not my first, second or tenth choice. ha! There's just something about concentrated banana flavor that turned me off. And artificial banana flavor, like banana taffy- double gag! But one day, Dawn of Vanilla Sugar turned that around for me. She shared a recipe on her blog that made me question my strong dislike for banana bread. Ya'll her recipe was GOOD!

The original recipe is no longer on her blog for some reason, so I can't link back to that particular post, but I'm sure you'll find lots of other yummies over there. The first time I made this banana bread, I added mini chocolate chips and it was delicious. For something different, I added cinnamon chips and topped it with cinnamon sugar before baking. When it came out of the oven it was crackly and crunchy on top and soft and moist in the inside with the added pop of melty cinnamon chips.

I doubled this recipe, made one large loaf and 4 smaller loaves to share with the neighbors. My thought was to try to make friends with the neighbors that we didn't know so well and really I don't think any of them really gave a flip. But at least I made the effort, which is more than I can say for them! Anyway, despite the lack of enthusiasm from my neighbors, I think you should make this bread. Don't feel compelled to add anything to this bread, it's just as delicious plain, but chopped nuts or a caramel swirl wouldn't hurt anything either. Trust me, this banana bread is perfection.

Cinnamon Chip Banana Bread adapted from Mama Dip and HERE

Printer Friendly Version

  • 1/2 cup shortening (not butter*)
  • 1 cup sugar
  • 2 eggs
  • 1 cup mashed very ripe bananas
  • 3 tbsp. sour cream
  • 1 tbsp. lemon juice
  • 2 cups flour
  • 1 1/2 tsp. baking powder
  • 1/2 tsp. salt
  • 1/2 tsp. baking soda
  • 1/2 cup cinnamon chips
  • 2 tbsp. cinnamon sugar for topping, optional

Preheat oven to 350 degrees. In a large bowl with an electric mixer or a spoon, cream shortening and sugar together. Beat in eggs one at a time; then add mashed bananas, sour cream, and lemon juice.

Sift together flour, baking powder, salt, and baking soda. Slowly add dry ingredients to the wet mixture, then fold in cinnamon chips.

Pour into greased and floured 9x5x3 loaf pan. Sprinkle with about 2 Tablespoons (use as much or as little as you want). Bake for 60 minutes.

NOTE: If your bread is getting too dark, loosely cover bread with foil. I did this for the last 15 minutes of baking time.

*Don't be tempted to use butter instead of shortening in this banana bread. It's what makes this recipe different.

_______________________________________________

Oh and for the winners of the Finlandia Cheese giveaway...

#23 Maria from Two Peas and Their Pod

and

#31 Leeann from Join The Gossip

Congrats ladies! Please email me with your addresses so I can send out your coupons for free Finlandia cheese!

Wednesday, September 29, 2010

Going Ape For Grapes

I know this recipe will never win an award for Beauty Queen, but I promise you it is delicious! I saw this recipe for Sweet Grape Salad on Cassie Craves in late May and I've made it a handful of times since then. It makes a great potluck dish since it can be made ahead of time, a light side dish and even a dessert. Everyone who has ever tasted this, raves over it and tries to hoard it (no joke). And that's why I think you should make it too!

Are grapes a seasonal fruit? If so, then get them before they leave your grocery store! This bowl of goodness starts off with a combination of cream cheese, sour cream, vanilla and sugar. Then you fold in the red grapes and top it with a sprinkling of brown sugar and chopped toasted pecans. The end result is like eating a fruit dip with grapes, but you get the added crunch from the nuts. The textures and flavors in this salad are something I never would have thought of, but it really works.

I have another Summery recipe coming your way, then I promise I'll start adding some Fall flavors to this blog. I just don't want to get burnt out on eating pumpkin so early in the game, know what I mean? Although I did make some killer pumpkin pancakes yesterday :-)

I also wanted to thank you all for the supportive and encouraging comments regarding my first recipe video. I'm glad you all liked it and with every comment I read, I become a little more confident and a little less nervous and critical of myself. So thank you, thank you, thank you!

Sweet Grape Salad from Food.com via Cassie Craves

Printer Friendly Version
  • 2 lbs. red seedless grapes
  • 1 8-ounce package cream cheese, softened
  • 1 8-ounce carton sour cream
  • 1/2 cup white sugar
  • 1 teaspoon vanilla
  • 2 tablespoons brown sugar
  • 2 tablespoons pecans (I like to double this amount and I like them toasted)

Combine cream cheese, sour cream, white sugar and vanilla in a large bowl. Gently fold in grapes.

Sprinkle with brown sugar, then pecan pieces.

Cover and refrigerate overnight or until well chilled. Serve very cold.

NOTE: This recipe is easily halved or doubled.

Don't forget to enter my giveaway, you have a couple more days to enter!

Sunday, August 29, 2010

Baking With My Mom and A Mini Giveaway

Before I tell you about these muffins I wanted to apologize for not checking in on your blogs over the past few days. I will get to them I promise, but I've been so sick that I haven't really been on the computer much. A couple weeks ago I noticed wheezing in my chest but I felt fine. I went to the doctor a few days later and was diagnosed with bronchitis. A took antibiotics, cough syrup and used an inhaler for a week and with each passing day I felt worse, not better. I went to get a chest x-ray and now I have pneumonia and I'm feeling pretty rotten. On top of all that I've developed a drug allergy and keep randomly breaking out in a rash all over my body. Fun times people.

Okay, enough of the pity party. I made these muffins with my momma! My mom is not much of a baker, mostly because she doesn't have the patience to follow a recipe. She just like to throw things in a pot and see how it turns out. That works out well if her creations aren't so great because she can't replicate them, but if something turns out really well and we all love it, she can never reproduce it. ha! Gotta love her. Anyway, I mentioned to her that I'd like to have her over to bake with me and she was so excited and knew just what she wanted to make. She saw a recipe in Parade Magazine for Dorie's lemon sour cream muffins and clipped it right away. It just so happens that I clipped the same recipe and I had all the ingredients to make them.

My mom mentioned that she painted her finger nails and I was teasing her telling her that she painted them for her guest appearance on my blog. I asked her to show them to me (so I could show them to you) and this is what she gave me. ha ha! Guess I asked for that one :-) Love you mom.

The recipe came together really quickly. We wanted them extra lemony so I added more lemon zest and juice. And I added a lemon sugar topping to them which made the tops super delicious but the muffin itself was mediocre at best and not very lemony. They were not very sweet and were very biscuit-like in texture and taste. The batter was very thick so I added a couple tablespoons of buttermilk to thin it out and that worked well. To make these more flavorful, we sliced them in half, buttered them and slathered on some tangy lemon curd. Besides baking with my mom, that was the best part. Then again you can slather just about anything with butter and lemon curd and it'll be good!

Lemony Sour Cream Muffins adapted from Dorie Greenspan via Parade

Printer Friendly Version
  • 2 cups all-purpose flour
  • 2/3 cup sugar
  • 2 tsp baking powder
  • 1/4 tsp baking soda
  • 1/4 tsp salt
  • 1 lemon, zested and juiced (I used 2- see note)
  • 3/4 cup sour cream
  • 2 large eggs
  • 1 tsp vanilla extract
  • 1/8 tsp lemon extract
  • 1 stick unsalted butter, melted
  • 2 Tbsp. buttermilk (see note)

Lemon Sugar:

  • 6 teaspoons sugar
  • Zest of one lemon

In a small bowl, combine the 6 tsp. of granulated sugar and zest of one lemon. Mix together and set aside while you make the batter.

Whisk the dry ingredients, including the lemon zest, together in a large bowl. In another bowl, whisk the remaining ingredients, including the lemon juice.

Pour the wet ingredients over the dry. Gently but quickly stir everything together. Don’t worry if you have a few lumps—they’re better than an overmixed batter.

Spoon batter into paper-lined or greased tins. Divide batter between 12 cups. Top each muffin with about 1/2 tsp. lemon sugar.

Bake at 400º for 18 to 20 minutes, until muffins are golden. Cool 5 minutes before unmolding.

NOTE: My batter was super thick so I added the juice of an extra lemon and a couple tablespoons of buttermilk to help thin it out.

Now on to the mini giveaway. When I said mini, I meant mini. My mom helped me pick these out and I thought they were too cute to pass up so I wanted to share with you. I liked them because their textures were so realistic.

Since I have 3 kitchen timers, I will choose 3 winners. Please let me know which one you'd prefer and I'll do my best to accommodate you. If you'd rather opt out of the giveaway, just say so in the comments section. One comment per person please.

Giveaway open to US residents only. The winners will be revealed on Wednesday. Be sure I can contact you if you win!

Saturday, August 14, 2010

Just Peachy

Our neighbor has a peach tree in his backyard and he invited us to come over and pick some peaches. Well, no, that's not entirely true. He picked peaches that were ready to be eaten and bagged them up to give us, but we weren't home and they got overly ripe so he said we could come over and pick fresh peaches from his tree. This turned out to be a good thing because I got to pick the ones I wanted AND take pictures of them. They're just so pretty and fuzzy.

Last years we got peaches from Fredericksburg- it's kind of like the peach capitol of Texas. I wondered how I would prepare them when Mr. H informed me not to touch them or I'd "ruin them". Alright then. We ate those peaches, simply sliced in a bowl. And we did the same with most of these peaches from our neighbor's tree. Side note: Have I mentioned before that my neighbor looks like Alton Brown? Because he totally does! Anyway, with a good portion of our fruit I made this wonderful peach ice cream from David Lebovitz- the ice cream guru.

After preparing this ice cream, I realized something. I realized that I've never had peach ice cream- I've only had what I *thought* was peach ice cream. What do I mean by that? Well, what I thought was peach ice cream , was simply vanilla ice cream with peaches in it. THIS ice cream is different and it is definitely peachy. It's icy and creamy at the same time, you can taste the vanilla but it's subtle- almond extract might be nice too. But the peaches take center stage. As it should be. Before Summer ends, pick some peaches from your neighbors tree or get some from a roadside stand and make this ice cream.

Peach Ice Cream from Perfect Scoop

Printer Friendly Recipe

  • 1 1/3 lbs. (600 g) ripe peaches (about 4 large peaches)
  • 1/2 cup water
  • 3/4 cup sugar
  • 1/2 cup sour cream
  • 1 cup heavy cream
  • 1/4 teaspoon vanilla extract
  • a few drops freshly squeezed lemon juice

Peel the peaches, slice them in half, and remove the pits. Cut the peaches into chunks and cook them with the water in a medium, nonreactive saucepan over medium heat, covered, stirring once or twice until soft and cooked through, about 10 minutes.

Remove from heat, stir in the sugar, then cool to room temperature.

Puree the cooked peaches and any liquid in a blender or food processor with the sour cream, heavy cream, vanilla and lemon juice until almost smooth but slightly chunky.

Chill the mixture thoroughly in the refrigerator (overnight is best) then freeze it in your ice cream maker according to manufacturer's instructions.

Variation: To make Nectarine Ice Cream, simply substitute nectarines for the peaches. There's no need to peel the nectarines, since their tender skins soften during cooking.

Summer in a bowl.

This post linked to:

Related Posts with Thumbnails