Showing posts with label Caramel. Show all posts

Wednesday, December 4, 2013

Brownie Points!


When we were kids, my step mom, Olivia, used to make my brother and me caramel brownies. She didn't make them very often and I remember them being really good (they were my brother's favorite) but I thought maybe it was a difficult recipe so they were only made for special occasions. I was wrong! She shared the recipe with me and they could not be simpler to make. I took the liberty to tweak things here and there (that's what I do) because the amounts were a little vague and I like to be specific when it comes to baking. Specific amounts in baking lead to consistent results, am I right? Here we go!


Pillsbury® recently sent me their new seasonal line of cake and cookie mixes just in time for holiday baking. I received Chocolate Peppermint Premium Cookie Mix, Traditional Sugar Premium Cookie Mix, Dark Chocolate Premium Cake Mix as well as Peppermint Frosting and Funfetti Frostings in Rudolph Red and Garland Green. My step mom's recipe for caramel brownies called for German Chocolate cake mix, but I opted for the Dark Chocolate Cake mix for these rich and gooey brownies. To learn more about these products, visit Pillsbury on Facebook, PillsburyBaking.com and Pillsbury on Pinterest

Dark Chocolate, semisweet chocolate chips, gooey caramel, crunchy pecans. You know these were good...and decadent! These brownies are for sharing. After making these and being left with an entire pan of brownies, I now understand why my step mom only made these about 1-2 times a year. They are dangerous and so much better than I remembered. I'm typically a "plain jane" brownie person and don't like anything but cocoa in my brownies but these are excellent. Thanks for the recipe and the trip down memory lane Olivia :-) I hope you'll seek out these new Pillsbury® products and make these brownies!

Dark Chocolate Caramel Nut Brownies 
adapted from my step mom, Olivia Luna

  • 14-16 oz. package caramels (50-60 caramels)
  • 2/3 cup evaporated milk
  • 1- 15.25 oz. box Pillsbury Dark Chocolate Premium Cake Mix
  • 1 cup unsalted butter, melted
  • 1/2 teaspoon vanilla extract
  • 3/4 cup semisweet chocolate chips
  • 3/4 cup chopped pecans

Preheat oven to 350 degrees F. Spray a 9x13-inch baking dish with non-stick cooking spray and line it with a sheet of parchment paper, allowing the paper to hang over the edges. Spray the paper once again with non-stick spray and set aside.

In a medium saucepan, combine the caramels and 1/3 cup of evaporated milk. Stir occasionally over medium heat until the caramels melt and the mixture becomes smooth. Turn off heat and allow to cool slightly while you prepare the brownie batter. 

In a large bowl, combine the dry cake mix, melted butter, vanilla extract and the remaining evaporated milk. Mix until well combined. 

Press half of the brownie batter into the bottom of the prepared pan. Bake for 6 minutes. 

Remove the pan from the oven and gently and evenly drizzle the caramel mixture over brownie base. Evenly distribute the chocolate chips and the chopped pecans over the caramel. Crumble the remaining brownie batter evenly over the nuts and chocolate and return back to the oven. 

Bake for an additional 20-22 minutes. It will be hard to tell when it's done because the brownies will be really gooey in the center and don't firm up until they have cooled completely, but don't bake any longer than the recommended time. 

Cool completely until the brownies have reached room temperature. Using the handles of the overlapping parchment paper, lift the brownies out of the pan. Cut the brownies into squares. Store in an airtight container. 


I was provided with product samples and compensation by Pillsbury, though the opinions I express here are my own.

©/® The J.M. Smucker Company. Pillsbury is a trademark of The Pillsbury Company, LLC, used under license.

Wednesday, October 2, 2013

Fall, I Welcome You


A few months ago I was asked by Pillsbury® if I'd like to sample and review their new Spring/Summer flavors of Orange Creamsicle, Key Lime and Funfetti products. I wrote about them here and here, if you're interested. Well today, I'm enthusiastically sharing with you Pillsbury's new Fall line of Caramel Apple and Pumpkin cake and cookie mixes...and they are quite tasty! 

Vintage bakeware is the best!
Living in central Texas means that it feels like Summer for at least 8 months out of the year. It will more than likely be around 80 degrees until November and while it may not look or feel like Autumn outside, Fall is happening in my kitchen. When the season arrives, I like to start baking with apples and spices then I later progress to one of my favorite flavors, pumpkin!


My friend Ingrid from 3B's has made a cake with yellow cake mix called Cinnamon Roll Cake. This is a twist on that recipe using Pillsbury's Caramel Apple Premium Cake mix and frosting. I upped the apple flavor by adding cinnamon applesauce in place of some of the oil and used the caramel apple frosting to make the glaze. If Ingrid's cake tastes like a cinnamon roll, this tastes like a cinnamon apple fritter. The cake itself was very moist and apple-y (is that a word?) with a slightly crunchy caramelly sugar topping. The glaze is completely unnecessary, but it's so tasty you won't want to skip it. 

To learn more about these products, visit Pillsbury on Facebook, PillsburyBaking.com and Pillsbury on Pinterest

Thank you Pillsbury® for all these great new products and for having me be a Pillsbury blog Ambassador :-)


Caramel Apple Fritter Cake from Lick The Bowl Good 
loosely adapted from 3B's and Jolts &Jollies


Cake: 
  • 1- 15.25 oz. box Pillsbury Caramel Apple Premium Cake Mix
  • 4 large eggs
  • 1/2 cup oil
  • 1/3 cup sour cream
  • 3/4 cup cinnamon applesauce

Topping: 
  • 1 cup light brown sugar
  • 1 Tablespoon ground cinnamon

Glaze: 
  • 1/2 cup Pillsbury Creamy Supreme Caramel Apple Frosting
  • 2 Tablespoons milk
  • 1/2 teaspoon vanilla extract

Preheat oven to 325 degrees F. Spray a 9x13-inch OR two 8x8-inch pans with non-stick baking spray with flour and set aside. 

In a large bowl combine the ingredients for the cake and mix until well blended. Pour the batter into the prepared pan and set aside. 

In a small bowl, mix the brown sugar and cinnamon together and sprinkle evenly over the batter. Using a butter knife swirl the brown sugar mixture gently into the batter. 

Bake for 35-40 minutes or until a toothpick inserted into the center comes out clean. 

Once the cake is fully baked, place on a cooling rack and make the glaze. 

In a small bowl, whisk the frosting, milk and vanilla together until thin, free of lumps and is drizzle consistency. Using a spoon, drizzle the glaze over the cake and allow the cake to cool for at least 20 minutes before serving. 

I was provided with product samples and compensation by Pillsbury, though the opinions I express here are my own. 

©/® The J.M. Smucker Company. Pillsbury is a trademark of The Pillsbury Company, LLC, used under license. 

Wednesday, September 25, 2013

Learning To Like New Things


I loathe making chiffon/angel food cakes and Swiss rolls so I was not so thrilled when this cake was chosen as the winning cake to be baked by The Cake Slice Bakers. In fact, my friend Maranda from Jolts & Jollies and I both held our breath and hoped this cake wouldn't be the winning cake because it seemed so labor intensive BUT in the end it was so much easier than I ever expected. Despite my reservations, this cake was a complete success and really quite DELICIOUS. It's also really pretty and that's always a plus. There are lots of photos in this post, bear with me. 

This is not your ordinary roll up cake. Firstly, you make your own butterscotch sauce (butter, sugar, cream) then you add some of that to freshly whipped cream to make the filling. It then gets spread on the cake and rolled up with sliced almonds scattered throughout. You cut the cake into four pieces and roll it up around itself until you have something that looks like a giant cinnamon roll. And who doesn't like giant cinnamon rolls, especially when the tender cake is the dough and it's filled with salted butterscotch cream?! 

I haven't always liked butterscotch. It wasn't until recently that I started to like it. I always assumed that butterscotch was nothing more than those little golden candies my grandpa used to carry around in his pockets. Why didn't anyone tell me it was like a cross between gooey, sticky toffee and caramel? Man, this stuff was good! The recipe below makes 1 1/2 cups of sauce but only one cup is needed for the filling. You can drizzle the remaining sauce over the cake or on ice cream, or in coffee or just stick your finger in it and lick it. oh yum! Make this! 

Butterscotch Cream Roll-Up 
from Vintage Cakes via Cooking By The Book


Butterscotch Sauce:

1/3 cup unsalted butter
1 cup firmly packed dark brown sugar
1 cup heavy cream
1 tablespoon whisky
1 ½ teaspoons pure vanilla extract
½ teaspoon fine sea salt

Cake:

1 cup sifted cake flour
1 cup sugar
1 teaspoon baking powder
½ teaspoon fine sea salt
½ cup canola oil
4 egg yolks, at room temperature
¼ cup water
1 teaspoon pure vanilla extract
6 egg whites, at room temperature
¼ teaspoon cream of tartar

Filling:

1 ½ cups cold heavy cream
½ cup natural sliced almonds, toasted plus more for this outside of the cake, if desired

To make the butterscotch sauce: Melt the butter over medium heat in a large heavy-bottomed sauce pan. Dump in the brown sugar all at once and stir with a wooden spoon to combine. Cook, stirring frequently, until the mixture begins to simmer and changes from a wet sand consistency to a liquid that fives off a lovely molasses smell and looks like taffy, approximately 3 minutes from the time it comes to a simmer. Drizzle ¼ cup of the cream into the mixture and vigorously blend the cram into the sugar and whisk in the remaining cream. Turn the heat up to medium-high and allow the sauce to boil, whisking occasionally, until it has darkened, about 8 minutes. Remove the pot from the heat and allow the sauce to cool for a few minutes before adding the whisky, vanilla, and salt. Refrigerate until cold.

To make the cake: Spray a 12 x 16 inch jelly roll pan with nonstick baking spray (with flour), line it with parchment paper, and then spray the parchment paper with more nonstick baking spray. Center a rack in the center of your oven and preheat the oven to 325⁰F.

Sift together the flour, baking powder, salt, and ¾ cup of the sugar in a large bowl, then whisk the ingredients by hand. In a small bowl, whisk together the oil, yolks, water and vanilla. Add the liquid mixture to the dry ingredients and briskly stir with a rubber spatula until just smooth.

In the clean bowl of stand mixer fitted with the clean whisk attachment, whip the egg whites on medium speed until frothy. Add the cream of tartar and gradually increase the speed to high, whipping until the whites just form a soft peak. With mixer on medium speed, gradually add the remaining ¼ cup of sugar in a slow stream. Return the mixer to high and continue whipping until the whites just begin to hold firm, shiny peaks.

With a rubber spatula, fold a third of the whites into he batter, using as few strokes as possible. Add the remaining whites, folding until incorporated. Pour the batter into the prepared pan and smooth the top with an offset spatula. Place the pan in the oven. Bake the cake until it springs back when lightly touched and is barely golden in color, 16 to 20 minutes. Cool the cake on a wire rack until it reaches room temperature.

To make the filling: Begin by placing the bowl of a stand mixer and its whisk attachment in the freezer for 5 minutes. Fit the cold bowl and whisk to the mixer and whip the 1 ½ cups of cold heavy cream and 1 cup of the cold butterscotch sauce together on low speed until the ingredients are blended. Gradually turn the mixer up to high speed and whip just until the cream holds soft peaks but is not yet stiff.

To assemble the cake:  Keep the cake in its pan and orient the pan so the longer side is closed to you. Cut the cake with a serrated knife into four equal pieces measure 4 by 12 inches. Cut through the underlying parchment paper with a pair of scissors in the same places that you cut the cake so you have four quarters of cake [with parchment paper attached] that can each move independently.

Leaving the cake in the pan, spread a bit more than half of the butterscotch cream evenly over the cake and sprinkle with the toasted almonds. Refrigerate the remainder of the cream while you roll up the cake.
Here comes the fun part: rolling the cake! With the pan still oriented with the longer side closest to you, lift up the nearest edge — both cake and paper — of one of your 4 strips. Using the parchment paper as the cake’s support, begin to tuck the cake into a roll and continue tucking [and peeling away the parchment paper] while gently rolling the cake away from you into a roll. Place the rolled cake upright on a serving plate, so the spiral of cake and filling is visible at the top. [Don’t worry, it gets easier from here.]Lift the next cake strip, using the parchment paper to support it, and wrap the strip around the roll on the serving plate, beginning where the outside edge of the first cake left off, in order to create a bigger roll. Continue with the next two strips, beginning the wrap where the last left off, to make one enormous rolled up cake.
Finish by frosting the sides with the reminder of the cream [you might need to give the cream a few turns with a hand whisk to stiffen it up], leaving he top free to show of the spiral of cake and cream. If you desire, you can pat more almonds into the sides of the cake. Refrigerate the cake for at least 1 hour and up to one day, lightly wrapped in plastic. Just before serving, warm the remaining butterscotch sauce and drizzle it over the individual servings.

Well wrapped and refrigerated, this cake keeps up to 3 days. 


Saturday, December 22, 2012

Last Minute Treats and Handmade Gifts


I am so cookied out! I keep thinking of other cookie recipes I want to make, but in reality, I really don't want to stand on my feet in the kitchen for hours on end, reaching into the hot oven. After baking 22 dozen cookies, I'm looking for an easy way out. And these cookie sandwiches are the golden ticket. 


I found these on my friend, Michelle's blog, One Ordinary Day and they could not be simpler. The hardest part was unwrapping all the shiny gold foil off the chocolate covered caramels, the rest was just easy peasy. You line up your crackers, top them with Rolos, bake for 3-5 minutes, then top with another Ritz and you're done. From start to finish, these took me about 10 minutes, so if you're in need of a quick sweet treat, these are for you. 


Rolo Stuffed Ritz Crackers adapted from One Ordinary Day

Printer Friendly Version 
  • Rolo Candies
  • Ritz Crackers

Preheat oven to 350 degrees F. 

Place Ritz crackers on a cookie sheet face side down, and top each one with a Rolo candy.

Bake for 3-5 minutes to soften (but not fully melt) the Rolos, Remove from the oven and immediately top  the Rolos with a second Ritz cracker. Cool completely before storing in an airtight container. 

NOTE: There are about 55 Rolos candies per bag. 


If you need a last minute gift for the grandparents, these salt dough ornaments are perfect. You only need three ingredients to make the dough, and acrylic paint and ribbon to embellish them. You can make them as fancy or as simple as you want, it's the handprint and the memory of spending time with your child that's important. 

Salt Dough Handprint Ornaments adapted from Once A Month Mom 

  • 1 cup flour
  • 1/4 cup salt
  • 7 tbsp water
  • Round cookie cutter large enough to go around the handprint
  • 1 drinking straw
  • Craft paint
  • Ribbon
Preheat oven to 250°F. 

Mix together flour, salt, and water. Knead for 10 minutes til smooth and no longer sticky. Add a little flour at a time, if necessary.  

Roll out the dough to no more than 1/4-inch thick, then use the cookie cutter (or glass) to make rounds. Press a hand into dough. If you’re doing this with really little ones, you may have to go back and make deeper impressions of their hands with your fingers or a kitchen utensil–the deeper the impression, the better your ornaments will turn out. 

Use a straw to poke a hole in each ornament (this is where the ribbon will go later). Place on a baking sheet and bake for 1 1/2 to 2 hours or until ornaments have completely dried out. 

Remove the tray from the oven, once they're cool enough to handle, place ornaments on a cooling rack and allow to cool before painting. Paint or decorate as you want. When the decorations have dried, thread ribbon through the hole. Hang on your tree. 

Wednesday, July 6, 2011

The Blame Game

Last Tuesday I had dinner at a friend's house and brought this coconut milk-cream cheese flan over for dessert. The very next day I had to do my glucose test at my OB's office to check for gestational diabetes. If you've never had to have a glucose test, consider yourself lucky. It involves drinking a sickly sweet orange beverage, that tastes like a cross between flat orange soda and orange Gatorade, then you wait an hour and they take your blood. A couple days later I found out that I failed my test by 2 lousy points! You have to score a 135 or lower and I scored a 137. I'm putting the blame on this sweet sticky flan :-)

Because I failed the first glucose test, I had to do do another test this morning, only it took close to 4 hours to complete and they took my blood 4 separate times, every hour on the hour. I had to do the test while fasting and was starving since I hadn't eaten in 15 hours. NOTE: Don't deprive a pregnant women of food and beverage. It's not pretty. After that I had to go to my OB to get a shot, so I was poked 5 times within a matter of hours. But it's over now, I survived and I got a delicious lunch afterwards and a long nap after that. If it sounds like I'm complaining, I am. hee hee! But I'm entitled to that every once in a while.

So, onto this flan. It's made with coconut milk and cream of coconut, but surprisingly didn't taste at all like coconut, just caramel. It also has cream cheese in it that makes it extra creamy and firm. The end product was more like a cheesecake with a baked caramel sticky syrup on top- cheesecake in texture, and flan in taste. I thought it was good, but not at all what I was expecting. My older brother is a flan lover- he'll go to a restaurant and order 3-4 servings for dessert. I saved a big hunk of this for him and while he ate it and seemed to like it, the first thing he said was "this tastes like cheesecake". So decide for yourself if you want to make this, but don't eat it before you go in for a glucose test.

Coconut Milk-Cream Cheese Flan from Sticky, Chewy, Messy, Gooey

Printer Friendly Version

For the Caramel:

  • 1 cup sugar
  • 2 tablespoons water
  • 1/2 teaspoon fresh lemon juice

For the Custard:

  • 16-ounces cream cheese, room temp
  • 1 cup canned coconut milk
  • 1/2 cup cream of coconut
  • 1 can (14 ounces) sweetened condensed milk
  • 7 large eggs
  • 1/2 teaspoon pure vanilla extract
  • Boiling water as needed

To make the caramel: Combine the sugar, water, and lemon juice in a large, heavy-bottomed saucepan over medium heat. Cook, gently swirling the pan occasionally, until the sugar dissolves and starts to turn color. Increase the heat to high and boil until the syrup turns to a deep amber color, 3 to 5 minutes. If the mixture gets too brown it will start to smoke and smell burned and the caramel will be ruined, forcing you to discard the mess and start again. Once you begin making the caramel, do not leave the pot! Caramel can go from perfection to disaster in just seconds.

Immediately pour the caramel into a 9-inch cake pan, swirl to completely coat the bottom and halfway up the sides of the pan, and set aside. WARNING: Caramel will be extremely HOT. Thus it will cause the pan to become very hot as well. If necessary use an oven mitt so you don't burn yourself.

To make the custard: In a blender or food processor, combine all the custard ingredients (except the boiling water) and blend or pulse at low speed just until smooth and combined. Strain the custard through a fine-mesh sieve into the caramel-lined pan. (Not all of my custard fit into the cake pan. My pan was completely full to the top and had to bake a smaller ramekin of the custard separately).

Position the rack in the middle of the oven and preheat to 300°F. Place the cake pan in a larger roasting pan and place the roasting pan on the oven rack. Pour boiling water into the roasting pan until it reaches halfway up the sides of the cake pan. Cover the roasting pan with aluminum foil, piercing the foil in several places to allow steam to escape. Bake until the flan is firm to the touch in the center and doesn't jiggle when the pan is moved, 50 to 60 minutes. (Mine took 1 hour and 30 minutes to cook all the way through).

Transfer the flan from the water bath to a wire rack and let cool. When completely cool, cover with plastic wrap and refrigerate until very cold, preferably overnight.

To unmold: Run a table knife carefully around the edges of the pan, pressing it against the side of the pan to loosen the flan but avoiding cutting into the custard. Hold a serving platter (one large enough to hold the lovely, golden sauce) over the top of the flan and invert. Shake the pan gently to release the custard. Remove the pan and let the caramel sauce flow around the sides of the flan and pool around the edges of the serving plate. Serve immediately.

Serves 8-10

How 'bout a sunset kissed slice o' flan?

Friday, May 20, 2011

Hit and Miss

Two posts in one week?! Yes, because it's Cake Slice Time! I can't believe it's already been a month since I last made a cake for The Cake Slice Bakers. Where does the time go? Last month's cake was a dense cream cheese pound cake, this time it's a light upside down cake. I have to admit being a little skeptical about this cake. Yes, I like oranges, and almonds and caramel, but I've never had them all together. Did it work? Yes and no.

I thought the cake part of this recipe was excellent. In fact I think I'd make it again and just nix the topping. It was super moist, tender, delicate and full of orange flavor. I had a little cake batter left and decided to mix it with a few chocolate chips and baked it in a cupcake tin. I ate it just warm out of the oven- oh so good! It's not too sweet either and would make an excellent muffin with fruit folded in.

I even liked the flavor of the topping and the crunch from the almonds but there was just something about the recipe that just didn't quite work. Firstly you cook the brown sugar and butter then layer it in a pan with sliced almonds and honey. I think the topping would have been better, uncooked and mixed all together because when it came to turning it out, the topping seperated from the cake. The caramel was just too hard and chewy, almost like a praline. it tasted good, but it was hard to eat. We ended up peeling off the topping and eating the cake seperately, taking a few bites of the nutty caramel in between bites. All in all, I liked this cake, it just needs a little tweaking. Below is the original, unadapted recipe. Keep that in mind if you make this cake.

Orange Almond Upside-Down Cake from Cake Keeper Cakes

For The Topping:

  • 1 cup sliced almonds
  • 6 Tbsp. unsalted butter
  • 2/3 cup packed light brown sugar
  • 1/4 cup honey

For The Cake:

  • 1 1/2 cups unbleached all-purpose flour
  • 1 teaspoon baking powder
  • 1/2 teaspoon baking soda
  • 1/4 teaspoon salt
  • 1/2 cup sour cream
  • 2 large eggs
  • 1/4 cup fresh orange juice
  • 1 teaspoon pure vanilla extract
  • 1/2 cup unsalted butter
  • 3/4 cup granulated sugar
  • 1 Tbsp. grated orange zest

Make the topping: Preheat the oven to 350 degrees F. Grease a 9-inch round nonstick cake pan and dust with flour. Line the bottom of the pan with a circle of parchment paper and grease and flour the parchment.

Spread the nuts on a baking sheet and toast until golden, 8-10 minutes. Heat the butter in a medium saucepan over medium heat until foaming. Whisk in the brown sugar, turn the heat to low, and cook, whisking for 2 minutes. Scrape the mixture into the prepared pan and smooth with a spatula, Drizzle with the honey. Scatter the toasted almonds over the honey. Set aside.

Make the cake: Combine the flour, baking powder, baking soda, and salt in a medium mixing bowl. Combine the sour cream, eggs, orange juice, and vanilla in a glass measuring cup and lightly beat.

Combine the butter and granulated sugar in a large mixing bowl and cream with an electric mixer on medium-high speed until fluffy, about 3 minutes, scraping down the sides of the of the bowl once or twice as necessary. Stir in the orange zest.

With the mixer on medium-low speed, pour the egg mixture into the bowl in a slow stream, stopping the mixer once or twice to scrape down the sides.

Turn the mixture to low speed and add the flour mixture, 1/2 cup at a time, scraping down the sides of the bowl after each addition. After the last addition, mix for 30 seconds on a medium speed.

Pour the batter over the almonds, gently spreading it into an even layer with a spatula.

Bake until the cake is golden and a toothpick inserted into the center comes out clean, 35-40 minutes. Transfer the pan to a wire rack and let stand for a couple minutes.

Holding the pan and a plate together firmly with oven mitts, immediately invert the hot cake onto the plate. Peel away the parchment paper. If necessary, replace and almonds stuck to the bottom of the pan. Let the cake cool for 20 minutes and serve warm, or at room temperature.

Store uneaten cake in a cake keeper at room temperature, or wrap loosely in a plastic and store at room temperature for up to 2 days.

NOTE: This recipe makes quite a bit of batter. Be sure not to overfill your pan or you’ll have overflow. Bake any excess cake batter in a separate tin.

Have you made any recipes lately that tasted good, but didn't quite work?

Saturday, November 20, 2010

Cake x 35

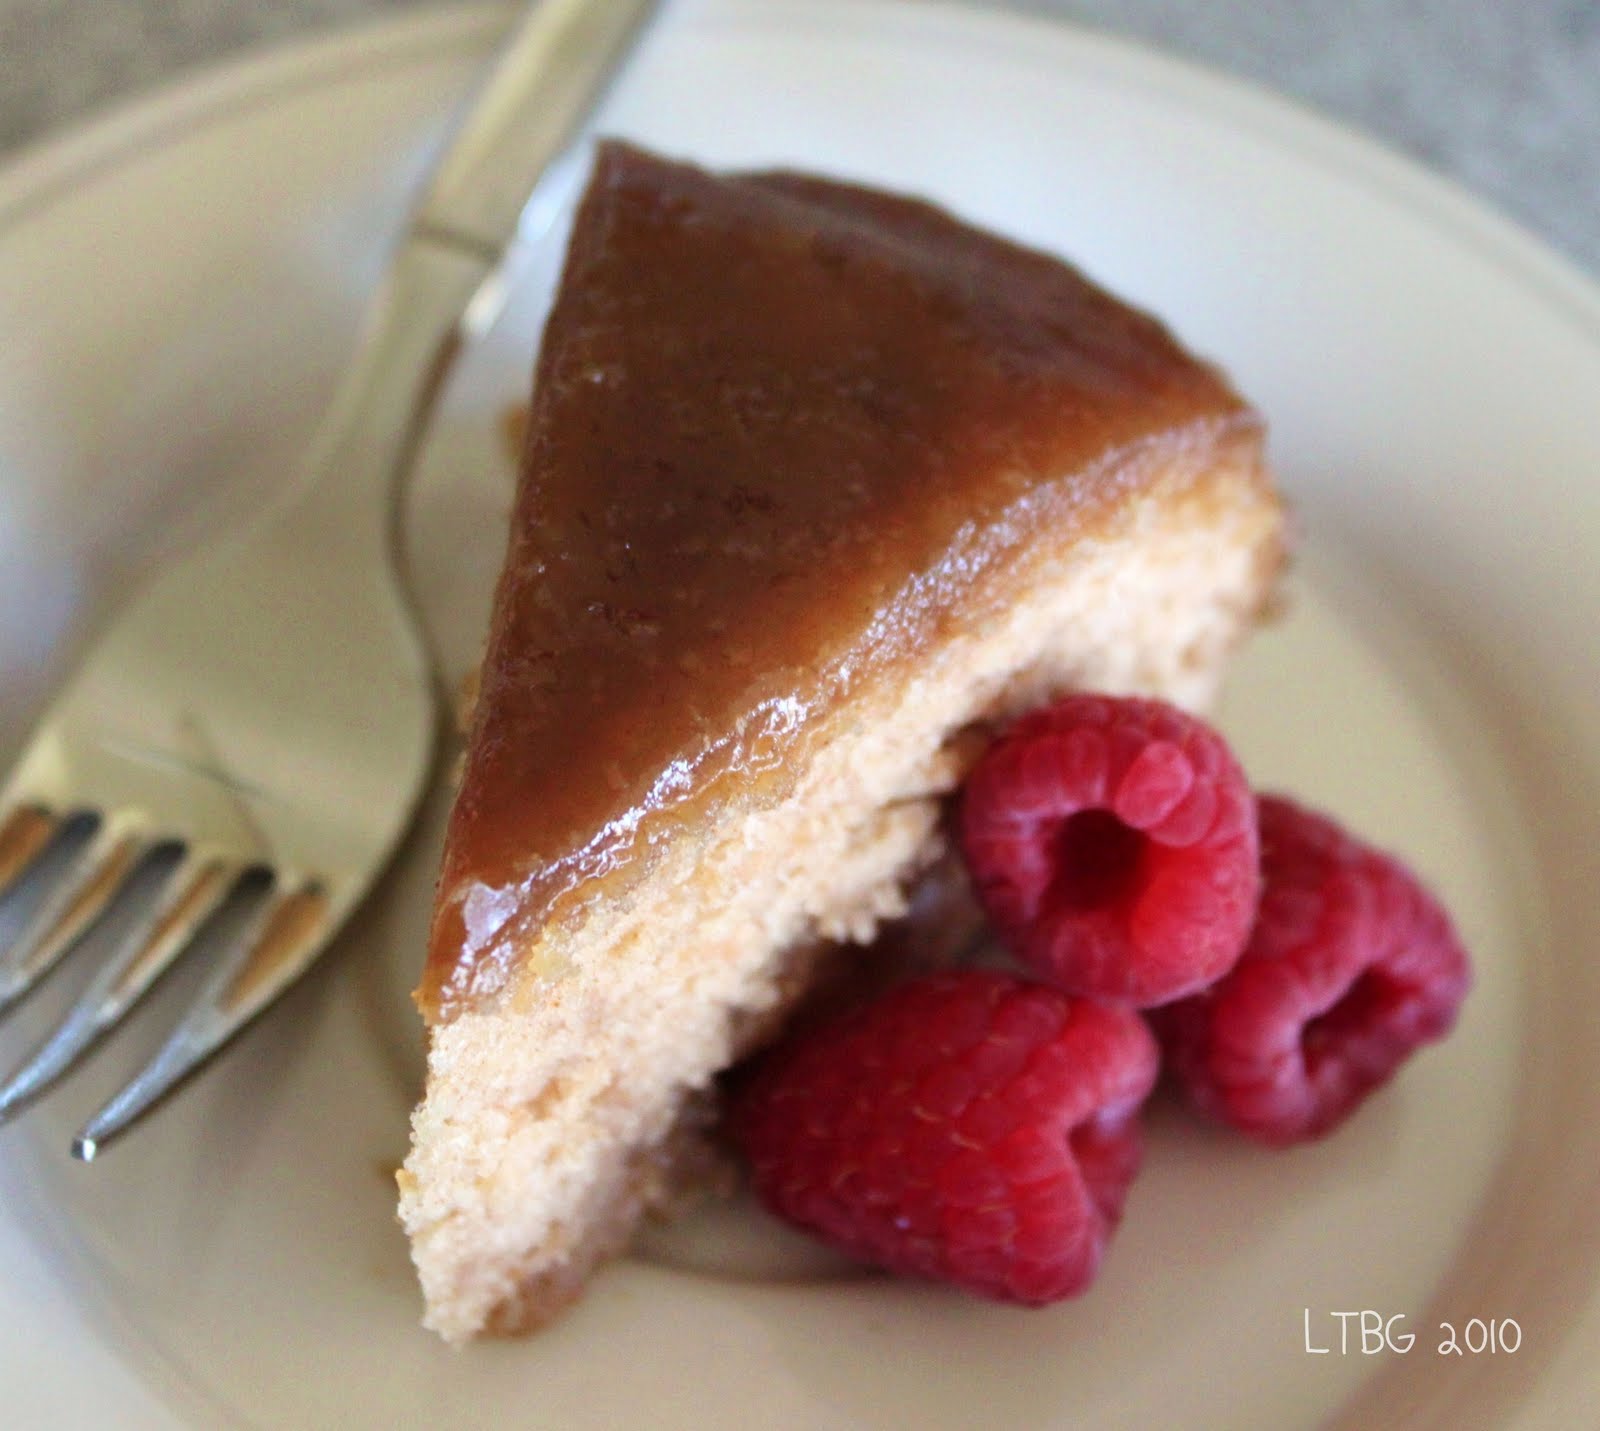
This is the second cake The Cake Slice Bakers have made from Cake Keeper Cakes by Lauren Chattman. Geez, how many times can you say "cake" in one sentence?! Cake. Cake. Cake. Cake. Cake. ha! The winning cake this month was Cinnamon Pudding Cake. I adore cinnamon so I was super excited about making this cake, but in the end I thought it was a little disappointing.

I've never had a pudding cake before so I wasn't sure what the end result would be like, but I was expecting something gooey- something with a molten center and this was not that. A lot of the bakers commented that it was very dry. My cake was not dry, but I also reduced the baking time by 10 minutes so I think that helped some. While the cake part was not gooey, the topping was. This cake starts off by pouring the caramel on top of the unbaked cake. As it bakes, the caramel seeps through the cake and making it's way to the bottom of the pan. It turns out like a 'self-frosting' upside down cake.

The cake was very much cinnamon flavored. But I felt it was kind of one-note. In my opinion, it was very one dimensional...it just lacked something. The caramel glaze saucy stuff on the bottom top of the cake was good but very sweet. All in all, I'm glad I made this cake. At least I can say I've made and eaten a pudding cake, but I don't think this is one that will make a repeat appearance in my kitchen. But I haven't given up, I will try another recipe...perhaps one with chocolate!

Cinnamon Pudding Cake slightly adapted from Cake Keeper Cakes

Printer Friendly Version

For the caramel topping:
  • 1 cup plus 2 Tablespoons packed light brown sugar
  • 3/4 cup water
  • 1 Tablespoon unsalted butter
  • 1/2 teaspoon salt

For the cake:

  • 2 cups all-purpose flour
  • 2 teaspoons baking powder
  • 2 1/2 teaspoons cinnamon
  • 1/2 teaspoon salt
  • 2 Tablespoons unsalted butter, softened
  • 1 cup sugar
  • 1 cup milk
  • 1 teaspoon vanilla

Preheat the oven to 350 degrees F. Spray the bottoms and sides of an 8-inch square baking dish with cooking spray. ( I used the kind with flour).

For the topping: Combine the brown sugar, water, butter and salt in a saucepan. Bring to a boil, stirring occasionally, then set aside to cool.

For the cake: In a medium bowl, combine the flour, baking powder, cinnamon and salt.

Combine the butter and sugar in a large mixing bowl and cream with an electric mixer on medium-high speed until fluffy, about 2 minutes.

Reduce the mixer speed to low, and add 1/3 of the flour mixture to the bowl. Add half of the milk and all of the vanilla. Add another 1/3 of the flour, mix til just combined, then add the remaining milk, then the rest of the flour. Scrape down the sides of the bowl and beat on medium speed for 30 seconds.

Scrape the batter into the prepared pan and smooth the top with a rubber spatula. Pour the topping over the batter (the pan will be very full). Carefully transfer the pan to the oven and bake until set, about 35-40 minutes. (The top of the cake might be slightly damp looking on top, but a toothpick inserted in the center should come out clean.)

Let the cake cool in the pan no longer than 5 minutes or the caramel will stick to the pan. Invert it onto a large rimmed platter. Serve warm.

Store cooled cake at room temperature for one day or up to 3 days in the refrigerator in an airtight container.

BTW, the word "cake" appears in this post 35 times. dang!

Related Posts with Thumbnails