Showing posts with label Pineapple. Show all posts

Wednesday, January 11, 2012

Carrots For Breakfast? Yes!

Do you make resolutions for the new year? Did any of you resolve to eat healthier this year? If so, then I have a healthy and delicious breakfast recipe for you today. I don't usually make New Year's resolutions because they often get broken and I can't stand the guilt and shame I bring upon myself when I don't follow through with them. Instead I just try to do better everyday, though sometimes I slip. The one silent resolution I did make this year was to read more to Hayden- simple yet gratifying.

Anyway, back to this recipe. Carrot Cake Pancakes. Sounds and tastes completely indulgent but they're light in calories and cram packed full of goodies. I've made these pancakes before but I didn't like the way the photos turned out so I never blogged them. I decided to make them again (only better this go round) when Grimmway Farms offered me some of their carrots to make a recipe with. Grimmway Farms, also known as Cal-Organic and Bunny-Luv has some great California grown produce. We used to feed our bunny, August, Bunny-Luv carrots and he, of course, loved them :-)

These pancakes are delicious. They have all the basics that are in the actual cake, including shredded carrots, brown sugar, nuts and spices. But I decided to kick them up a bit by adding crushed pineapple, sweetened shredded coconut, and raisins. Of course most carrot cakes are topped with cream cheese frosting, but a single pat of butter and some golden maple syrup is all these really need. These pancakes are dense, hearty and satisfying but not heavy. If you're looking for a little something different to try this weekend, I hope you'll try these pancakes. They also freeze and reheat well so make a double batch to enjoy during the week.

Carrot Cake Pancakes adapted from Picky Cook

Printer Friendly Version

  • 1 1/4 cups all purpose flour
  • 2 teaspoons baking powder
  • 1 1/2 teaspoon ground cinnamon
  • 1/4 teaspoon salt
  • 1/8 teaspoon freshly ground nutmeg
  • 1/8 teaspoon ground ginger
  • 1/4 cup brown sugar
  • 3/4 cup buttermilk
  • 2 Tablespoons canola or vegetable oil
  • 1 1/2 teaspoon vanilla
  • 2 large eggs, lightly beaten
  • 2 cups grated carrot
  • 1 teaspoon orange zest
  • 3 Tablespoons crushed pineapple
  • 3 Tablespoons shredded coconut
  • 3 Tablespoons raisins
  • 3 Tablespoons toasted chopped pecans
  • butter for pan

Combine flour, baking powder, cinnamon, nutmeg and ginger in a large bowl with a whisk.

In a medium sized bowl, whisk brown sugar, buttermilk, oil, vanilla and eggs together.

Add sugar mixture to the flour mixture and gently combine with a large spatula. Do not overmix. Fold in the carrots, orange zest, pineapple, coconut, raisins and pecans.

Heat a cast iron skillet/griddle/other large skillet over medium heat. Coat the bottom with butter. Spoon (1/4 cup) batter into the skillet and gently spread the batter out a little bit. Cook for a couple minutes or until you see the top covered with bubbles. Flip over and cook another minute or two.

Keep pancakes warm in 190 degree oven until you are ready to serve. Serve with butter and maple syrup.

Makes about 12 four-inch pancakes.

Ooooh, come to momma!

If you'd like to give Grimmway Farms carrots a try, just tell me how you'd use them and you may be chosen to receive a coupon for free produce. Thank you Grimmway Farms!

The recipients of the Grimmway Farms coupons are revealed HERE.

Wednesday, January 12, 2011

Ripe Banana Remedy

What do you do with speckled overly ripe bananas? I'm sure many of you are thinking banana bread, right? I don't love banana bread (gasp!) so I usually toss them into fruit smoothies or make this strawberry Jell-o salad. I like bananas as a snack, but I like them firm with a little green still on them. Once they turn brown, I'm out! Usually if they're really black they get thrown away. Don't hate me banana bread lovers! I've tried freezing them with and without the peel but wasn't not a pretty site, in fact it made me dislike ripe bananas even more.

This is one recipe that I don't get tired of though and it calls for 2 overly ripe mashed bananas. Since I usually only buy 3 at a time, this works out perfectly so I can eat one and not worry about the others turning colors. And my husband loves it and requests it all the time so it's a win-win situation. I featured this Jell-O salad before on LTBG a couple years ago but it had one lone picture and it was ugly so no one ever commented. ha ha! I'm sharing it again because it really is good and I think you'd like it.

I usually make this in a Pyrex bowl, but I've made them in small clear glasses for a prettier, single-serving presentation as well. Either way you serve it, it tastes the same. The gelatin is more substantial and has body from the banana and crushed pineapple that are mixed into it. The frozen strawberries kinda break things up a bit so not everything is too smooth and baby food like. But it's the sour cream layer that I love. It's not sweetened at all but when you eat it with the strawberry Jello it almost tastes like cream cheese. I hope you'll give this one a try- it's nothing fancy, just good stuff.

Strawberry Jell-O Salad previously seen HERE

Printer Friendly Version

  • 1 6 oz. box strawberry jell-o
  • 1 1/2 c. boiling water
  • 8 oz. can crushed pineapple, drained
  • 2 ripe bananas, mashed without lumps
  • 10-12 whole frozen strawberries
  • 1 c. sour cream

In a medium bowl pour boiling water over strawberry jello. Mix til gelatin is fully dissolved. Add in crushed pineapple, and bananas. Add in strawberries and mix.

In a small bowl, stir sour cream til creamy and loosened a bit.

In a medium bowl, pour half the gelatin mixture (see note). Carefully ladle the sour cream over the jell-o, then pour the rest of the mixture over the sour cream.

Cover and refrigerate for at least 3 hours.

NOTE: To help the jello set up a bit quicker, I put the bowl in freezer for 5 minutes before adding the sour cream layer and the additional jello on top. This just helps keep the layers separated but it's not necessary.

____________________________________________

And just because I think it's funny, here's a picture of Mr. H and Autumn sharing a father/daughter moment while taking a break from varmint hunting in our backyard*.

*No animals were harmed in the making on this Jello :-)

Thursday, September 23, 2010

Fall and Baking with Kids

Today is officially the first day of Fall. Ah, I'm so excited it's finally here. I did a little cleaning up and organizing this weekend. I rearranged my China cabinet to accommodate more of the cake stands I keep buying. It's an addiction, I tell you! I rearranged my cookbooks and bookshelves and while I was at it, I set out all of my Autumnal decorations. Now if only I could find someone to put my laundry up and dust for me, I'd be all set :-)

Look for the Lucky Leaf Premium. It's made with real sugar rather than corn syrup.

I'm a nanny and on Mondays, Wednesdays and Fridays, I pick the little guy up from school. He's only 3 years old so he goes to a Montessori preschool and they're teaching him about Fall. He kept saying that he couldn't wait for Thursday so the leaves could start falling. If only it worked that way. I told him that first the leaves had to change from yellow to orange to red or brown before they turned brown and fell. He was so excited to go to the window and see that the leaves were turning yellow. Then he declared that he wanted to bake a pie for Fall (I love this kid!). When I told him that he'd have to wait til we got all the ingredients to make the pie he started crying, "I want to baaake. I want to baaake." I couldn't help myself, but I laughed :-)

ooh, so pretty!

He then took a deep breath and wiped his crocodile tears. I cut him a healthy slice of chocolate birthday cake and we sat at the kitchen table to read through cookbooks- Joy of Cooking and Deceptively delicious, if you're curious. We read through the pies and tarts sections in which we found pumpkin pies, pecan pies and several fruit tarts and galettes. None of those were good enough. He went to the fruit basket, grabbed a plum, a peach and a couple limes and said that's all we needed, no pie crust necessary. We didn't bake today but we might tomorrow.

I made this dessert a couple weeks ago, alone in my own kitchen, but it's simple enough for your little helper to make it on his/her own with a little supervision. It's called dump cake, which is rather gross if you ask me so I'm calling it crunch cake. There is no mixing required, just layering ingredients in a pan, pouring on some melted butter and baking it. It's surprisingly good and if you use the Duncan Hines Butter Recipe cake mix, it tastes a little less artificial. It's sweet, fruity and crunchy, very similar to a fruit crisp. It's good warm with ice cream or cold straight from the fridge. I used cherry pie filling, but blueberries, blackberries or peaches would be good too. Get your kids in the kitchen and bake- Fall is here, so celebrate! And if you don't have kids of your own, invite the neighbors kids over or go rent some for the day :-)

If you're interested in a pumkin crunch cake, click the link.

Pineapple Cherry Crunch Cake adapted from Paula Deen

  • 3/4 cup butter, plus more for dish
  • 1 (20-ounce) can crushed pineapple, in juice
  • 1 (20-ounce) can cherry pie filling
  • 1 (18.25-ounce) box yellow cake mix
  • 1 cup chopped pecans (optional)

Preheat oven to 350 degrees F. Butter a 13 by 9-inch casserole dish.

Melt 3/4 cup butter in saucepan over low heat.

Pour the pineapple with juice into the casserole dish and evenly spread cherry pie filling on top.

Cover with dry yellow cake mix and top with pecans, if using. Drizzle with melted butter and bake for 35 to 45 minutes.

NOTE: I was reading the reviews for this recipe, and someone complained because she was expecting a cake, not a fruity crisp. So please note that this is not your typical fluffy iced cake, it's a cake mix used to make a crisp topping :-)

If you haven't already, go enter my giveaway sponsored by Novica!

Tuesday, September 7, 2010

Sam's 4th Birthday Cupcakes

I baked these cupcakes for my son's 4th birthday last month. I've mentioned before that I have 2 sons, but they aren't with me. I don't talk about them on here a whole lot because this blog is a cheerful place and I use it to share photos and recipes, not to talk about my personal life. Just thinking about my boys makes my heart sing and I am so proud to be their mother, but the fact that they died is sad and I understand why others wouldn't want to read about them all the time. I love Sam and Jack with all my heart but I don't want to be a downer so when I want to talk about them and their memory I talk about them on my other blog. Still, today I needed to talk about my first born, Sam, so I hope you'll stick around for a bit. I don't write about them so you'll feel sorry for me, I write about them because they are my children.

On August 15th, my Sam would have been 4 years old. It seems like just yesterday he was born and other times it seems that this has been my reality for an eternity. Both Sam and Jack were born still in the second trimester 6 months apart. I have a weak cervix and it gave out under the weight of the babies, which caused them to be born early. They were fully formed babies, just too little to live outside the womb. I never got to bring them home, sing them lullabies or nurse their wounds, but I can parent them the only way I know how. One of my jobs as their mother is to make their birthdays special.

This year for Sam's birthday, the in-laws came over, we went to dinner and we had a balloon release. I also made these hummingbird cupcakes with mascarpone frosting. I wanted something that a 4 year old would actually eat and enjoy so I went for a moist fruit filled cupcake and a light and fluffy, but not too sweet frosting. I've made Hummingbird Cake before, but I didn't want too much cake leftover so I halved the recipe and baked them into cupcakes. I have to thank Maranda for reminding me how good this cake is. It's not too dense, but it is a substantial cake. It's sweet from the crushed pineapple and mashed bananas so I opted for a fluffy mascarpone mousse-like frosting rather than cream cheese icing. The combination really was nice and I can only hope that Sam would have liked them as much as we did.

Hummingbird Cupcakes adapted from Paula Deen

  • 1 1/2 cups self-rising flour
  • 1 cup granulated sugar
  • 6 Tbsp. vegetable oil
  • 1/2 cup finely chopped pecans
  • 1 very ripe large banana, mashed
  • 4 ounces (1/2 cup) crushed pineapple, with juice
  • 1/2 teaspoon pure vanilla extract
  • 1/2 teaspoon ground cinnamon
  • 2 large eggs, beaten

Preheat oven to 325 degrees F. Line 15 cupcake indentions with liners.

In a large mixing bowl, combine flour, sugar, oil, pecans, bananas, pineapple, vanilla, cinnamon and eggs. Stir well with a spoon until the batter is smooth.

Divide the batter evenly amongst 15 lined cupcake indentions, filling about 2/3 full. Bake for 22-26 minutes or until the tops spring back and are golden. Cool in the tins for 10 minutes then remove and place on a wire rack til completely cool.

Makes about 15 cupcakes.

Mascarpone Frosting from JustJENN Recipes

  • 8 ounces mascarpone cheese
  • 1 cup powdered sugar
  • pinch of salt
  • 1 teaspoon vanilla extract
  • 1 1/2 cups heavy whipping cream

In a medium bowl combine mascarpone cheese, sugar, salt and vanilla. Stir together until smooth, and set aside.

In the bowl of an electric mixer beat whipping cream until stiff peaks form – don’t overdo it, the last thing you want is for it to curdle.

Fold the whipped cream, into the mascarpone mixture until combined.

Pipe or spoon a generous amount onto cooled cupcake.

Makes enough to generously frost about 18-20 cupcakes.

NOTE: I used pecan halves and candied pineapple for garnish.

Happy birthday my sweet boy!

Saturday, September 4, 2010

Sliders and Pops: A Labor Day Two-fer

It's finally September and cooler weather is here! I feel like half of America wants Fall to be here already and the other half is wishing Summer would stick aound just a little longer. I fall somewhere in between. Autumn is my favorite season (and dog!) so I wish it for it year-round but I'm not quite ready for Summer to be over. I just wish we had cooler temps. I'm not a fan of 105 degree days, where are the 80's? Heck the other day it was after 9pm and still in the 90's- that's crazy!

This menu reminds me of Summer. It's simple and fuss free and can be eaten with your hands. Both can be made ahead of time and require very little time to get them on in your belly. Of course they can be prepared and eaten any time of year but I think they're perfect for rounding out the last few days of Summer. They can be eaten as snacks or as a full meal and kids love them as much as the adults do too. The nice thing about these recipes is you can make as many or as few you need.

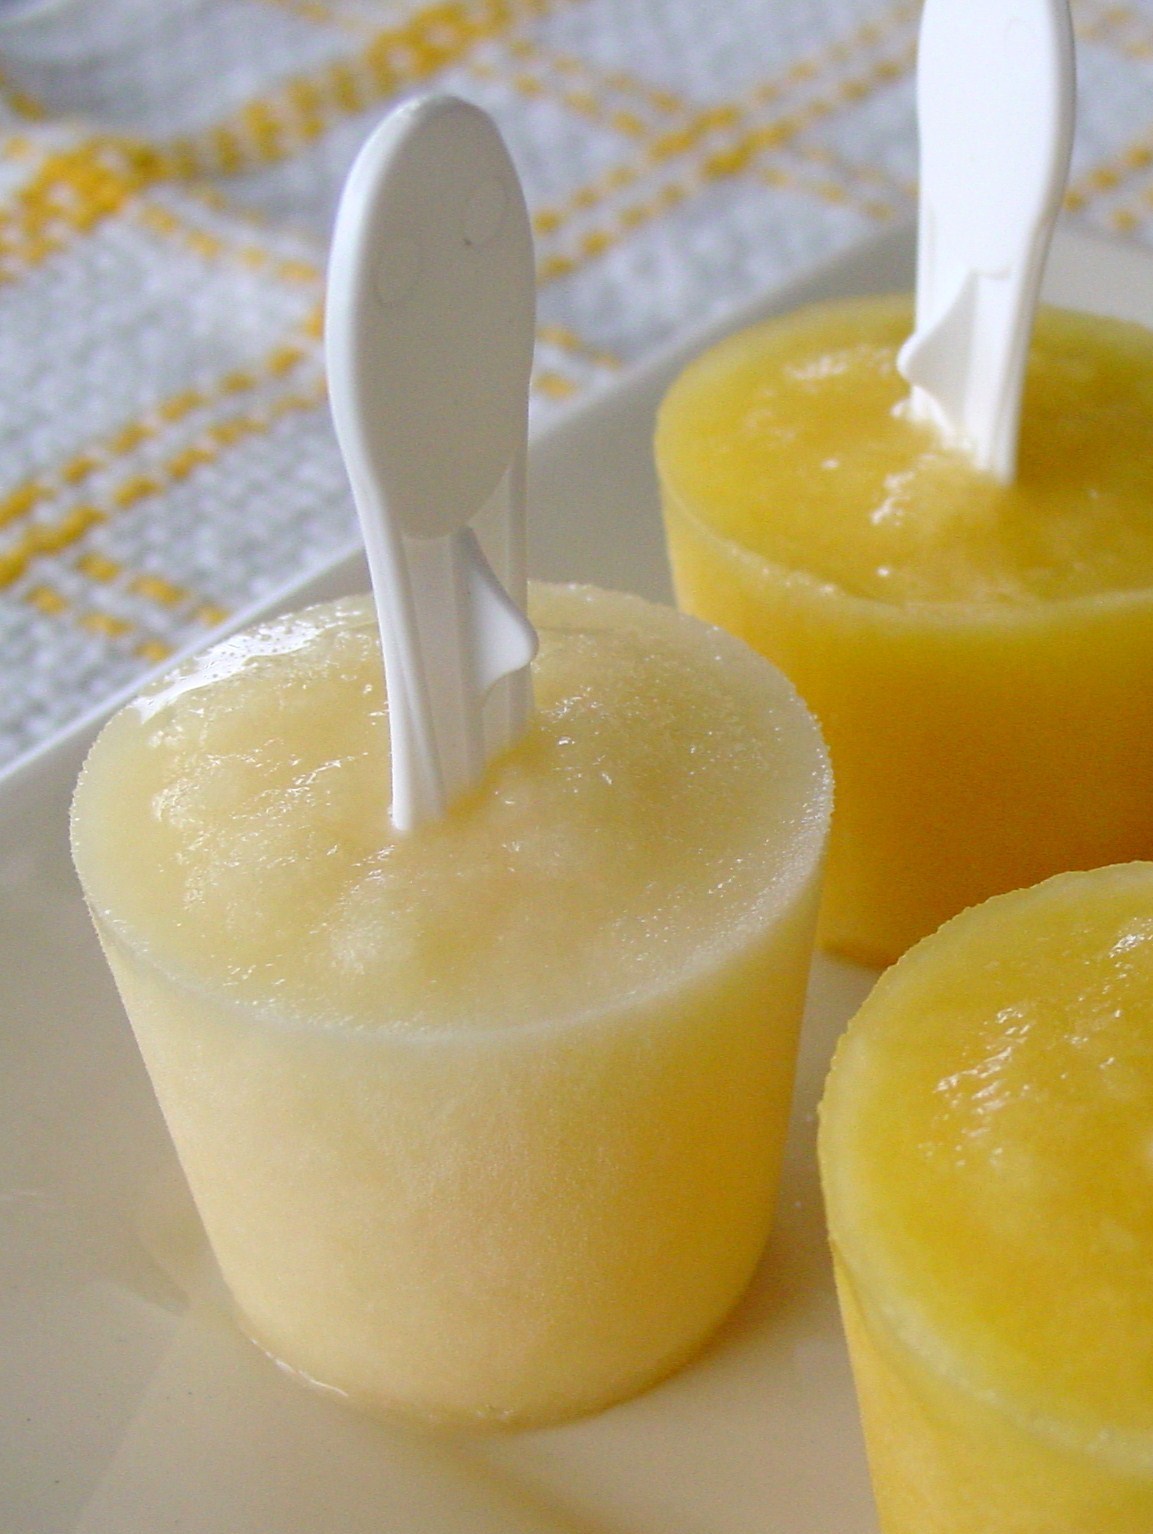
I made these ham and swiss sliders on sweet Hawaiian bread, but any soft white dinner roll will do. There's not one element that stands out above the other, but it's the buttery poppyseed mustard sauce that tops it all off that makes it unique. These popsicles taste like a slice of fresh pineapple. The original recipe called for milk but I did an experiment and made half with pineapple juice and those turned out to be better looking and tasting. And you don't need any fancy molds to make them, just fill up paper cups and put a stick in them. Make enough to feed your family or a crowd this Labor Day!

Ham and Swiss Sliders adapted from Christy

  • 12 good white dinner rolls (I used Hawaiian rolls)
  • 12 pieces good honey ham
  • 12 small slices Swiss cheese
  • 3 Tbsp. mayonnaise
  • 3 Tbsp. miracle whip

Poppy seed sauce:

  • 1 1/2 tsp. poppyseeds
  • 2 tsp. yellow mustard
  • 1/2 stick butter, melted
  • 1/2 tsp. dried minced onion or 1 1/2 tsp. fresh minced onion
  • 1/4 tsp. Worcestershire sauce

In a small bowl, mix together mayonnaise and miracle whip. Cut the rolls in half and place cut side up. Spread onto both sides of the center of each roll. Place a slice of ham and a slice of Swiss inside of each roll. Close rolls and place them into a large baking dish or heavy cookie sheet. Place very close together.

In a medium bowl, whisk together all of the poppy seed sauce ingredients. Pour evenly over all of the sandwiches. Let sit 10 minutes or until butter sets slightly.

Cover with foil and bake at 350 degrees for 12-15 minutes or until cheese is melted. Uncover and cook for 2 additional minutes. Serve warm.

NOTE: Sandwiches can be assembled a day ahead and kept in the fridge ready to bake.

Pineapple Pops adapted from Everyday Food

  • 3 cups fresh pineapple chunks (or one 14.5-ounce can chunks packed in juice, drained)
  • 1/3 cup pineapple juice or milk
  • ¼ cup sugar

In a food processor, combine pineapple chunks, juice or milk, and sugar; pulse until almost smooth, with some chunks of pineapple remaining.

Pour half the mixture into a medium bowl (or a glass measuring cup for easy pouring). Pulse remaining mixture until completely smooth; add to mixture in bowl.

Divide evenly among eight 3-ounce molds or paper cups, and insert wooden sticks. Freeze until solid, at least 4 hours or up to 2 weeks (cover with plastic wrap).

NOTE: The original recipe calls for milk to be added to the pops. I made half a batch with milk and the other with the reserved pineapple juice from the can. The juice was hands down more flavorful!

Hope you have a wonderful Labor Day weekend!

Monday, August 16, 2010

Cocktail Umbrella Not Included

I made this cake for my mother in-laws' birthday. In MARCH. Yeah, I know! We're gonna get past that fact and move on straight to this cake. Ever heard of Planters Punch? I never had until I found this recipe in Bundt Classics. There are a ton of really great recipes in this book all made for Bundt pans. Some of the recipes start off with a cake mix and others are from scratch. There are sweet cakes, savory recipes and glazes in this spiral bound book. There aren't many pictures but if you ever come across it, I highly recommend you check it out.

Okay back to this cake. It starts off with a cake mix and then you add some tropical flavors to it, like pineapple, orange rum and grenadine to add a nice rosy color. I'm assuming those are the flavors that are in Planters Punch as well. You just dump everything in the bowl, mix it up and it's in the oven in no time. One of the things that I liked about this cake was that it baked so completely level- meaning it didn't make a hump in the pan as it baked. I don't know why that thrilled me, but it did. It's the little things :-)

As I mentioned this cake starts off with a boxed mix, but it didn't taste like it at all. It had a wonderful tender crumb, was moist and had such a pleasant peachy color. I don't know how to describe the flavor as not one flavor stood out over the other. It was just good! I actually put a little too much glaze on this cake (is there really such a thing as too much glaze?) but my MIL scraped it all up and put it on her piece. I think that meant she liked it. If you're into into fruity umbrella drinks, you definitely need to try this cake!

Planters Punch Cake adapted from Bundt Classics

Printer Friendly Version

  • 1 (18.25 oz.) package yellow cake mix
  • 1/2 cup pineapple juice
  • 1/2 orange juice
  • 1/4 cup light rum (I used coconut rum)
  • 1/4 teaspoon rum extract
  • 3 tablespoons grenadine syrup
  • 1/3 cup butter, softened
  • 2 eggs

Heat oven to 325 degrees F. Grease and flour a 10 or 12 cup Bundt pan.

In a large mixing bowl, mix all the cake ingredients. Mix on medium speed for 2 minutes. Spoon into prepared pan.

Bake for 50-55 minutes or until a toothpick inserted in center of cake comes out clean. Cool 10 minutes then remove from pan. Place on rack and cool completely. If desired, drizzle with Vanilla Glaze (recipe below).

Vanilla-Rum Glaze from Monica H

  • 1 cup sifted powdered sugar
  • 2 Tbsp. butter, softened
  • 1/4 tsp. vanilla extract
  • 1/4 tsp. rum extract
  • 1-2 Tbsp. milk

In a medium bowl, mix sugar and butter. Add vanilla and rum extract. Gradually add milk until desired consistency is achieved. Mix until smooth.

For a thinner consistency, add more milk. For a thicker glaze, add more sugar.

Apply glaze to cake and let it set before serving.

Monday, July 12, 2010

A Taste Of The Islands

I'm embarrassed to tell you how long ago I made this fudge, so I won't. :-) Does it matter how long ago I made, as long as I'm sharing it with you now? I didn't think so either. I've made a version of this fudge before, last July for my mom's birthday. It was loaded with her favorite flavors- orange, cranberry and macadamia nuts. This version incorporates dried pineapple, coconut and nuts!

This summery concoction was requested by my mom's friend as a paid order. In fact she requested this flavor as well as the cranberry orange version and a semisweet chocolate and walnut fudge. This was my favorite of the three and it's so easy to throw together. You can use the basic recipe (below) and add any kind of flavorings, fruits, nuts, and chocolate to make it your own. Don't like nuts? Don't add 'em. Love dried fruit? Add more. It's that simple.

Pina Colada Fudge. Ever heard of that before? It's sweet and creamy, with a slight taste of rum in the background. The macadamia nuts and pecans add a nice crunch, while the dried pineapple adds a chewy factor. The toasted coconut flakes are kind of a hidden surprise. They add to the overall texture but they don't overwhelm the fudge. And since it's toasted it's not going to be stringy and get caught up in your teeth. You're welcome. Go make this for yourself or as a treat for someone else. You don't even have to turn the oven on, what are you waiting for?!

Pina Colada Fudge adapted from HERE

Printer Friendly Version

  • 1 (12 oz.) package white chocolate chips
  • 1 (16 oz.) tub cream cheese or vanilla frosting
  • 1/4 tsp. salt
  • 1/2 tsp. rum extract
  • 1/2 cup dried pineapple, chopped
  • 1/4 cup toasted flaked coconut
  • 1/3 cup chopped macadamia nuts
  • 1/3 cup chopped pecans
  • more nuts or fruit for garnish (optional)

1. Lightly butter an 8 x 8-inch baking pan or a 9-inch diameter pan*. Set aside.

2. Melt the baking chips in the microwave in a medium bowl.

3. Stir in the frosting, salt, extract, nuts and fruit until well combined.

4. Scrape into the prepared pan and sprinkle with additional nuts or fruit as garnish, if using.

5. Refrigerate for at least 1/2 hour or until firm. Cut it into squares to serve.

NOTE: *I used a silicone pan, so I skipped step one and it made popping out the fudge so easy.

This is the blueprint recipe for this fudge. You can use ANY combination of flavors to make your fudge uniquely yours. Have fun with it.

Easy Fudge from Nancy's Kitchen
  • 1 (12-ounce) package of baking chips
  • 1 (16-ounce) tub of prepared frosting
  • 1/4 teaspoon salt
  • 1/2 teaspoon extract of your choice
  • 3/4 cup nuts of your choice

1. Lightly butter an 8 x 8-inch baking pan or a 9-inch diameter pan. Set aside.

2. Melt the baking chips in the microwave in a medium bowl.

3. Stir in the frosting, salt, extract, and nuts until well combined.

4. Scrape into the prepared pan and refrigerate for at least 1/2 hour or until firm. Cut it into squares to serve.

I heart Pina Colada Fudge!

Saturday, March 20, 2010

A Ring Around The Rosy

This month's cake for The Cake Slice Bakers is another Southern classic- Pineapple Upside Down Cake. I love pineapple upside down cake and I've never come across one I didn't like. It is cake after all :-) So when the bakers chose this cake from Southern Cakes by Nancie McDermott I was giddy. But it's been a busy month and I didn't think I was going to have time to make it but I managed to squeeze it in by the hair of my chinny chin chin. I don't really have a hair though, quit looking!

This cake didn't get the greatest reviews. Some people really liked it and others thought the cake part could have been better. I fall somewhere in between. Because of the reviews I was hesitant to make it but I decided to bake a half batch in a smaller pan that way if I didn't like the cake it wasn't a total loss. It turns out, I did like the cake but it's not the best pineapple upside down cake I've ever had. The cake topping was buttery and sweet and the fruit softened and caramelized from the heat. The part where the syrup meets the cake gets a little gooey and sticky, which is fine by me. The cake itself had a good flavor but was a little heavy and ever so slightly gummy.

I think it could have been lighter, maybe the addition of another egg would help? I say this because I halved the recipe but I used the whole egg and it wasn't as dense as some others claimed. Also I think the method in which this cake is made also results in the texture of this cake. You add the butter to the dry ingredients instead of creaming the butter and sugar together. Maybe it doesn't have enough air incorporated into it? I don't know, I still thought it was good but this one was better in my opinion.

In other news, I was having a bad day when I made this cake and I thought I'd go drown my sorrows in the cake batter but it's cheery appearance and sticky cherries actually turned my frown upside down. So if you need a lift, make this cake. It's cheaper than a therapist :-)

Pineapple "Turn Your Frown" Upside Down Cake adapted from Southern Cakes

Printable Version (unadapted version)

Pineapple Topping:

  • One 20-ounce can pineapple rings (save the juice)
  • 4 Tbsp butter
  • 2/3 cup firmly packed brown sugar
  • 10 maraschino cherries

Cake:

  • 1 1/2 cups all purpose flour
  • 3/4 cup sugar
  • 1 1/2 tsp baking powder
  • 1/2 salt
  • 1/2 cup milk
  • 4 Tbsp butter, softened
  • 1 egg (I would suggest 2 eggs for a lighter batter)
  • 1 tsp vanilla extract
  • 2 Tbsp. pineapple juice

Heat the oven to 350F.

Drain the pineapple well but save 2 tablespoons of the juice for the cake batter. Melt the butter in a 10 inch cast iron skillet over medium heat. Or, put the butter in a 9 inch round cake pan and put it in the oven for a few minutes as the heat melts the butter.

Remove the pan from the oven or stove and sprinkle the brown sugar over the buttery surface. Place the pineapple rings carefully on top of the scattered brown sugar and melted butter, arranging them so they fit in 1 layer. (You may have a few left over). Place a cherry in the center of each ring, and set the pan aside.

In a large mixing bowl, combine the flour, sugar, baking powder and salt. Use a fork to mix them together well. Add the milk and butter and beat well with a mixer, scraping down the bowl once or twice until you have a thick, fairly smooth batter, about 1 to 2 minutes.

Add the egg, reserved pineapple juice and the vanilla. Beat for 2 minutes more, stopping once or twice to scrape down the sides.

Carefully pour the batter over the pineapple arranged in the skillet or cake pan and use a spoon to spread it evenly to the edges of the pan. Bake for 35 to 40 minutes until the cake is golden brown and springs back when touched lightly in the center. Cool in the skillet or pan for 5 minutes on a wire rack.

With oven mitts, carefully turn out the warm cake onto a serving plate by placing the plate upside down over the cake in the pan and then flipping them over together to release the cake onto the plate. Serve warm or at room temperature.

NOTE: I halved this recipe and baked it in a 6 inch cake pan. I also used 1 whole egg in the cake and used a whisk to mix it all together as to not overbeat it.

Please show some love to the other Cake Slice Bakers!

Related Posts with Thumbnails