Showing posts with label Candy. Show all posts

Wednesday, January 16, 2013

Playing Catch Up With Lots of Random Photos

I was going to share with you my top recipes of 2012 but I haven't gotten my act together and compiled that list yet. Instead I thought I'd share some pictures that I've taken over the last couple months of recipes that I've made, sunsets from my backyard and a few pics of Hayden thrown in for good measure. And a caterpillar- can't forget him! Sound good? Here we go!

I photographed this breakfast casserole for a holiday magazine. This time I made it with ham and cheddar. Looks good enough to eat! One of my favorite casseroles to eat for breakfast, lunch or dinner. 


This boy loves marshmallows and steals them out of the pantry every chance he gets. This particular time, it was for breakfast. Busted!

I made this pecan cheesecake pie for Thanksgiving but never got around to taking any more photos of the completed pie, then it all got eaten and there was nothing to take pictures of. It's a pecan pie with a layer of cheesecake filling in it. It was yummy served cold!


My little man stirring up something delicious. 

 
I searched high and low for the perfect pumpkin pie recipe. My brother absolutely loves it and every year he buys several pies from a BBQ restaurant here in town. To be honest they're really not that good. They're kind of dry and bland so I made sure to make an extra special pie for him. And you know what? It was delicious and spicy and creamy and tender. One of the best pumpkin pies I've ever eaten, actually. My brother said it was good but immediately followed it up with a criticism. That's pretty typical. Come to find out, he likes cheesecake and pumpkin pie to be hard and dry in texture. That's his personal preference, but if you like smooth and creamy and spicy pumpkin pie with a special ingredient, this pie is for you!

Fuzzy little guy!
I made these for Christmas as plate decorations for the neighbors to go along with their Christmas cupcakes. I also had a few with cocoa. :-) These are so easy to make. Just like your pan with wax, parchment or a Silpat. Put your mini candy canes together to form hearts, fill with melted chocolate and sprinkle with non-pareils. Allow to set up at room temperature and you're done. 


Didn't have time to get family photos done this year, so I took some of Hayden by himself in from of the tree to use on our Christmas card. He's a pretty handsome guy, if I say so myself!


Here we are Christmas morning, before opening gifts. I set the time on the DSLR and kept running back and forth to make sure the lighting and composition were set up correctly. About 50 pictures and a not-so-amused-husband later, I realized I didn't even bother to brush my hair. Oh well. Merry Christmas!

And lastly, my Aunt Mary's Sugar Cookies. Made with powdered sugar instead of granulated so they're extra tender. These really aren't the kind you top with icing, but they're still fun to decorate with colored sugar and sprinkles. I make these every year with different cookie cutters. 

Hope you enjoyed my catch up post. Have a great rest of the week!

~Monica

Saturday, December 22, 2012

Last Minute Treats and Handmade Gifts


I am so cookied out! I keep thinking of other cookie recipes I want to make, but in reality, I really don't want to stand on my feet in the kitchen for hours on end, reaching into the hot oven. After baking 22 dozen cookies, I'm looking for an easy way out. And these cookie sandwiches are the golden ticket. 


I found these on my friend, Michelle's blog, One Ordinary Day and they could not be simpler. The hardest part was unwrapping all the shiny gold foil off the chocolate covered caramels, the rest was just easy peasy. You line up your crackers, top them with Rolos, bake for 3-5 minutes, then top with another Ritz and you're done. From start to finish, these took me about 10 minutes, so if you're in need of a quick sweet treat, these are for you. 


Rolo Stuffed Ritz Crackers adapted from One Ordinary Day

Printer Friendly Version 
  • Rolo Candies
  • Ritz Crackers

Preheat oven to 350 degrees F. 

Place Ritz crackers on a cookie sheet face side down, and top each one with a Rolo candy.

Bake for 3-5 minutes to soften (but not fully melt) the Rolos, Remove from the oven and immediately top  the Rolos with a second Ritz cracker. Cool completely before storing in an airtight container. 

NOTE: There are about 55 Rolos candies per bag. 


If you need a last minute gift for the grandparents, these salt dough ornaments are perfect. You only need three ingredients to make the dough, and acrylic paint and ribbon to embellish them. You can make them as fancy or as simple as you want, it's the handprint and the memory of spending time with your child that's important. 

Salt Dough Handprint Ornaments adapted from Once A Month Mom 

  • 1 cup flour
  • 1/4 cup salt
  • 7 tbsp water
  • Round cookie cutter large enough to go around the handprint
  • 1 drinking straw
  • Craft paint
  • Ribbon
Preheat oven to 250°F. 

Mix together flour, salt, and water. Knead for 10 minutes til smooth and no longer sticky. Add a little flour at a time, if necessary.  

Roll out the dough to no more than 1/4-inch thick, then use the cookie cutter (or glass) to make rounds. Press a hand into dough. If you’re doing this with really little ones, you may have to go back and make deeper impressions of their hands with your fingers or a kitchen utensil–the deeper the impression, the better your ornaments will turn out. 

Use a straw to poke a hole in each ornament (this is where the ribbon will go later). Place on a baking sheet and bake for 1 1/2 to 2 hours or until ornaments have completely dried out. 

Remove the tray from the oven, once they're cool enough to handle, place ornaments on a cooling rack and allow to cool before painting. Paint or decorate as you want. When the decorations have dried, thread ribbon through the hole. Hang on your tree. 

Sunday, April 15, 2012

Chocolate Monster Cookies from Baking Basics and Beyond- A Review and Giveaway!


A couple weeks ago I shared a recipe for Cowboy Cookies that had crushed cornflakes in them. I really liked that addition so when I was sent this cookbook, Baking Basics and Beyond by Pat Sinclair, for review I knew I'd be making Chocolate Monster Cookies. These cookies were LOADED with flavor from oats to cornflakes to little candy coated chocolates. What makes these cookies different is that there's cocoa in the dough. Why didn't I think of that?


This recipe makes a boat load of cookies- a whopping 8 dozen! I cut the recipe in half and made about 4 dozen large cookies, still quite a bit for sharing. I chose to add Spring colored M&M's to my dough but you could also use chocolate or butterscotch chips. The thing is, the dough is so flavorful I'd be happy without the added bursts of chocolate. And when have you ever heard me say that? These cookies were crisp on the outside and had a slight chew in the center. I liked them a minute or two underbaked for a chewier cookie. They were excellent with a tall glass of ice cold milk.


Baking Basics and Beyond is a great book. It's loaded with all kinds of basic information from how to grease and flour pans, to how to make whipped cream, melt chocolate to how to assemble and frost a layer cake to how to make the perfect pie crust and what "blind baking" means. There's a wealth of knowledge in this book. The recipes are thorough and come with Baker's Notes on how to achieve success with each baked good. There are both sweet and savory recipes in this book and while not each recipe is accompanied with a photo, the ones that are included are great quality and in color. With over 120 recipes in this book, there is something for everyone- most are from scratch but there are a couple that call for boxed brownie mix or jarred caramel sauce. This paperback is perfect for both beginner and skilled bakers and would make a great gift or a nice addition to your cookbook collection.


Chocolate Monster Cookies from Baking Basics and Beyond
Printer Friendly Version 
  • 3 1/3 cups all-purpose flour
  • 1/2 cup unsweetened cocoa
  • 2 teaspoons baking powder
  • 2 teaspoons baking soda
  • 1 teaspoon salt
  • 2 cups butter, softened
  • 2 cups granulated sugar
  • 2 cups firmly packed brown sugar
  • 2 teaspoons vanilla
  • 4 eggs
  • 2 cups quick cooking oats
  • 2 cups cornflakes, lightly crushed
  • 2 cups semi-sweet chocolate chips, butterscotch chips or 12 oz. M&M's
Heat oven to 350 degrees F with oven rack in middle. Lightly grease cookie sheets (I used parchment paper).

Mix flour, cocoa, baking powder, baking soda and salt together in a very large bowl.

Beat butter, granulated sugar and brown sugar in a bowl of a heavy-duty mixer on medium-high speed until creamy, scraping down sides of bowl once or twice. Add the vanilla and eggs and mix well.

Reduce mixer speed to low and add the flour mixture. Scrape down sides of bowl and beat til dough forms.

Scrape dough back into the very large bowl. Add the oatmeal, corn flakes, and chips and stir until well mixed. (I added the fillings to the mixing bowl and stirred them in by hand).

Using a 1/4-cup ice cream scoop, drop dough onto cookie sheets. Drop 6 cookies onto each cookie sheet.
Bake 15-20 minutes or until set in the center and the edges are lightly browned. For softer cookies, reduce baking time slightly. The cookies will still look a little moist in the center. Cool cookies 1 minute on the cookie sheets them place them on wire cooling racks.

These cookies should be stored loosely covered at room temperature.

Makes about 8 dozen cookies.

Reprinted with permission from Baking Basics and Beyond, Second Edition, by Pat Sinclair, Agate Surrey, December 2011.


GIVEAWAY: I mentioned there was a giveaway, right? Agate Publishing is giving away one copy of Baking Basics and Beyond (Second Edition) by Pat Sinclair to one lucky reader. All you have to do is leave me a comment on this blog telling me why you want to win this book. I'll announce a winner on Friday, April 20th. One comment per person, please.

Thursday, December 22, 2011

Cranberry Raisinets and A Shabby Apple Giveaway (CLOSED)

December has flown by and Christmas is quickly sneaking up on me. Stop the time- I'm not ready! I need another 4 weeks to get ready, decorate the house, wraps gifts, send out cards and do my holiday baking. Surprisingly (or not) I haven't made a single cookie this month. Heck, my Christmas tree just got decorated yesterday! True story. Usually by this time of year, I have a stash of baked goods already in the freezer ready to be placed into cookie boxes. This year my freezer holds nothing but cartons of half eaten ice cream, frozen meals and a backstock of breastmilk. haha!

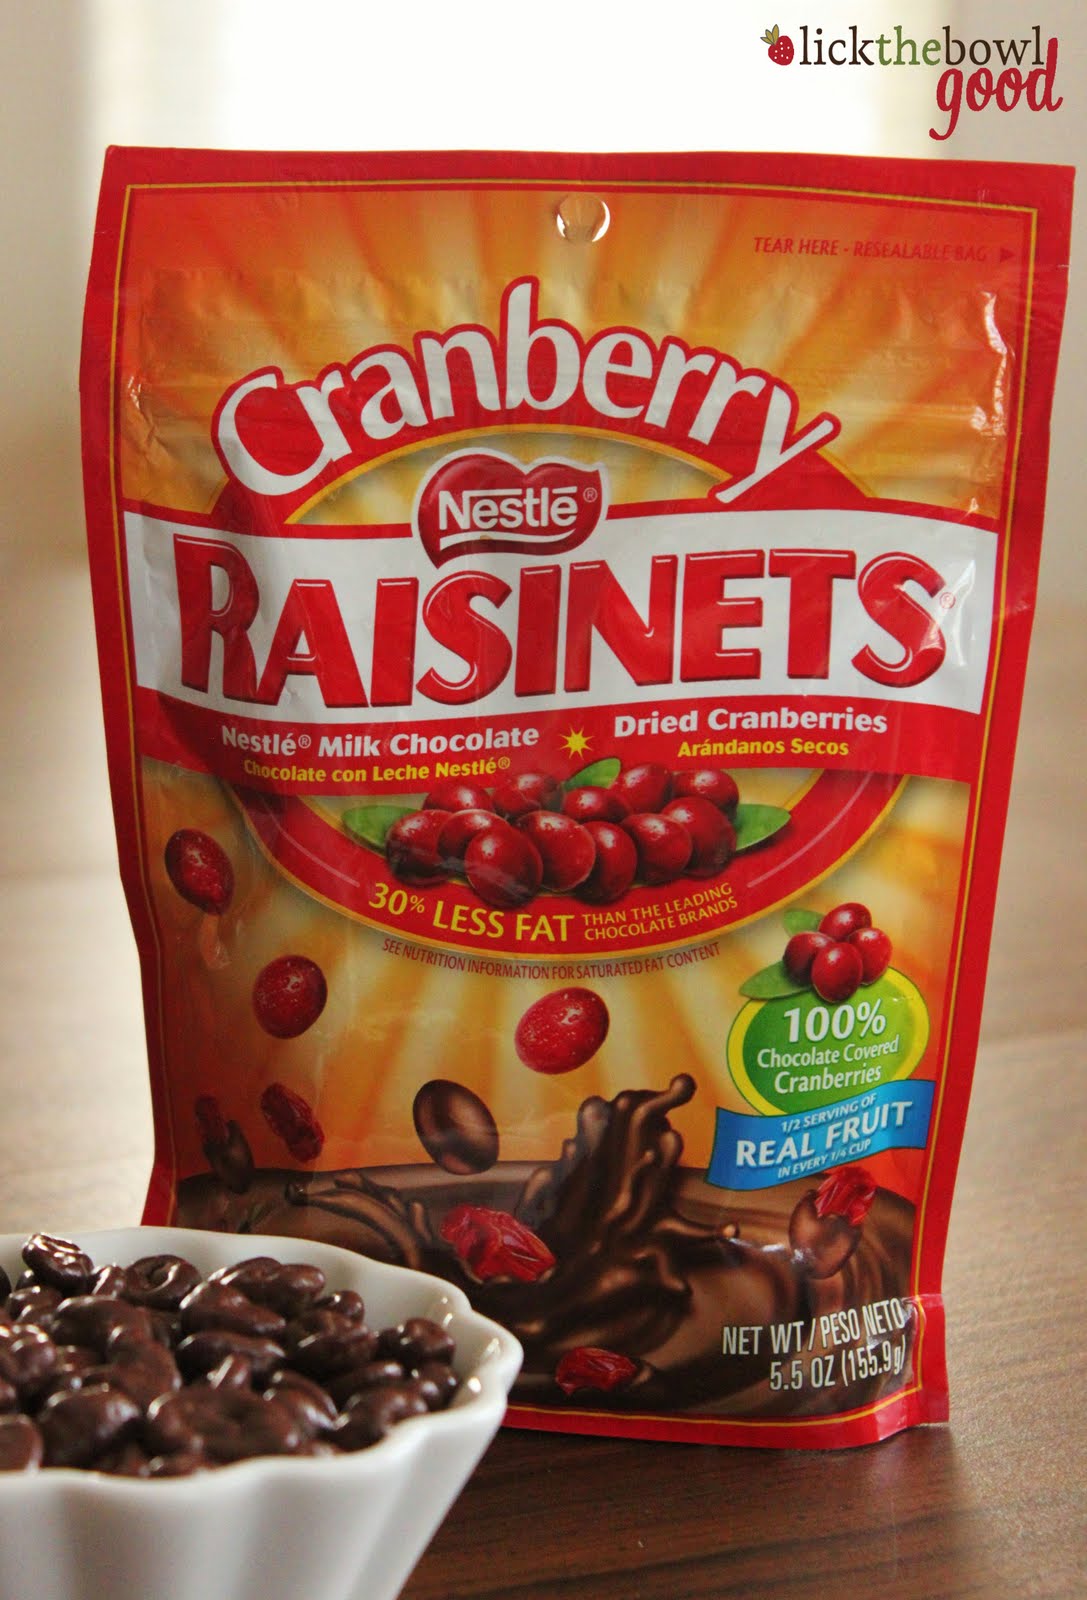
I did, however, make these cookie bars last week to take to my in-laws house for dinner. I discovered that Raisinets now makes a cranberry version and I couldn't wait to bake them into something. Instead of raisins covered in milk chocolate, they're dried cranberries in milk chocolate and they were really good. Very similar to the original, but a little more tart.

I bought a couple bags (found in the candy aisle) and incorporated them into some chewy buttery oatmeal bars. I added a handful of vibrant dried cranberries to the batter for color and added flavor. To say I liked them was an understatement. This entire pan was gone in 2 days. Just looking at the pictures makes me want to make them again. I bet they'd be good warmed slightly with a scoop of vanilla on top too. Good thing, I have some in the freezer. I'll just have to make another batch of these bars!

And the winner of Sugar, Sugar: Every Recipe Has A Story is #45 Jeanette of The Whimsical Cupcake. Congratulations Jeanette! I enjoyed your story about your meatball mishap and hope you enjoy this book. Please email me with your address and this book will be shipped out to you. For another giveaway, head down below.

Chocolate Cranberry Oat Bars adapted from Quaker and Monica h

Printer Friendly Version

  • 1 cup (2 sticks) unsalted butter, softened
  • 3/4 cup firmly packed brown sugar
  • 1/2 cup granulated sugar
  • 2 eggs
  • 1 teaspoon vanilla
  • 1 1/2 cups all-purpose flour
  • 1 teaspoon baking soda
  • 1 teaspoon ground cinnamon
  • 1/2 teaspoon salt
  • 3 cups Quaker Oats (old fashioned, uncooked)
  • 1 cup Cranberry Raisinets
  • 1/2 cup dried cranberries

Heat oven to 350°F.

In large bowl, beat butter and sugars on medium speed of electric mixer until creamy. Add eggs and vanilla; beat well.

Add combined flour, baking soda, cinnamon and salt; mix well. Add oats, Cranberry Raisinets and dried cranberries; mix well.

Press dough onto bottom of an ungreased 9x13-inch baking pan. Bake 30 to 35 minutes or until light golden brown. Cool completely in pan on wire rack.

Cut into bars. Store tightly covered at room temperature.

The generous folks at Shabby Apple would like to offer one of the readers here at Lick The Bowl Good one of their beautiful aprons! How cool is that?! Shabby Apple is an online boutique of women's dresses, aprons and accessories. They have such beautiful things and I could truly spend all day adding things to my cart on their site. But today we're talking aprons so let's get on with the giveaway. Their vintage-inspired cheery aprons are a part of the Boysenberry Pie Collection and each apron comes complete with a recipe for its namesake dessert. Click HERE to see their beautiful aprons. I am partial to the Wildberry Pie apron- so pretty!

In order to enter this giveaway, there are a few things you must do.

  1. You must "Like" Shabby Apple on Facebook- http://www.facebook.com/pages/Shabby-Apple/56291792791
  2. Go to ShabbyApple.com and pick your favorite apron, then come back here and leave me a comment on this post telling me you "liked" them on Facebook and which apron you would like to have.

Winner must have a USA shipping address to be eligible for entry. Winner will be chosen in a few days. Best of luck!

Friday, March 18, 2011

Cookie Monster Cookies and A Thank You

I have to tell you that as I read through the comments on my last post, I smiled, then I cried. I was so overwhelmed by you all and your kind words. I can honestly say that I felt and still feel, loved, supported and blessed. I thank you all so very much from the depths of my heart. I always knew there were wonderful people out there, I'm just thankful that I have you in my life. You have no idea what your words do for me. We are forever grateful for your prayers for us and this little one. Please keep them coming and thank you.

I haven't been baking much lately. I haven't had any morning sickness with this pregnancy (thank goodness!) and while it seems I wake up starving every morning, food doesn't really do it for me. I am eating, but portions are small. There have been a few cravings though, and a big fat salad was one of them. Go figure. There were also a few days where I wanted key lime pie and pineapple upside down cake, but after a slice I was done. I also haven't had much energy the past few weeks since the surgery to bake or cook or stand for longer than 20 minutes so these cookies are from last April.

I made these m&m cookies a while back for my father-in-law. He is a true cookie monster! And for some reason he keeps buying those under baked gummy ones from the grocery store bakery. They're really not that great but because they're convenient and he's not picky, he eats them. I've made these cookies before and they really are good so I decided to make a batch just for him. They're buttery and crisp, have great vanilla flavor and the m&m's are an added bonus. If I remember correctly, he ate them all by himself and did not share :-) This weekend is his birthday and while I won't be making these cookies for him, I will be making him a delicious birthday cake. Stay tuned for it.

Red's Ultimate M&M's Cookies from M&M

Printer Friendly Version

  • 1 cup butter or margarine, softened
  • 1/2 cup granulated sugar
  • 1/2 cup firmly packed light brown sugar
  • 1 large egg
  • 1 teaspoon vanilla extract
  • 2 cups all-purpose flour
  • 1/2 teaspoon baking soda
  • 1/8 teaspoon salt
  • 1- 12 ounce package M&M'S

Preheat oven to 350°F.

In large bowl, cream butter and sugars until light and fluffy; beat in egg and vanilla.

In medium bowl combine flour, baking soda and salt; blend into creamed mixture. Stir in M&M's.

Drop by heaping tablespoonfuls about 2 inches apart onto ungreased cookie sheets.

Bake 10 to 13 minutes or until edges are lightly browned and centers are still soft. Do not overbake. Cool 1 minute on cookie sheets; cool completely on wire racks. Store in tightly covered container.

NOTE: I like to section out the cookie dough with an ice cream scoop then I place the m&m's on top of the mounded dough before baking to ensure that the candy stays on top of the cookie. But feel free to mix the candy directly into the batter- it all tastes the same :-)

P.S. I am waaay behind on reading your blogs. Please be patient with me, but know that I will make it there soon, I promise. I miss you guys. Thanks for understanding but all this baby wants to do is sleep!

Sunday, February 20, 2011

Cake With A Crunch

I know I've been MIA lately, but I'm hoping this cake will more than make up for it. If you like cake, and coffee, and chocolate covered Heath toffee bits, then you'll love this cake. These are all some of my favorite baking flavors so this cake was delicious to me. It doesn't look like much, but it's packed full of flavor with an espresso laced cake, and a buttery toffee crumble on top. It's very simple and ready in less than an hour, from start to finish.

I do have some good news in that I'm finally feeling better. I still have a little congestion and I managed to get my brother and husband sick in the process but we are finally back in the game and doing much better. Although my brother does not admit to being sick. He says sickness is all a state of mind, yet he was asking for cough syrup and his throat was hurting and he was congested like the rest of us. Yeah okay, if you say so. I'm mentioning my brother because his birthday was Thursday when I made this cake. He was staying with us for about a week and left right before I made this so he didn't get to taste it. But I did think of him while I ate it :-). Happy 30th birthday Joe!

This cake had a great contrast of textures. The cake base was moist and tender but the crumbly streusel topping was crunchy and sweet. I really like coffee flavored things, but if you're not a fan, the instant espresso could easily be omitted and you'll be left with a vanilla batter that would still be delicious with the chocolate and toffee. Lauren Chattman (the author of this book) says this cake was developed because of a love for an ice cream with similar flavors. I don't know what ice cream flavor that would be, but I want some! To check out all the other Cake Slice Bakers, click the link.

Coffee Heath Bar Cake from Cake Keeper Cakes

For the Cake:
  • 1½ cups all purpose flour
  • 1 Tbsp instant espresso powder (optional, see note)
  • 1½ tsp baking powder
  • ½ tsp salt
  • ½ cup (1 stick) unsalted butter, softened
  • 1 cup packed light brown sugar
  • 1 egg
  • 1 egg yolk
  • 1½ tsp vanilla extract
  • 1 cup milk

For the Streusel:

  • 4 Heath bars (1.4 oz. each) chopped, or 1 cup prechopped Heath bits
  • 2 tbsp light brown sugar
  • 2 Tbsp all purpose flour
  • 1 Tbsp butter, softened

Preheat the oven to 350F. Grease a 9-inch round springform pan.

For the Streusel: Combine the Heath toffee bits, brown sugar, flour and butter in a medium mixing bowl. Work the mixture with your fingers until it resembles large crumbs. Refrigerate until ready to use.

For the Cake: Combine the flour, espresso powder, baking powder and salt in a medium mixing bowl.

Combine the butter and brown sugar in a large mixing bowl and cream with an electric mixer on medium-high speed until fluffy, about 3 minutes, scraping down the sides of the bowl as necessary.

With the mixer on low speed, add the egg, egg yolk and vanilla.With the mixer on low speed, add a third of the flour mixture and then half the milk, scraping down the bowl after each addition. Repeat, alternating the flour and milk, ending with the flour.

Scrape the batter into the prepared pan and smooth into an even layer with a spatula. Scatter the streusel onto the batter, distributing it evenly over the cake.

Bake the cake until golden and a toothpick inserted in the center comes out clean, 55 to 60 minutes (Mine was done in 50 minutes). Let the cake cool in the pan on a wire rack for 5 minutes. Release the sides of the pan and use a large spatula to slide the cake from the pan bottom to onto a wire rack.

Cool completely, cut into wedges and serve. Store uneaten cake in a cake keeper or wrap in plastic and store at room temperature for up to 3 days.

NOTE: If you don't enjoy the coffee flavoring, it can be omitted from the recipe.

Wednesday, October 27, 2010

Halloween Recipe: Black Cat Cookies

I made these cookies with the little guy I nanny for. And they may or may not have been used as a bribery tool. :-) You see the little guy doesn't eat very much. His mom packs his lunch for school, but he rarely eats unless it's mac n' cheese or dinosaur shaped nuggets. He likes peanut butter and jelly but he goes to a peanut-free school, so that's not an option. She usually packs him leftovers from the dinner before but they end up coming back home, untouched. So in an effort to get him to eat either at school or at home- I don't care where he eats, the goal is to get nutritious food into him- I told him we could make these together. It worked!

Now it only worked for a week, but for a week, he ate pretty well. He always likes to get into the kitchen with me and bake and I've told him as a reward for being a good eater, we could bake up a treat a couple times a month. We'll see how that goes. He's been sick this week but we're going to bake up some pumpkin muffins for a Halloween party this Friday- he's dressing up as a pirate! I'll share the recipe soon, because they're simple and delicious! Back to the black cat cookies...I found these cuties at Coleen's Recipes, but I think the recipe originates from Taste Of Home. Coleen made these last year and I'm glad she shared them again this year because they're fun, tasty and definitely kid friendly!

The cookie dough is very stiff and uses quite a bit of cocoa, but it all works out. If you have a stand mixer, use it. If not then you will need some elbow grease for this one. The recipe states it makes 24 black cat cookies, but I thought they were kind of big and could be made a little smaller to stretch out the recipe to feed more people if necessary. I intended to use m&m's for the eyes since I don't like candy corn, but the little guy does so that's what I used. I think they're cuter this way anyway. They're crunchy on the outsides from being rolled in the sugar before baking and they're chewy on the inside. And if you let the kids help with this one, each cat will be unique and different. Just be sure to use caution when applying the candy because the cookie sheets are hot!

Black Cat Cookies adapted from Coleen's Recipes and Taste Of Home

Printer Friendly Version
  • 1 cup butter, softened
  • 2 cups sugar (plus more for rolling)
  • 2 eggs
  • 3 teaspoons vanilla extract
  • 3 cups all-purpose flour
  • 1 cup baking cocoa
  • 1/2 teaspoon baking powder
  • 1/2 teaspoon baking soda
  • 1/2 teaspoon salt
  • 48 candy corn candies
  • 24 mini m&m candies

Preheat oven to 350 degrees F. Line cookie sheet with parchment paper. Set aside.

In a large bowl, cream butter and sugar. Beat in eggs one at a time then and vanilla.

Combine the flour, cocoa, baking powder, baking soda and salt; gradually add to the creamed mixture until well incorporated.

Divide dough into 24 even pieces. Roll each piece of dough into 1-1/2-in. balls. Roll each ball in granulated sugar, then flatten with the bottom of a juice glass. (I flattened them with my palm, then coated them in sugar). Place 3 inches apart on cookie sheet lined with parchment paper. (You can grease your cookie sheets and forgo the the parchment paper, but since I only had one cookie sheet to work with, it was easier to remove the parchment with the cookies still on it to cool, while I baked another batch).

Pinch the top of the cookie in two places to form ears. For whiskers, press a fork twice into each cookie. Bake for 10-12 minutes in preheated oven.

Remove from the oven and immediately press on candy corn for eyes and m&m's for the noses. Remove to wire racks to cool completely. (If using parchment paper, slide the whole sheet to the rack to cool before moving the cookies since they're fragile when warm). The candy will set at the cookie cools.

Related Posts with Thumbnails