Showing posts with label Two-fer. Show all posts

Saturday, August 18, 2012

"Whatever Happened To Sunday Dinner?" Cookbook Review & Giveaway


Two savory recipes in a row! No, I'm not sick and yes, I have more sweetness coming your way, but first I have a cookbook to share with you- Whatever Happened To Sunday Dinner? by Lisa Caponigri. This is such a clever book. The concept behind this book is bringing back Sunday dinner. "Fifty-two menus are presented in the Italian tradition: an antipasto (usually a crostini to pass at the table), a primo (first course: almost always a pasta), a secondo (call it the main course) served with a single contorno (side dish) and finally, dessert. Every menu is different; not a single repeated."


Sunday dinner according to Lisa is not just about eating. It's about getting the family together in the kitchen and dividing up the tasks so that everyone is involved and contributing to the family meal, whether it's by chopping, baking, stirring or setting the table. "Sunday dinner doesn't have to be elaborate, just delicious." There are 260 recipe in this book to choose from. Obviously you don't have to follow each menu as written; you can mix and match recipes from different menus to create your perfect meal. The idea is to get comfortable in the kitchen, eat, linger at the table, relax and share the highlights of your week. "Sunday dinner is irreplaceable, the meeting place of memories that will last a lifetime."


You can feel Lisa's passion for Sunday dinner through her family photos, words and menus. As I read about her love of food and family, I started planning my own Sunday dinners. We often have Sunday dinner at my mom's house, but that usually means my mom does most of the cooking and I provide dessert. We all sit down together, share stories and laughter and enjoy a great meal. But I realized after reading Lisa's stories that we could all help out a little more and make it more of a family activity.  


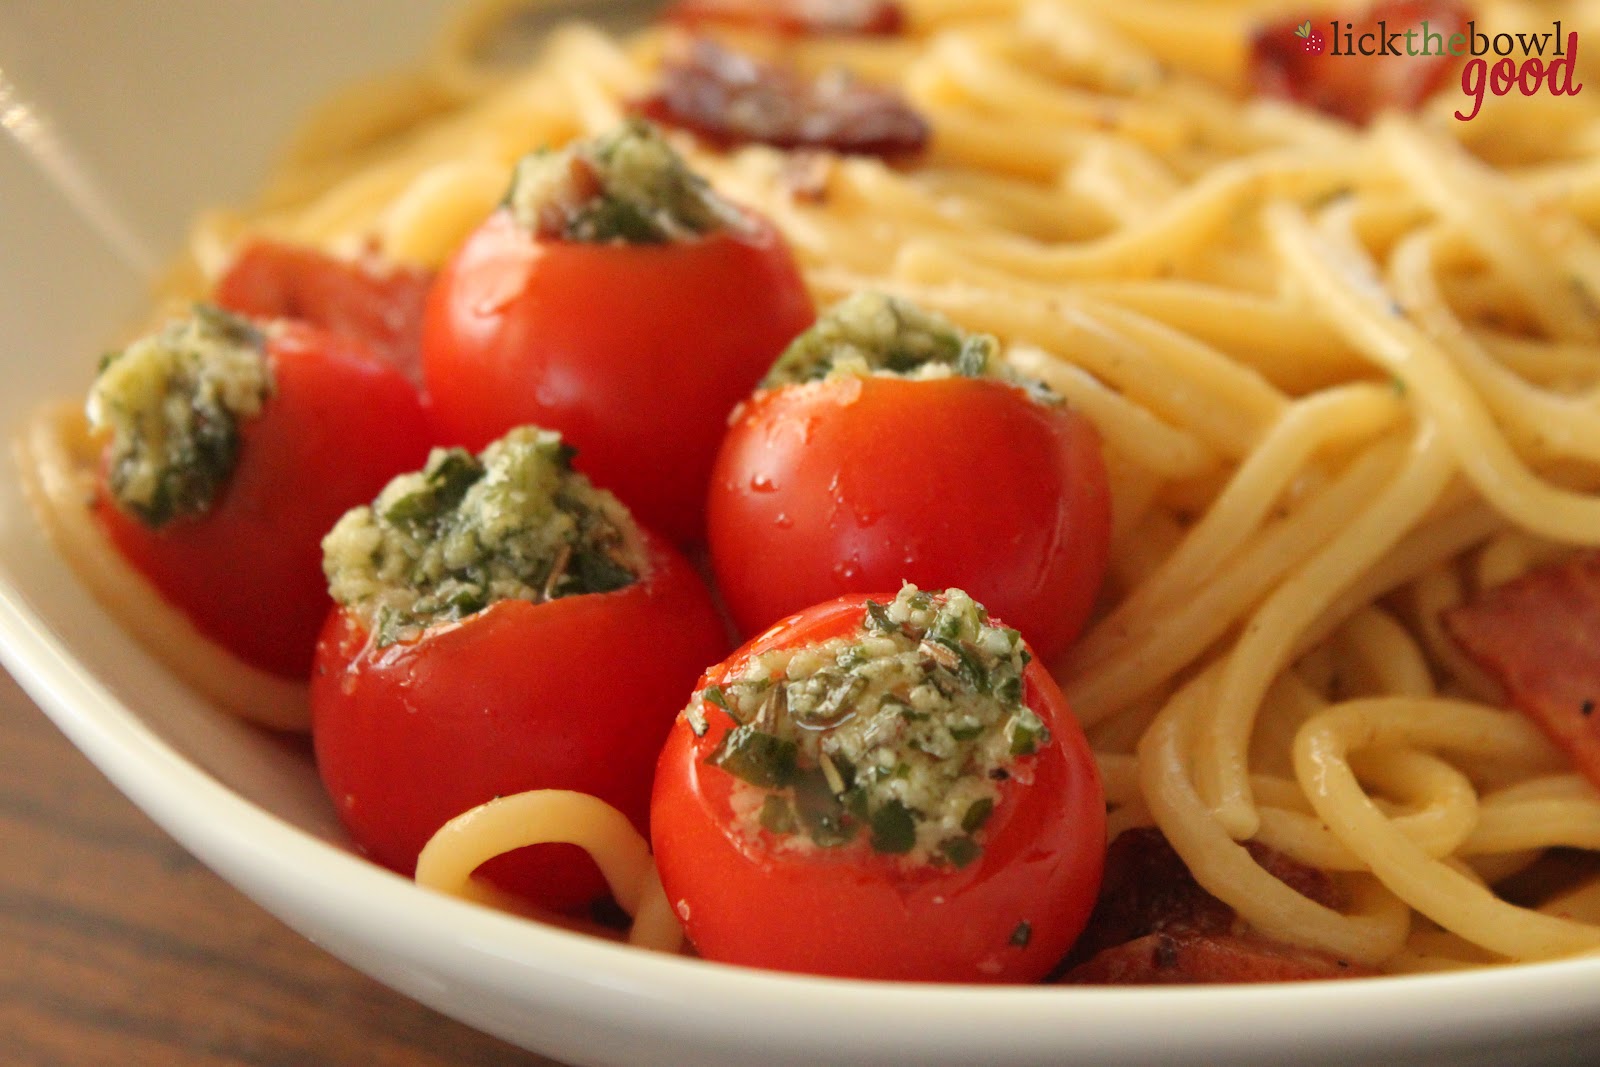
I flipped through page after page of this book. The recipes are enticing and the photos are gorgeous. This really is a handsome book, and hefty at that. And because there is so much variety, you could cook through it all throughout the week, not just on Sundays. I chose to make Pasta alla Carbonara and Pesto Stuffed Cherry Tomatoes, only to simplify things I used store bought pesto because it's what I had on hand. I made the pasta recipe as written but I added my thoughts and notes below. Both were delicious and easy enough to make on a  busy weekday. To win a copy of "Whatever Happened To Sunday Dinner?" scroll down. 


Pasta Alla Carbonara- Pasta with Eggs and Bacon

Printer Friendly Version 

Recipe serves 8, but can easily be halved-
  • 8 Tbsp. (1 stick) unsalted butter* (see note)
  • 1/4 cup extra-virgin olive oil
  • 1 pound thick-sliced bacon or pancetta, cut into 1-inch pieces
  • head of garlic, separated into cloves and chopped
  • 2 pounds of spaghetti
  • 6 large eggs
  • 2 cups grated pecorino romano 
  • freshly ground pepper
Bring a large pot of salted water to a boil. 

Meanwhile, melt the butter in a large skillet. Add the olive oil. Add the bacon and garlic and cook until the bacon is very crisp, taking care not to burn the garlic* (see note). Remove the bacon and garlic from the skillet, using a slotted spoon, and drain on paper towels. 

Add the pasta to the boiling water and cook until al dente, about 8 minutes. 

Meanwhile, in a large serving bowl, beat together the eggs, cheese, and pepper to taste. Stir in the bacon and garlic. 

Drain the pasta and add to the bowl. Toss until the pasta is well coated with the eggs and cheese mixture and serve immediately. 

NOTE: I didn't find that cooking the bacon and garlic in butter and olive oil was necessary. It just resulted in a lot of grease in a pan that had to be thrown away. The bacon yields a lot of fat on it it's own- next time, I'd crisp up the bacon then just before it's done, add the garlic. I found cooking the garlic along with the bacon just overcooked it.


Pomodorini Ripieni Di Pesto- Cherry Tomatoes Stuffed with Pesto

Printer Friendly Version 
  • 1 cup fresh basil leaves
  • 3-4 cloves garlic, peeled
  • 5 Tbsp. pine nuts
  • 1/2 tsp. sea salt
  • 1/2 cup extra-virgin olive oil, plus more if needed
  • 1/2 cup grated pecorino romano
  • 1 pound cherry tomatoes
Place the basil leaves, garlic, pine nuts, salt, olive oil, and Pecorino in a food processor or blender and process until smooth. If the pesto is too thick for your taste, add a little more olive oil. 

Cut the tops off the tomatoes. With a small spoon scoop out the seeds and pulp, taking care not to puncture the skin. Fill the tomatoes with the pesto and serve at room temperature. 

NOTE: Don't use grape tomatoes to make this- they won't stand upright and the filling will spill out.


To win a copy of "Whatever Happened To Sunday Dinner?" by Lisa Caponigri all you need to do is leave me a comment below telling me about your family meals. It doesn't have to be Italian, it can be anything. Do you have a tradition of getting the family together on a regular basis, cooking and eating? Tell me about it! 

Be sure to leave your contact info so if you win I know how to get a hold of you. I'll announce a winner next week and ship the book out. One comment per person, please. Giveaway open to US residents only. Good luck!

My little helper!

Sunday, January 2, 2011

Dinner and Dessert for Jeanette

I dedicate this post to my friend Jeanette from Starting Over. On Monday, I got an email with some heartbreaking news- Jeanette passed away on Christmas morning.

Jeanette and I became friends in early 2010. She found this blog and emailed me to tell me that she loved and trusted the recipes I shared. You see, Jeanette was in a car accident several years ago and suffered some brain damage that affected her olfactory gland, which in turn meant that she could not taste or smell. She enjoyed textures and she ate for health, but she couldn't really enjoy food like you and I do. She relied on the people she cooked and baked for to tell her how something tasted. When she received requests for recipes, then she knew it was a keeper. One day she emailed me to say "You know because I can't taste I always come to your blog for new recipe ideas. I never worry about how things will turn out...you just don't know how much I appreciate you and your recipes. This is the first time since I lost my taste and smell that I am not afraid to try new things for my friends and family." That means the world to me.

This fall, Jeanette went in for back surgery to repair some ruptured discs. When she went home she was filled with nuts, bolts and screws holding her all together. She was in pain. Over the next few weeks, she returned to the hospital for more surgeries- a total of 6, I believe. Then she had a stroke which affected her speech. She was on bed rest and pumped full of drugs. All through this, she was still upbeat and positive. I was not there, I have never met her in person, but we communicated via email quite a bit, or when she was able to. I considered her my friend. She's still my friend though there will no longer be emails shared between us. I will miss that.

She was a kind soul and a symbol of strength. I don't know of anyone else who has been through so much and still had a smile on her face. She still laughed and joked and shared stories with me. She told me about how she would make costumes for her rabbits and dress them up as other animals. She told me about her pot belly pigs- Hamlet and Yam Yam and how when they were little she tried to sneak them into WalMart. And how she bakes them cornbread on their birthdays. ha! More recently she took her dogs to the drug store to get their passport photos taken, just because she wanted decent photos of them. She told the people there that her dogs were famous and they needed passports to travel outside the country. She was a hoot! She loved animals and had several dogs to keep her company and love on.

Jeanette shared with me memories of her late daughter Jenee', which I was more than happy to read about, honored really. I don't know why Jeanette's life was cut short. I don't know many details of her death except for that she is no longer here. I do know that she loved her husband and her family with all of her heart and she'd do anything for them. She had a big, generous heart and I will never forget her. I believe there is a Heaven, and that Heaven is anything you dream it can be. I believe in my heart, that in her Heaven, she no longer hurts. And that she joins her daughter, her father and her dogs, Keelie and Ning.

In her Heaven, there will be scramble dogs and soft chocolate chip cookies and she will not only eat them, she will taste and enjoy them! These two recipes came from her blog. The scramble dogs are basically chopped up chili dogs in a bowl with the added crunch of oyster crackers on top. The chocolate chip cookies are thick and soft and a favorite of her husbands. We ate them and felt like she was sitting down with us for dinner. I hope you'll make them and feel the same.

Aunt Nette's Scramble Dogs adapted from Starting Over

Printer Friendly Version

  • 1 hot dog bun, toasted and chopped
  • 1 all beef wiener, cooked and chopped
  • chili
  • chopped onions
  • mustard
  • 4 dill pickle slices, chopped
  • shredded cheddar cheese
  • oyster crackers

Toast a hot dog bun and cook your wiener. Chop both into bite sized pieces and set aside.

Place your chopped and toasted hot dog bun in a bowl. Scatter the wiener on top of the bun and pour chili over it.

Top with shredded cheddar cheese, diced onion, dill pickles slices, and a squirt of mustard. Top scramble dog with a handful of oyster crackers. Dig in!

Serves 1

Soft Chocolate Chip Cookies from AR via Starting Over

Printer Friendly Version

  • 2-1/4 cups all-purpose flour
  • 1 teaspoon baking soda
  • 1 cup butter, softened
  • 3/4 cup packed brown sugar
  • 1/4 cup white sugar
  • 1 (3.4 ounce) package instant vanilla pudding mix
  • 2 eggs
  • 1 teaspoon vanilla extract
  • 2 cups semisweet chocolate chips
  • 1 cup chopped walnuts (optional)

Preheat oven to 350 degrees F (175 degrees C). Sift together the flour and baking soda, set aside.

In a large bowl, cream together the butter, brown sugar, and white sugar. Beat in the instant pudding mix until blended. Stir in the eggs and vanilla. Blend in the flour mixture. Finally, stir in the chocolate chips and nuts.

Drop cookies by rounded spoonfuls onto ungreased cookie sheets.

Bake for 10 to 12 minutes in the preheated oven. Edges should be golden brown.

Makes approx. 3 dozen.

NOTE: I used a medium ice cream scoop to portion out the cookie dough. I got 32 cookies and baked them for 13 minutes on parchment lined sheets.

Please, please please, take a moment to visit her blog and leave a note for her husband, Doug. He is stationed in Saudi Arabia for work and is trying to make his way back to the States to be with his wife. I'm not sure if he's made it home yet, but prayers for him would be much appreciated. I wish him peace and blessings.

Jeanette you will be missed.

~Monica H

Wednesday, December 29, 2010

Cranberry Orange Bliss: A Two-fer

I hope you all had a peaceful holiday full of family, friends, fun and food! There was a lot of cooking and preparing on my end, but once the festivities began, I was able to relax a bit. I hope the same was for you. We had family over (a total of 17) for Christmas Brunch over at my mom's house. It's the first time we've ever done brunch for this holiday and I have to say, it was a nice change to the usual turkey and ham- though I love that too.

Since I was so pressed for time this year, I wasn't able to make the dozens of cookies that I am known to make. I was a little bummed about it because I had such grand plans conjured up in my head, but all I was able to crank out of my kitchen for gifts was this bread. But it's a fabulous bread, so that's okay. This recipe comes straight from the Cranberry people themselves- Ocean Spray. That just goes to show that the recipes on the back of the bag deserve to be made- they're there for a reason. I tripled this recipe and made 2 loaves for my neighbors and I froze one to share with the family at Christmas brunch. This recipe also makes really great and addictive muffins. The fresh orange flavor really shines through and it's low in fat. Shhhh....I won't tell if you don't.

I bought this stoneware wreath mold from Williams-Sonoma last December at their after Christmas sale. I got it on clearance for about $9, but I never used it until this past Thanksgiving when I made the classic molded cranberry sauce from their website. It really was delicious, but my family kept calling it "fancy Jello", which irked me a bit 'cause it took a lot longer to make than Jello. I could have just made the boxed stuff for ease, but this was SO much better! Eh, I'll get over it :-) If you don't have a mold, you can just use a bowl or a small bundt pan, but do make it. Also excellent on leftover turkey sandwiches.

P.S. If you're interested, I did a guest post on Maranda's blog, Jolts & Jollies. If you haven't been over there before, you need to check her out, because she has a lot to offer! Go HERE.

Cranberry Orange Bread from Ocean Spray

Printer Friendly Version

  • 2 cups flour
  • 1 cup sugar
  • 1 1/2 teaspoons baking powder
  • 1 teaspoon salt
  • 1/2 teaspoon baking soda
  • 3/4 cup orange juice
  • 1 tablespoon grated orange peel
  • 2 tablespoons shortening
  • 1 egg, well beaten
  • 1 1/2 cups fresh or frozen cranberries
  • 1/2 cup chopped nuts, optional

Preheat oven to 350ºF. Grease a 9 x 5-inch loaf pan.

Mix together flour, sugar, baking powder, salt and baking soda in a medium mixing bowl. Stir in orange juice, orange peel, shortening and egg. Mix until well blended.

Stir in cranberries and nuts, if using. Spread evenly in loaf pan.

Bake for 55 minutes or until a toothpick inserted in the center comes out clean. Cool on a rack for 15 minutes. Remove from pan; cool completely. Wrap and store overnight.

Makes 1 loaf (16 slices)

Molded Cranberry Orange Sauce from Williams-Sonoma

Printer Friendly Version

  • 1 lb. fresh cranberries
  • 1 cup plus 2 Tbs. sugar
  • Zest of 2 oranges
  • 2/3 cup fresh orange juice
  • Pinch of salt
  • 2/3 cup plus 2 Tbs. cold water
  • 1 envelope unflavored gelatin

Lightly coat the inside of a ceramic cranberry mold with nonstick cooking spray.

In a large saucepan over medium-high heat, combine the cranberries, sugar, orange zest, orange juice, salt and the 2/3 cup water. Bring to a boil, then reduce the heat to medium-low and simmer, stirring occasionally, until the sauce thickens and the cranberries have burst, about 15 minutes.

Meanwhile, pour the 2 Tbs. water into a small bowl and sprinkle with the gelatin. Let stand until the gelatin softens and swells, 5 to 10 minutes.

Spoon 1/2 cup of the juices from the cranberries into the gelatin and stir until the gelatin has dissolved. Pour the gelatin mixture into the cranberry mixture and stir to combine.

Pour the cranberry mixture into the prepared mold and let cool to room temperature. Cover loosely with plastic wrap and refrigerate for at least 8 hours or up to overnight.

To unmold, dip the mold into a large bowl of warm water so the water reaches almost to the rim of the mold. Remove from the water and run a small paring knife or spatula around the inside of the mold to loosen it. Place a serving platter upside down on top of the mold, invert the platter and mold together and shake gently. Then lift off the mold.

Serves 12 to 16.

NOTE: I pureed, then strained the cranberry mixture before adding it to the gelatin, for a smoother texture.

On a side note, this is my most favorite gift that I received this year from my hubby. Actually, it was my favorite gift from anyone. It's special to me, because he made them with his own two talented hands. They're made with black walnut, cherry and maple woods. Ahhh, LOVE.

Hope you have a safe weekend. Happy New Year!

Wednesday, December 15, 2010

Pan Cake. Not Pancake.

Ever heard of one-bowl chocolate cake? Of course you have. It's a simple recipe that can be mixed up in one bowl. But have you ever heard of a one-pan cake? Me neither! This recipe comes from King Arthur Flour and all the ingredients are mixed right into the very pan you bake it in. It sounded too good to be true so I tried it out, and it worked!

I took step by step photos of this one so you could see just how simple it really is. You mix it, bake it and serve it from straight from the same pan. Since it doesn't call for greasing the pan, you need to serve it from the pan, but if you want, you can mix it up in a bowl, then pour it into a greased pan for a nicer presentation. The hard working people at KAF made two cakes to show the difference, check it out here. This cake is great though because there aren't many dishes to clean up, nor do you need a bowl to make it.

Not only is this recipe unique and different, but it's vegan too. According to KAF, it's cholesterol free and if you use canola oil, then it's relatively low in saturated fat as well. It's tasty too and stays moist for days. I served this with Mexican style cinnamon chocolate ice cream, (which my momma loved and ate 3 bowls of in one night!) and some fudgy chocolate sauce from The Perfect Scoop. Simple and delicious and lusciously chocolatey!

Cake-Pan Cake from KAF

Printer Friendly Version

  • 1 1/2 cups all-purpose flour
  • 1 cup sugar
  • 1/4 cup cocoa
  • 1/2 teaspoon salt
  • 1/2 teaspoon espresso powder, optional
  • 1 teaspoon baking soda
  • 1 teaspoon vanilla
  • 1 tablespoon vinegar
  • 1/3 cup vegetable oil
  • 1 cup cold water, coffee, or milk

Preheat your oven to 350°F.

1. Measure all the dry ingredients into an 8" or 9" round or square cake pan. (If you use an 8-inch pan, make sure it's at least 2 inches deep, otherwise use a 9-inch pan.)

2. Blend the ingredients together thoroughly with a fork or whisk and scoop out three holes, or indentations.

3. Pour the vanilla into the first hole, the vinegar into the second, and the vegetable oil into the third.

4. Take the cup of cold liquid (water, coffee, milk, etc.) and pour it directly over everything in the pan. Note: If you've used espresso powder, adding coffee will make this a mocha cake.

5. Stir all the ingredients together with your fork or spatula until they are well blended.

6. Bake for 30 to 35 minutes.

Serve right from the pan; warm from the oven.

Yield: 8-12 servings.

Mexican Chocolate Ice Cream adapted from Perfect Scoop

Printer Friendly Version

  • 2 cups heavy cream
  • 6 Tablespoons unsweetened Dutch process cocoa powder
  • 3/4 cup sugar
  • 3 oz. semisweet or bittersweet chocolate, chopped
  • 1 1/2 cups whole milk
  • 1 teaspoon vanilla extract
  • pinch of salt
  • 1 1/2 teaspoons ground cinnamon
  • 2 Tablespoons Brandy

Whisk together the cream, cocoa powder, and sugar in a large saucepan. Heat the mixture, whisking frequently, until it comes to a full boil (it will start to foam up). Remove from the heat and add the chocolate, then whisk until it is completely melted. Stir in the milk, vanilla, salt cinnamon, and Brandy. Pour the mixture into a blender and blend for 30 seconds, until very smooth.

Chill the mixture thoroughly in the refrigerator, then freeze it in your ice cream maker according to the manufacturer's instructions.

Makes 1 quart.

NOTE: Ice cream is very rich and thick. You can opt to use half-n-half in place of the cream or add more milk for an icier texture.

Chocolate Sauce from Perfect Scoop

Printer Friendly Version

  • 1/2 cup sugar
  • 1/3 cup light corn syrup
  • 1/2 cup water
  • 6 Tablespoons unsweetened Dutch process cocoa powder
  • 1/2 teaspoon vanilla extract

Whisk together the sugar, corn syrup, and cocoa powder in a medium saucepan. Heat over medium heat, whisking constantly, until the mixture begins to bubble at the edges.

Continue to whisk until it just comes to a low boil. Cook for 1 minutes, whisking frequently. Remove from the heat, stir in the vanilla, and let cool. Chill in the refrigerator before using.

Use as a topping or swirl into any flavor ice cream.

Makes 1 cup.

Store for up to 2 weeks in an airtight container in the refrigerator.

Saturday, September 4, 2010

Sliders and Pops: A Labor Day Two-fer

It's finally September and cooler weather is here! I feel like half of America wants Fall to be here already and the other half is wishing Summer would stick aound just a little longer. I fall somewhere in between. Autumn is my favorite season (and dog!) so I wish it for it year-round but I'm not quite ready for Summer to be over. I just wish we had cooler temps. I'm not a fan of 105 degree days, where are the 80's? Heck the other day it was after 9pm and still in the 90's- that's crazy!

This menu reminds me of Summer. It's simple and fuss free and can be eaten with your hands. Both can be made ahead of time and require very little time to get them on in your belly. Of course they can be prepared and eaten any time of year but I think they're perfect for rounding out the last few days of Summer. They can be eaten as snacks or as a full meal and kids love them as much as the adults do too. The nice thing about these recipes is you can make as many or as few you need.

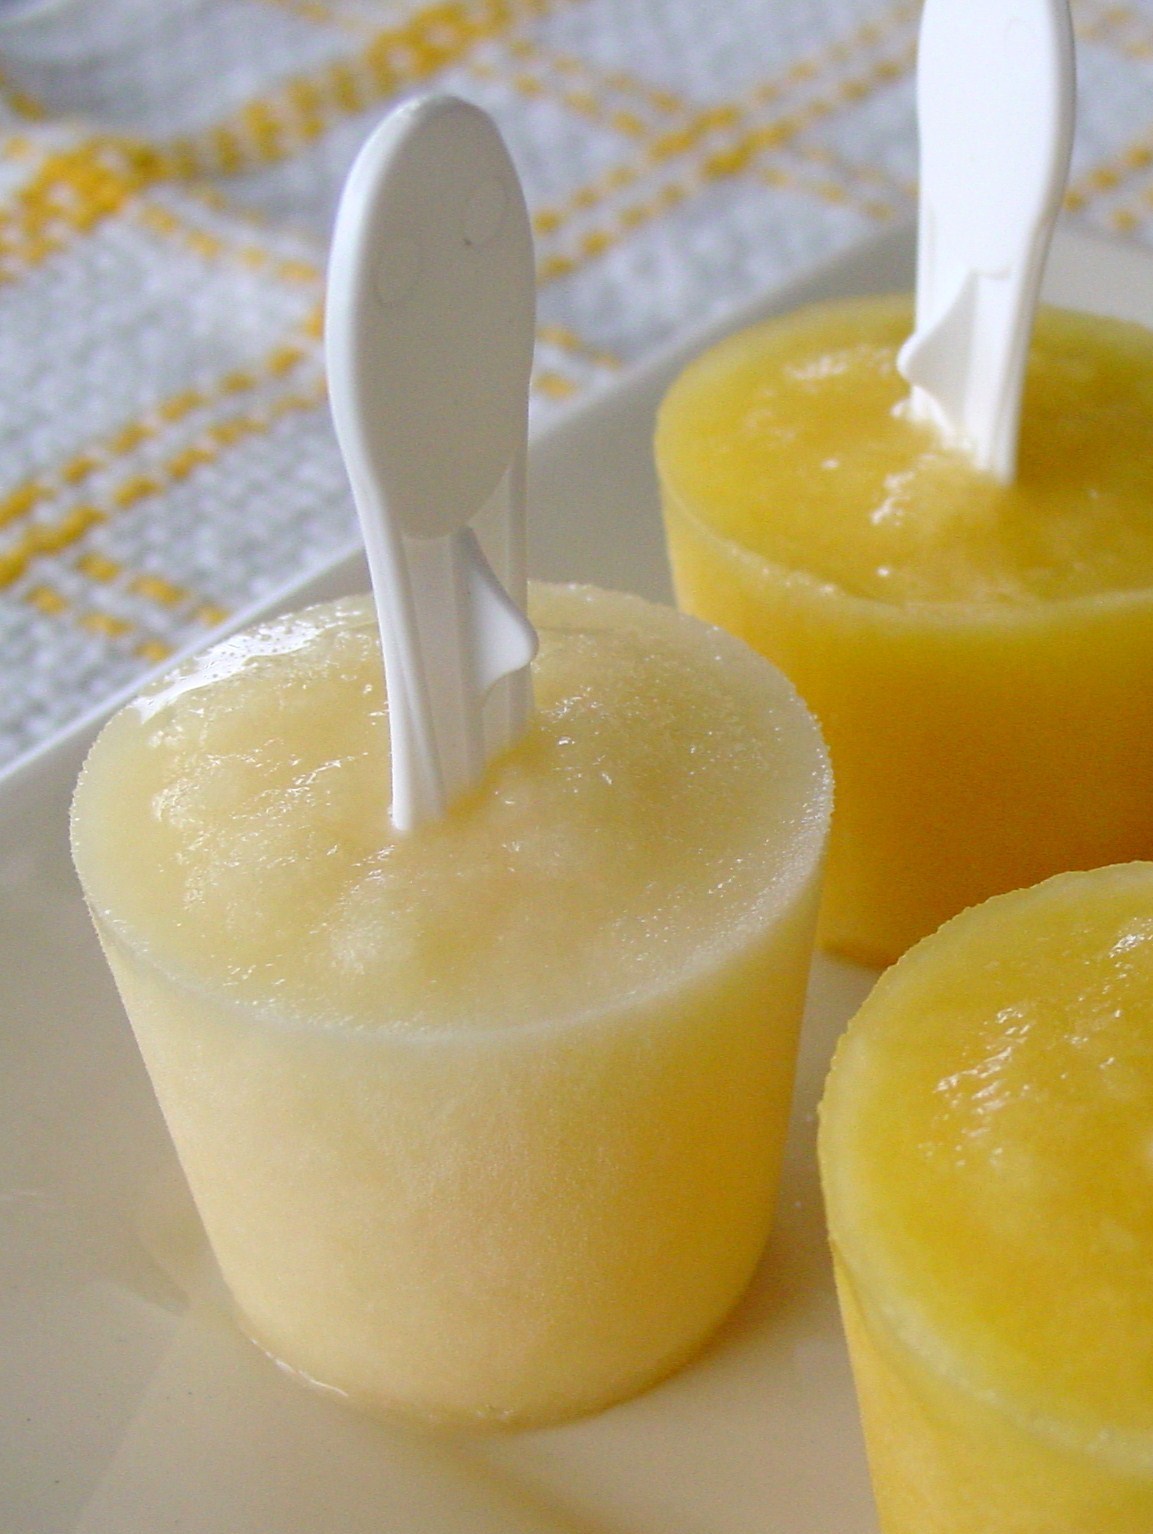
I made these ham and swiss sliders on sweet Hawaiian bread, but any soft white dinner roll will do. There's not one element that stands out above the other, but it's the buttery poppyseed mustard sauce that tops it all off that makes it unique. These popsicles taste like a slice of fresh pineapple. The original recipe called for milk but I did an experiment and made half with pineapple juice and those turned out to be better looking and tasting. And you don't need any fancy molds to make them, just fill up paper cups and put a stick in them. Make enough to feed your family or a crowd this Labor Day!

Ham and Swiss Sliders adapted from Christy

  • 12 good white dinner rolls (I used Hawaiian rolls)
  • 12 pieces good honey ham
  • 12 small slices Swiss cheese
  • 3 Tbsp. mayonnaise
  • 3 Tbsp. miracle whip

Poppy seed sauce:

  • 1 1/2 tsp. poppyseeds
  • 2 tsp. yellow mustard
  • 1/2 stick butter, melted
  • 1/2 tsp. dried minced onion or 1 1/2 tsp. fresh minced onion
  • 1/4 tsp. Worcestershire sauce

In a small bowl, mix together mayonnaise and miracle whip. Cut the rolls in half and place cut side up. Spread onto both sides of the center of each roll. Place a slice of ham and a slice of Swiss inside of each roll. Close rolls and place them into a large baking dish or heavy cookie sheet. Place very close together.

In a medium bowl, whisk together all of the poppy seed sauce ingredients. Pour evenly over all of the sandwiches. Let sit 10 minutes or until butter sets slightly.

Cover with foil and bake at 350 degrees for 12-15 minutes or until cheese is melted. Uncover and cook for 2 additional minutes. Serve warm.

NOTE: Sandwiches can be assembled a day ahead and kept in the fridge ready to bake.

Pineapple Pops adapted from Everyday Food

  • 3 cups fresh pineapple chunks (or one 14.5-ounce can chunks packed in juice, drained)
  • 1/3 cup pineapple juice or milk
  • ¼ cup sugar

In a food processor, combine pineapple chunks, juice or milk, and sugar; pulse until almost smooth, with some chunks of pineapple remaining.

Pour half the mixture into a medium bowl (or a glass measuring cup for easy pouring). Pulse remaining mixture until completely smooth; add to mixture in bowl.

Divide evenly among eight 3-ounce molds or paper cups, and insert wooden sticks. Freeze until solid, at least 4 hours or up to 2 weeks (cover with plastic wrap).

NOTE: The original recipe calls for milk to be added to the pops. I made half a batch with milk and the other with the reserved pineapple juice from the can. The juice was hands down more flavorful!

Hope you have a wonderful Labor Day weekend!

Thursday, June 10, 2010

Aye, Aye Cap'n! A Father's Day Two-fer

A couple weeks ago a reader named Katherine from Pennsylvania left me a comment with a request for a recipe containing Cap'n Crunch Cereal. This is what she said "I'm a regular reader and always looks forward to your unique recipes and posts. Therefore, I come to you with a recipe void I am in need of filling, and I hope you can help me out. My father loves Cap'n Crunch cereal, I mean LOVES it. So with father's day coming up, I would love to bake him something special...something with Cap'n Crunch cereal in it! Aside from just having the cereal as an ingredient, I want this item to truly TASTE like the cereal - that's key here :) So, I hope you can use your special baking skills and think up something yummy for the most important man in my life, my father. Thank you for your time!" How could I not come up with something for her?

I've never really gotten a request like this before. Sure I've had people email me and ask if I have certain types of recipes but no one has ever asked for such a unique recipe. So off to the Google Gods I went, then I asked Mr. H if he'd help eat the remaining cereal if I were to buy a box and luckily he agreed. Katherine was originally thinking of a cake or cookie recipe to make for her father but today I have two recipes for you and her but neither are cake or cookies. I wanted to make something that I would want to eat so that I didn't waste any ingredients and I came up with Cap'n Crunch French Toast and Cap'n Crunch Peanut Butter Cereal Bars. yum!

I want to be honest and say that I did not create either of these recipes. The French Toast recipe comes from Blue Moon Cafe in Maryland that was featured on Diners, Drive-In and Dives. I love french toast so I was excited about this one. And the second recipe is a kicked up marshmallow cereal bar. It has the addition of peanut butter and M&M's to make them extra sweet and fun. I wasn't sure how well I'd like these because I thought they'd be too sweet but these were very good. I ate most of them myself :-P The only thing I'd change next time is to use the mini M&M's. They had a nice crunch to them from the cereal but they were gooey and buttery and had a nice contrasting flavor from the creamy peanut butter and chocolate.

The toast was awesome! I used day old French bread that I cut about an inch thick and dipped it into the custard. The trick to getting fluffy french toast is to not soak the bread completely, otherwise you'll end up with wet and dense toast- that took me a few years to figure out :-) I omitted the extra sugar in the custard because the cereal is so sweet already. It was sweet and crispy on the outside but light and soft on the inside. It tasted like Cap'n Crunch but it wasn't overly sweet. The original recipe calls for sweetened whipped cream but we opted for syrup and fresh fruit. This was a winner!

Cap'n Crunch French Toast from Blue Moon Cafe via Diners, Drive-Ins and Dives Cookbook

Printer Friendly Version

French Toast:

  • 3/4 cup heavy cream
  • 3 large eggs, lightly beaten
  • 2 tablespoons sugar (I omitted this)
  • 1 teaspoon pure vanilla extract
  • 3 cups cap’n crunch cereal
  • 8 to 10 slices bread, such as Texas toast or French bread
  • Butter for cooking

Topping: (optional)

  • 1 cup heavy cream
  • 2 tablespoons confectioners’ sugar
  • 1 teaspoon pure vanilla extract
  • 2 cups assorted fresh seasonal berries

Mix the cream, eggs, sugar, and vanilla in a large bowl and whisk until combined.

Put the cereal in a storage bag and use a rolling pin to crush cereal until it resembles cracker meal. Transfer the cereal to a shallow dish.

Dip a couple slices of the bread into the cream mixture until soft but not completely soaked. Let excess liquid drip from the bread, then press into the cereal crumbs to coat evenly. Place on a sheet pan and repeat with the remaining slices.

Heat a large skillet or griddle over medium heat, add butter as needed, and cook the bread until caramelized on both sides, about 6 to 8 minutes total.

For the whipped cream topping: Beat the cream, confectioners’ sugar, and vanilla in a large bowl with a hand mixer to soft peaks. Dollop on top of the French toast and serve with the berries.

NOTE: I cut this recipe in half and made 4 slices of toast and omitted the whipped cream topping.

__________________________________________________

Cap'n Crunch Peanut Butter Bars adapted from Spark Recipes

Printer Friendly Version

  • 3 Tbsp butter
  • 3 Tbsp creamy peanut butter
  • 30 large marshmallows
  • 6 cups Cap'n Crunch Cereal
  • 1 1/2 cups M&M's

Spray a 9 x 13 pan with cooking spray, set aside.

In a large pot on the stove melt butter, peanut butter and marshmallows on medium low heat, stirring occasionally (I did this in the microwave in a glass bowl).

Once mixture is melted and all combined, remove from heat. Add cereal and M&M's quickly and stir quickly to well coat. As the marshmallow mixture cools will become harder to mix.

Pour into prepared pan. Coat your hands with a little extra butter and press down the mixture into the pan to get it as even as possible. Allow to cool completely and cut into squares.

Makes 24 bars.

NOTE: I only made 1/3 of this recipe.

Katherine I hope these recipes will make your father happy this Father's Day!

Related Posts with Thumbnails