Showing posts with label Ice Cream. Show all posts

Thursday, September 12, 2013

Tastes Like Home


I don't remember my Grandma baking very much when we were kids. She was an excellent cook and made the best pot of beans, skillet fried chicken and potato salad, just to name a few. I always loved her potato salad just after she made it when the potatoes were still warm and soft. She always saved a bowl for me to enjoy at room temperature while the rest of it went into the refrigerator. In July, we took a road trip and visited my cousin for his 1st birthday and stayed at my grandparents house. On our last night there we had a cookout and I was able to enjoy her potato salad again. It's little things like that that take me back to my childhood. My mom still makes potato salad, and while it's similar (and delicious), it's not my grandma's. 

This little guy had a field day playing with the ice cream maker. When he thought I wasn't looking, he'd stick his fingers in the top and sneak a few licks of gelato. At one point he even climbed up onto the island and tried to put his face into the machine. You could say he's a fan of this rice gelato, just like his momma. 
When my grandma did make "dessert" it was often a bowl of atole de arroz, which is kind of like rice pudding but not as rich or creamy. It's more of a rice porridge, made with white rice, sugar, water, milk and cinnamon sticks. During the summer months, a man would walk all over town pushing a cart of Mexican popsicles, called paletas. We called him "The Paleta Man" :-). And just like the ice cream truck, we'd hear him ringing his bell, run outside and flag him down as he approached our house. We would make our requests and he'd reach into his mint green chilled chest and pull out colorful treats on sticks. I liked the fresh strawberry and the rice paleta the best. The rice paleta was milky, creamy, lightly sweetened and had a dusting of cinnamon on it. What made it different from the rest was that it had nibbly bits of rice in it. I loved that. 


When I came across this recipe for Rice Gelato from The Perfect Scoop, I knew it would be making an appearance in my future. The original recipe called for adding strips of orange zest to the rice mixture, but cinnamon sticks seemed more up my alley. It's what reminds me of home, so that's what I used. I also added a bit of ground cinnamon to the mixture after the rice was cooked. The smell of the sweet rice cooking filled the house like perfume. This gelato is much creamier and richer than anything my grandma ever made, but this is gelato after all, and it should be creamy. The rice softens and plumps up during the cooking process- half of it is blended really finely and the other half stays whole for optimal texture.While this dessert is frozen and is great on an end of summer day, there's something about it that comforts and soothes the soul. And that to me, is the best of both worlds. 

Rice Pudding Gelato 
adapted from The Perfect Scoop

  • 1/2 cup Arborio rice
  • 3 cups whole milk
  • 3/4 cup sugar
  • Pinch of salt
  • 1 vanilla bean, split in half lengthwise
  • 1 cinnamon stick
  • 5 large egg yolks 
  • 1 cup half-and-half or heavy cream
  • 1/4 teaspoon ground cinnamon
  • Pinch of freshly grated nutmeg

Preheat oven to 350 degrees F. 

In a 2 quart baking dish, mix together the rice, milk 1/4 cup of the sugar and the salt. Add the vanilla bean and cinnamon stick and cover the dish with aluminum foil. 

Bake for 1 hour. Remove the rice from the oven and remove the foil. Stir in the remaining 1/2 cup sugar, then continue to bake the rice, uncovered for an additional 30 minutes.

Remove the rice from the oven a second time, remove the vanilla bean and cinnamon stick and briskly whisk in the egg yolks at once. Then whisk in the half and half or cream, round cinnamon and nutmeg.

Puree half of the rice mixture in a blender or food processor until finely chopped. Then stir it back into the cooked rice.

Place the rice mixture in the fridge until completely chilled. Then freeze it in your ice cream maker according to the manufacturer’s directions.

NOTE: This gelato freezes really hard. Let it sit out at room temperature for about 10 minutes before serving, if necessary. 

Sunday, August 11, 2013

Smucker's Ice Cream Toppings (Giveaway)


What better way to beat the heat than with homemade vanilla ice cream churned in an old-fashioned maker with ice and rock salt....and Smucker's ice cream toppings!

Smucker's sent me a care package of some fun summer stuff and 4 awesome new ice cream toppings. In my care package were 2 bottles of microwavable Hot Butterscotch and Hot Milk Chocolate toppings as well as 2 bottles of Magic Shell in Root Beer and Pink Lemonade flavors. We took some freshly churned vanilla ice cream and these toppings to my mom's house to enjoy for dessert after Sunday dinner. Everyone got to mix and match and create their own sundaes- such a fun idea to get everyone involved in the kitchen. I'm offering a giveaway below, but if you want to try them out, they're available in stores now from $2.29- $2.99. Check the FlavorFinder to find your favorite flavor. 

The Magic Shell toppings were the most fun to play with because as soon as you pour them over the cold ice cream it firms up and you can crack into it as you eat the ice cream. Adding colorful sprinkles and chocolate jimmies only made it better. My mom and Hayden liked the Pink Lemonade the best. It was refreshing and bright, but not sour in anyway. It was almost like eating lemon cake along with your ice cream. My brother, loved the Root Beer Magic shell and poured his over an ice cream cone. I'm generally not a big fan of root beer unless it's with ice cream. This tasted just like those hard root beer candies. If you are a root beer fan, you will LOVE this. Michelle from One Ordinary Day...I'm talking to you!

The Hot Butterscotch and Milk Chocolate were my favorites. I could eat these toppings by the spoonful! Their bottles are designed to be heated in the microwave and the new label will read "Hot" when it's heated up. I skipped this step and just poured them straight over my ice cream and topped with chopped almonds. It tasted like the best Butter Pecan Ice Cream ever....except that it was almonds :-)Sticky, gooey, buttery and with a great caramel flavor. Butterscotch has never been a favorite flavor but this topping changed my mind. And of course, there's the Milk Chocolate flavor that my hubby liked. Just like hot fudge, but milk chocolate flavor- a must try. 


GIVEAWAY: 

Smucker's is spreading the love and giving one reader an ice cream topping kit complete with these four ice cream toppings. The winner will receive 1 bottle of each Smucker's toppings: Hot Butterscotch and Hot Milk Chocolate, Magic Shell Root Beer and Magic Shell Pink Lemonade.

You have FOUR chances to enter and win: 

1. Leave a comment on this blog post telling me which of the four Smucker's ice cream toppings you're most excited to try (mandatory entry).

(Please leave a separate comment for each additional entry.)

    
3. Share the link to this post on your blog or on your Facebook. Post a separate comment letting me know you've done so. 

4. Follow me at monica_h30 on Instagram

Winner will be selected at random using random.org. I will announce the winner by the end of the week. Good luck!

Disclosure: Though I was compensated from Smucker's the opinions here are my own.  

Sunday, May 27, 2012

Nestle Pretzel Dipped Drumsticks and A Pizza Party


Last weekend, we invited family over to our house for a make-your-own-pizza party. Everyone got involved and had fun decorating their personal pizza crusts with an array of toppings. It was interesting to see that the men went straight for the meat (sausage, bacon, pepperoni) while the women added more veggies. Since I was putting pizzas in the oven and taking them out, I got to oversee everyone's pizza making skills. Some chose lots of sauce, some opted for a drizzle of olive oil instead. Some loaded up the cheese while others just wanted a sprinkle to hold everything together. 

This party was fun for me and easy. I started earlier in the day by chopping up the veggies and browning the meat and just set everything in small clear bowls. I covered them all up, placed them on a large cookie sheet and into the fridge it all went. We had mushrooms, spinach, bell peppers, tomatoes, onions, garlic, crumbled Italian sausage, pepperoni, Canadian bacon, breakfast bacon, and pineapple along with shredded mozzarella and muenster cheese. If you're looking for a different yet affordable way to feed and entertain a crowd, pizza making could be the way to go. Who doesn't like pizza? And the best thing is that no one can complain about their dinner because they made it. 

For dessert my mom made a lemon cheesecake, I made a banana pudding dessert and we also had Nestle Drumsticks. As part of the Foodbuzz Tastemaker program, I received a couple coupons for free Nestle Pretzel Dipped Drumsticks. Only we got so full after eating pizza, that we didn't enjoy the ice cream treats until the next day. I was really looking forward to this new flavor and I am and always have been a fan of Nestle Drumsticks. I like the original peanut covered variety with vanilla ice cream while Mr. H likes the chocolate version. No surprise there. This pretzel dipped version takes the typical waffled sugar cone, filled with vanilla ice cream then dipped in a dark chocolate shell, with pretzel pieces. 


I was really looking forward to the salty sweet combination of the Nestle Pretzel Dipped Drumsticks, however the end result was a little underwhelming. Don't get me wrong, they were good but the salty pretzel was virtually non-existent. The Drumsticks come in a package of 4 and I had to open up all of them to find one that had more than just a couple pretzels pieces on top. I think the idea is good in theory but the pretzel essence just didn't come through for me. However, I do have to say that the Nestle Pretzel Dipped Drumsticks served along side a handful of mini pretzels was quite delicious. I especially liked taking the pretzel and scooping up a bit of the vanilla ice cream- yum! I think Nestle could have added the crunchy pretzels pieces on top of the chocolate as they do with the peanut variety for more flavor or maybe they could have gone with a salted pretzel cone? 


All in all, I liked the Nestle Pretzel Dipped Drumsticks but I'm not sure it's a flavor that I'd buy on my own simply because it was just like eating a chocolate covered ice cream cone. You pay extra (Target had them for 20 cents more than the original Drumsticks) for the pretzel nuggets and they're just not there, at least not in my box. Thank you Nestle for sponsoring my pizza party and for allowing us to try the new flavor of Drumsticks. Please consider getting a box this Summer and giving them a try for yourself and remember they're a seasonal  product so don't wait- they'll be gone before you know it!


Disclosure: Nestlé has provided me with free product and other items in order to help with my review, but anything I receive from Nestle does not affect my thoughts on its company or their products. 


Enjoy a Drumstick and have a Happy Memorial Day!

Saturday, April 28, 2012

Coca-Cola Memories


I've been drinking Coca-Cola ever since I was a wee one. Except I never called it Coca-Cola, it was just "Coke". In fact, I referred to all soft drinks as Coke. What do you call them? Soda, soft drinks, pop? It was as if Coca-Cola was the king of all soft drinks, to me. Maybe it was the red and white striking can, or the fact that we could drink the fizzy beverage out of bottles when I was a kid, and that was just kind of cool. Coca-Cola is still my go-to soft drink when I'm craving something carbonated and refreshing.

Here is a picture of my older brother, Joe, and I bonding over a Coke when we were kidlets. In case you're wondering, that is a pink Miami Vice shirt I'm wearing. And if I remember correctly, he is wearing a He-Man tank. Ahhh, the '80's! Don't be jealous :-)


I've had that picture of my brother and I on my fridge for some time now and I've been wanting to make something sweet and delicious using Coke, when the people at Coca-Cola contacted me and asked if I'd like to make a recipe using the beverage. It just seemed like perfect timing and I couldn't wait to get started. I had so much fun with these cupcakes and photographing all the shiny red accompaniments- from the can to the cherries that topped the mounds of whipped cream on top of the cupcakes. Fun, I tell you!


I perused the My Coke Rewards website for a recipe that I wanted to make and  I couldn't decide if I wanted sweet or savory. But you know me, sweet always wins! I ended up adapting a recipe from Nigella Lawson for Coca-Cola cake and turning it into Coke Float Cupcakes. A Coke float is one of my favorite indulgences. When we were kids and we wanted soda my grandma would pour us a glass half full of Coke, then fill the rest up with milk. Sounds strange, I know, but it was like a less sweet version of a Coke float and it got us to drink our milk. Sneaky Grandma.


These cupcakes were kind of like that too. I started off with a cocoa cupcake infused with Coca-Cola, then added a Coca-Cola glaze and topped it off with a healthy scoop of vanilla ice cream and/or lightly whipped cream. I was a happy camper! The Coca-Cola taste was subtle against the chocolate, but it was distinguishable. I liked the glaze under the cream because it kept the cupcake from getting soggy as the ice cream melted and remained nice and light and fluffy. The glaze also added a bit of sweetness and added another texture to the dessert.

I ended up making two different versions because I'm indecisive and I like having options. I liked the ones with ice cream but I have to say the cupcake version with whipped cream and a cherry were my favorite. It was just the perfect package all wrapped up in a red foil liner. It was creamy, sweet, fluffy and fun and I felt like a kid again sitting in my grandma's kitchen. After all my hard work in the kitchen I rewarded myself with a coke float. I was on a sugar high the rest of the afternoon, but it was well worth it. I hope you'll treat yourself to one too.


Coke Float Cupcakes adapted from Nigella Lawson

For The Cakes: 
  • 1 1/2 cups all-purpose flour
  • 1 cup + 2 Tbsp. granulated sugar
  • 1/2 tsp. baking soda
  • 1/4 tsp. salt
  • 1 large egg
  • 1/2 cup buttermilk
  • 1 tsp. vanilla
  • 1/2 cup (1 stick) unsalted butter
  • 2 Tbsp. cocoa
  • 3/4 cup Coca-Cola
For The Glaze: 
  • 1 1/2 cups powdered sugar
  • 2 Tbsp. unsalted butter
  • 1 Tbsp. cocoa
  • 3 Tbsp. Coca-Cola
  • 1/2 tsp. vanilla
Garnish: 
  • vanilla ice cream
  • whipped cream
  • maraschino cherries
  • sprinkles
Preheat the oven to 350F. Grease a 12-cup muffin tin or line with paper liners and set aside. 
For The Cupcakes: In a large bowl, combine the flour, sugar, baking soda and salt. Beat the egg, buttermilk and vanilla in a measuring cup and set aside. 
In a heavy-based saucepan, melt the butter, cocoa and Coca-Cola, heating it gently. Pour into the dry ingredients, stir well with a wooden spoon, and then add the liquid ingredients from the measuring cup, beating until it is well blended.
Pour into prepared muffin tin and bake for about 15 minutes or until a toothpick inserted in the center comes out clean.
For The Glaze: Sift the powdered sugar and set aside. In a heavy-based saucepan, combine the butter, Coca-Cola and cocoa and stir over a low heat until the butter has melted. Remove from the heat, add the vanilla, and spoon in the sifted sugar, beating as you do, until you’ve got a good, spreadable, but still runny, icing.
Carefully dip the top of the cupcakes into the glaze allowing the excess to drip off or simply spoon the glaze over the cupcakes while they are still warm, place on a wire rack and allow to cool completely.

Serving: Once the cakes have cooled and the glaze has set, serve with a scoop of vanilla ice cream, or lightly sweetened whipped cream, cherries and sprinkles.

Makes about 15 cupcakes
DrinkCompensation was provided by Coca-Cola, but Coca-Cola is not a sponsor, administrator, or involved in any other way with this post. All opinions expressed are my own and not those of Coca-Cola.

Drink Coke. Make Cupcakes. Be Happy. 

For more Coca-Cola recipes, head on over to My Coke Rewards for more inspiration. 

Wednesday, December 15, 2010

Pan Cake. Not Pancake.

Ever heard of one-bowl chocolate cake? Of course you have. It's a simple recipe that can be mixed up in one bowl. But have you ever heard of a one-pan cake? Me neither! This recipe comes from King Arthur Flour and all the ingredients are mixed right into the very pan you bake it in. It sounded too good to be true so I tried it out, and it worked!

I took step by step photos of this one so you could see just how simple it really is. You mix it, bake it and serve it from straight from the same pan. Since it doesn't call for greasing the pan, you need to serve it from the pan, but if you want, you can mix it up in a bowl, then pour it into a greased pan for a nicer presentation. The hard working people at KAF made two cakes to show the difference, check it out here. This cake is great though because there aren't many dishes to clean up, nor do you need a bowl to make it.

Not only is this recipe unique and different, but it's vegan too. According to KAF, it's cholesterol free and if you use canola oil, then it's relatively low in saturated fat as well. It's tasty too and stays moist for days. I served this with Mexican style cinnamon chocolate ice cream, (which my momma loved and ate 3 bowls of in one night!) and some fudgy chocolate sauce from The Perfect Scoop. Simple and delicious and lusciously chocolatey!

Cake-Pan Cake from KAF

Printer Friendly Version

  • 1 1/2 cups all-purpose flour
  • 1 cup sugar
  • 1/4 cup cocoa
  • 1/2 teaspoon salt
  • 1/2 teaspoon espresso powder, optional
  • 1 teaspoon baking soda
  • 1 teaspoon vanilla
  • 1 tablespoon vinegar
  • 1/3 cup vegetable oil
  • 1 cup cold water, coffee, or milk

Preheat your oven to 350°F.

1. Measure all the dry ingredients into an 8" or 9" round or square cake pan. (If you use an 8-inch pan, make sure it's at least 2 inches deep, otherwise use a 9-inch pan.)

2. Blend the ingredients together thoroughly with a fork or whisk and scoop out three holes, or indentations.

3. Pour the vanilla into the first hole, the vinegar into the second, and the vegetable oil into the third.

4. Take the cup of cold liquid (water, coffee, milk, etc.) and pour it directly over everything in the pan. Note: If you've used espresso powder, adding coffee will make this a mocha cake.

5. Stir all the ingredients together with your fork or spatula until they are well blended.

6. Bake for 30 to 35 minutes.

Serve right from the pan; warm from the oven.

Yield: 8-12 servings.

Mexican Chocolate Ice Cream adapted from Perfect Scoop

Printer Friendly Version

  • 2 cups heavy cream
  • 6 Tablespoons unsweetened Dutch process cocoa powder
  • 3/4 cup sugar
  • 3 oz. semisweet or bittersweet chocolate, chopped
  • 1 1/2 cups whole milk
  • 1 teaspoon vanilla extract
  • pinch of salt
  • 1 1/2 teaspoons ground cinnamon
  • 2 Tablespoons Brandy

Whisk together the cream, cocoa powder, and sugar in a large saucepan. Heat the mixture, whisking frequently, until it comes to a full boil (it will start to foam up). Remove from the heat and add the chocolate, then whisk until it is completely melted. Stir in the milk, vanilla, salt cinnamon, and Brandy. Pour the mixture into a blender and blend for 30 seconds, until very smooth.

Chill the mixture thoroughly in the refrigerator, then freeze it in your ice cream maker according to the manufacturer's instructions.

Makes 1 quart.

NOTE: Ice cream is very rich and thick. You can opt to use half-n-half in place of the cream or add more milk for an icier texture.

Chocolate Sauce from Perfect Scoop

Printer Friendly Version

  • 1/2 cup sugar
  • 1/3 cup light corn syrup
  • 1/2 cup water
  • 6 Tablespoons unsweetened Dutch process cocoa powder
  • 1/2 teaspoon vanilla extract

Whisk together the sugar, corn syrup, and cocoa powder in a medium saucepan. Heat over medium heat, whisking constantly, until the mixture begins to bubble at the edges.

Continue to whisk until it just comes to a low boil. Cook for 1 minutes, whisking frequently. Remove from the heat, stir in the vanilla, and let cool. Chill in the refrigerator before using.

Use as a topping or swirl into any flavor ice cream.

Makes 1 cup.

Store for up to 2 weeks in an airtight container in the refrigerator.

Saturday, August 14, 2010

Just Peachy

Our neighbor has a peach tree in his backyard and he invited us to come over and pick some peaches. Well, no, that's not entirely true. He picked peaches that were ready to be eaten and bagged them up to give us, but we weren't home and they got overly ripe so he said we could come over and pick fresh peaches from his tree. This turned out to be a good thing because I got to pick the ones I wanted AND take pictures of them. They're just so pretty and fuzzy.

Last years we got peaches from Fredericksburg- it's kind of like the peach capitol of Texas. I wondered how I would prepare them when Mr. H informed me not to touch them or I'd "ruin them". Alright then. We ate those peaches, simply sliced in a bowl. And we did the same with most of these peaches from our neighbor's tree. Side note: Have I mentioned before that my neighbor looks like Alton Brown? Because he totally does! Anyway, with a good portion of our fruit I made this wonderful peach ice cream from David Lebovitz- the ice cream guru.

After preparing this ice cream, I realized something. I realized that I've never had peach ice cream- I've only had what I *thought* was peach ice cream. What do I mean by that? Well, what I thought was peach ice cream , was simply vanilla ice cream with peaches in it. THIS ice cream is different and it is definitely peachy. It's icy and creamy at the same time, you can taste the vanilla but it's subtle- almond extract might be nice too. But the peaches take center stage. As it should be. Before Summer ends, pick some peaches from your neighbors tree or get some from a roadside stand and make this ice cream.

Peach Ice Cream from Perfect Scoop

Printer Friendly Recipe

  • 1 1/3 lbs. (600 g) ripe peaches (about 4 large peaches)
  • 1/2 cup water
  • 3/4 cup sugar
  • 1/2 cup sour cream
  • 1 cup heavy cream
  • 1/4 teaspoon vanilla extract
  • a few drops freshly squeezed lemon juice

Peel the peaches, slice them in half, and remove the pits. Cut the peaches into chunks and cook them with the water in a medium, nonreactive saucepan over medium heat, covered, stirring once or twice until soft and cooked through, about 10 minutes.

Remove from heat, stir in the sugar, then cool to room temperature.

Puree the cooked peaches and any liquid in a blender or food processor with the sour cream, heavy cream, vanilla and lemon juice until almost smooth but slightly chunky.

Chill the mixture thoroughly in the refrigerator (overnight is best) then freeze it in your ice cream maker according to manufacturer's instructions.

Variation: To make Nectarine Ice Cream, simply substitute nectarines for the peaches. There's no need to peel the nectarines, since their tender skins soften during cooking.

Summer in a bowl.

This post linked to:

Wednesday, August 4, 2010

Caffeine Is My Friend

It's no secrect that coffee and I are best friends. I love it and it loves me. I don't like paying $5 per coffee drink but every now and again I need a fix and give in. We generally like to make espresso at home in our stovetop espresso pot, but that's usually only on the weekends with breakfast. When we do drink it, we like it lightly sweetened with raw sugar and half-n-half. It hits the spot every time. That's really the only time I can drink hot coffee, especially in this heat! When cooler weather comes, it'll be a different story but for now I'll stick to the sweet, cool and icy coffee drinks.

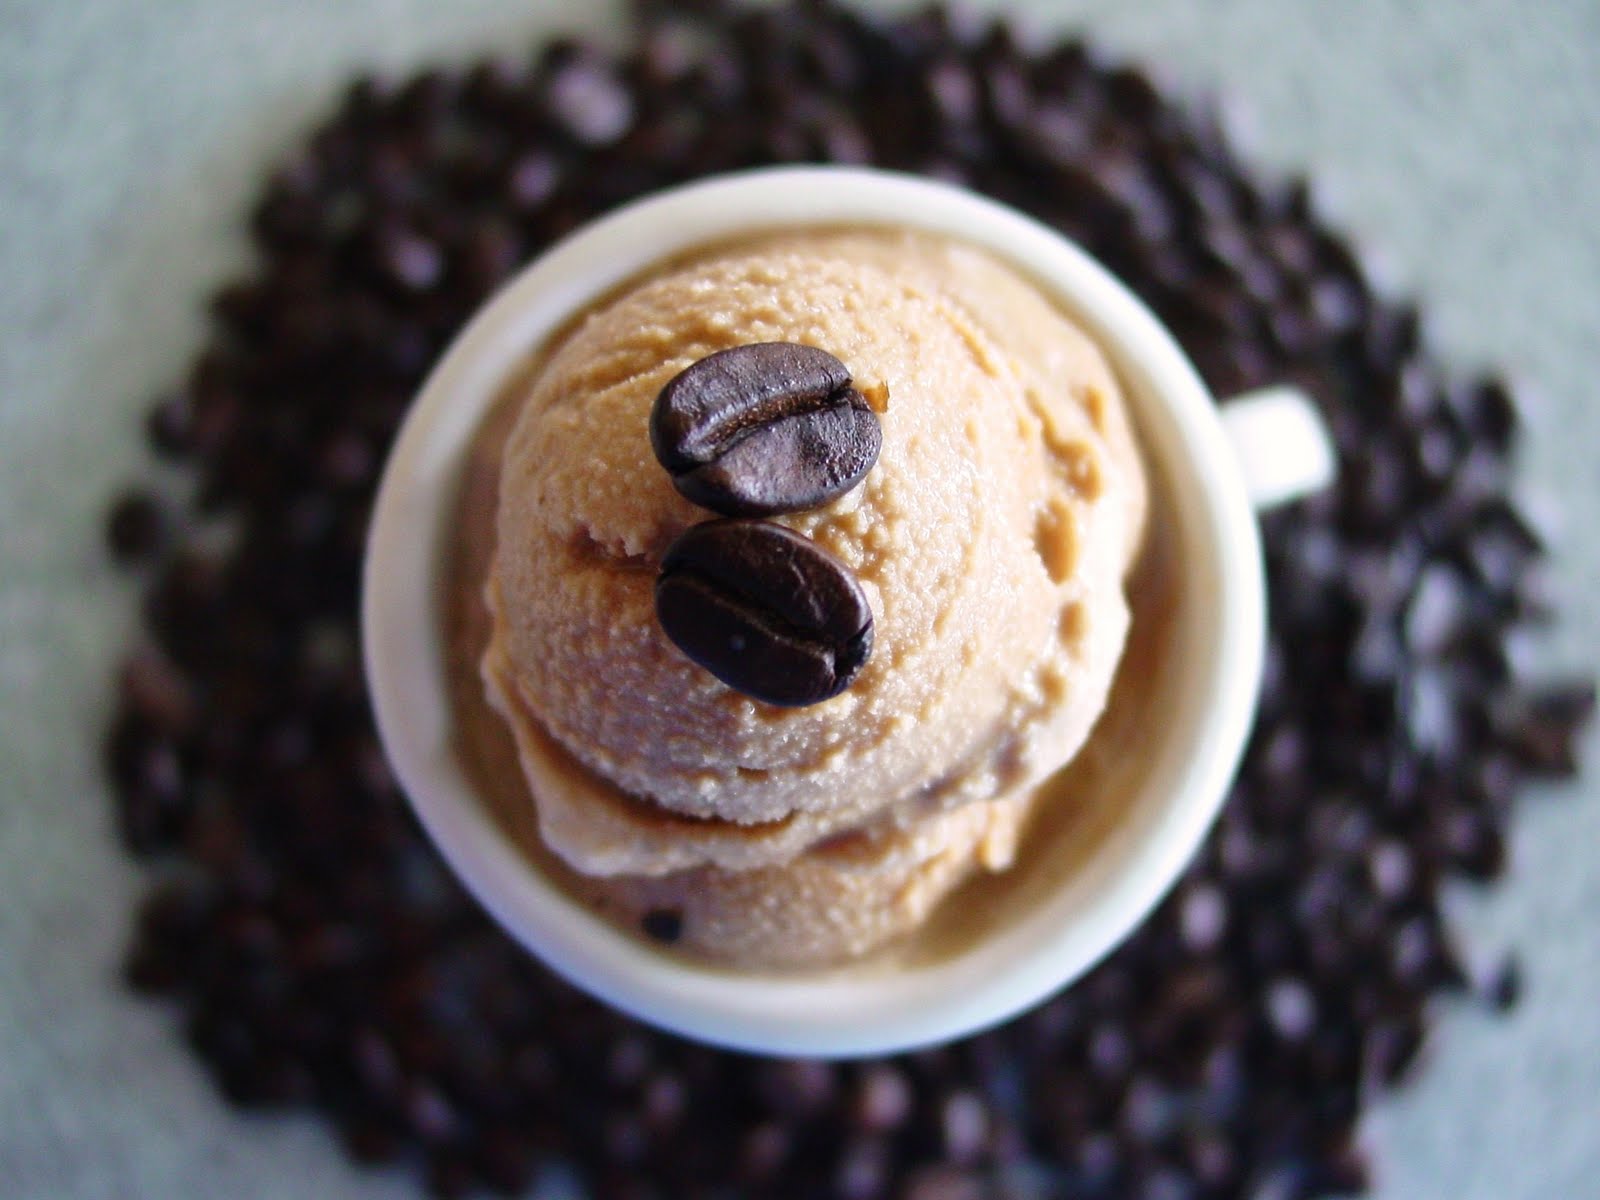
Keeping with the same theme of how I like my coffee, I decided to make David Lebovitz's Vietnamese Coffee Ice Cream. Now I've never had a traditional Vietnamese coffee (strong coffee with sweetened condensed milk), but if it's anything like this ice cream, I'm quite sure I'd like it. There are only 3 ingredients in this ice cream- brewed espresso, sweetened condensed milk and half-n-half. That's it! Well actually you can add a fourth ingredient, a pinch of ground coffee, but I left that out since I wanted the ice cream to be completely smooth.

This ice cream could not be simpler. It comes together in a matter of minutes, you chill it thoroughly and put it in your ice cream maker. Mr. H is even more of a coffee junkie that I am and while he thought the espresso flavor really came through, he thought it was a little too sweet. It was sweet but if you savor it one spoonful at a time, not only will it last longer but it will fulfill your cravings and your sweet tooth. Blend a little ice cream with milk, ice and chocolate syrup and you have an awesome Mocha Frappe. Add caramel sauce in lieu of the chocolate and you'll have a Caramel Macchiato Frappe- yum!

Vietnamese Coffee Ice Cream from The Perfect Scoop

Printer Friendly Version

  • 1 1/2 cups sweetened condensed milk
  • 1 1/2 cups brewed espresso or very strongly brewed coffee
  • 1/2 cup half-n-half
  • Big pinch of finely ground dark roast coffee (I omitted this)

Whisk together the condensed milk, espresso, half-n-half and ground coffee. Chill the mixture thoroughly (overnight) then freeze it in your ice cream maker according to the manufacturer's instructions.

Related Posts with Thumbnails