Friday, July 30, 2010

Clean Oven Cookies


I just cleaned my oven and it's spotless. I have vowed to never bake in it again and muck it up. Really how do they get so dang dirty in there? I don't spill things in there and nothing overflows that I know of. It didn't look that dirty but after spraying it down and letting it sit overnight with oven cleaner in it, 'twas a different story. It was like cleaning out a grease trap at a fast food restaurant. Okay, not really that gross, but I was elbow deep in goo and it wasn't pretty.
You would think this was my first time cleaning my oven. And you'd be right. ha! It has been cleaned before, just not by me. My fabulous husband usually cleans it for me and I've never stuck around long enough to witness the vulgar act. Today, I thought I'd attempt it on my own (for some unknown reason). I now have a new found appreciation for him and the things he does for me in the name of love. Thanks Babe! Now onto that vow I made about not baking in it...that may not last too long.
Luckily for you (and me), I made these cookies a couple weeks ago. These are probably my husband's favorite cookies. I've been making them for as long as I can remember and my family expects them in their cookie boxes at holiday time. The original recipe makes 3 dozen 1/4 cup cookies- that's a big cookie! I usually make them a tad smaller and make more of them with the same recipe. I can get about 6 dozen cookies from a full recipe but this time I decided to cut the recipe into thirds and ended up with about 2 dozen. If you want the full recipe, go HERE otherwise the small batch recipe is below.
These cookies are loaded with oatmeal, chocolate chips, shredded coconut and pecans. They're awesome right out of the oven with a glass of milk but they're just as delicious once cooled. They're crispy from the white sugar but they're a little chewy from the addition of the brown sugar and coconut. The nuts provide crunch and the chocolate chips add sweetness in every bite. Oh and there's cinnamon in there too- gotta love that! They really are a well rounded cookie- perfect for cowboys and husbands who clean your oven too :-)

Cowboy Cookies (1/3 Recipe)
adapted from Laura Bush
Printer Friendly Version
  • 1 cup all-purpose flour
  • 1 teaspoon baking powder
  • 1 teaspoon baking soda
  • 1 teaspoon ground cinnamon
  • 1/4 teaspoon salt
  • 1/2 cup (1 stick) butter, at room temperature
  • 1/2 cup granulated sugar
  • 1/2 cup packed light-brown sugar
  • 1 egg
  • 1 teaspoon vanilla
  • 1 cup semisweet chocolate chips
  • 1 cup old-fashioned rolled oats
  • 2/3 cups sweetened flake coconut
  • 2/3 cups chopped pecans
Heat oven to 350 F. Line baking sheet with parchment paper.
Mix flour, baking powder, baking soda, cinnamon and salt in bowl. In a large bowl, beat butter on medium speed until smooth and creamy, 1 minute. Gradually beat in sugars; beat to combine, 2 minutes.
Add egg and vanilla. Mix til combined.
Stir in flour mixture until just combined. Add chocolate chips, oats, coconut and pecans.
Using a medium ice cream scoop (2 Tablespoons) drop dough onto ungreased baking sheets, spacing 3 inches apart.
Bake in 350 F oven for about 15 minutes, until edges are lightly browned. Remove cookies from rack to cool.
Makes about 2 dozen cookies.

Gotta go make dinner...on the stovetop!

Tuesday, July 27, 2010

A Lemon Love Affair

It seems as if I've been on a lemon kick lately. First it was the Lemon Curd Icebox Cheesecake, then the Lemon Blueberry Marble Cake now these Lemon Cornmeal Shortbread. I even made something lemony again today- I can't get enough! I hope you guys don't mind :-)

I actually made these as a last minute treat to take to the book store to drink with my coffee :-) I know that's kind of like sneaking snacks into the movie theater, but I'm okay with that. Last week I was meeting a friend for coffee and chatting at B&N. Usually we just grab a couple of lattes, we walk around looking for a comfy chair or two and when we don't find one we head back to the noisy cafe area to chat about the weekly events. She mentioned that maybe next time we could get one of their desserts from the bakery counter and I agreed. Then I pondered that idea and changed my mind. Yes I wanted a sweet treat to accompany my beverage but I didn't want a cupcake, cereal treat or slice of cheesecake that had been sitting there for who knows how long. I wanted something fresh.

I did mention that I made these at the last minute right? When I say last minute, I mean I made these right before I hopped in the shower to meet her. They cooled while I was getting ready and I packaged them up before heading out the door while they were still a tad warm. They're simple and quick and they satisfied my craving for buttery shortbread. These shortbread fingers have the addition of lemon zest for added Summery flavor and cornmeal for a slight toothy crunch. I topped them with a little raw sugar for a little more sweetness and they were just right. They kind of reminded of lemon bars but without the gooey filling and a little more crumbly- delicious.

Lemon Cornmeal Shortbread adapted from Fine Cooking

Printer Friendly Version

  • 1 1/2 sticks (3/4 cup or 12 T.) unsalted butter, room temp.
  • 3/4 cup powdered sugar
  • 1 Tbsp. finely grated lemon zest
  • 1/2 tsp. lemon extract
  • 1 cup all-purpose flour
  • 1/2 cup finely ground yellow cornmeal
  • 1/4 tsp. table salt
  • 2 Tbsp. Turbinado or sparkling sugar (optional)

Position a rack in the middle of the oven and heat oven to 325 degrees F. Lightly grease the sides and bottoms of an 8x8-inch square baking pan. Line with a sheet of parchment. Set aside.

In a medium bowl, combine butter, sugar, lemon zest and extract. With a hand mixer, beat on medium high speed til light and creamy; about 3 minutes. Add the flour, cornmeal and salt and mix on low speed until the dough begins to form moist clumps. Dump the dough into the prepared pan.

Using a rubber spatula (I used my hand moistened with water) spread the dough into the pan in a smooth even layer. Dip the tip of a knife or a bench scraper in flour to prevent sticking and score the dough all the way through the bars. Cut the bars into finger like shapes (I cut the bars into 6 pieces on one side and 3 on the other side for a total of 18 pieces). Sprinkle the tops of the uncooked shortbread with turbinado or coarse grain sugar.

Bake until the tops look dry and are golden, about 35-40 minutes. Transfer the pan to a rack. Immediately cut the shortbread into bars using the previously scored lines as a guide (they will have faded a bit during baking). Let the bars cool completely in the pan before removing them from the pan.

NOTES: It's important to cut the shortbread as soon as it comes out the oven . If you wait til it's cooled, it will crumble when you try to cut it.

~ If you leave an overhang on the parchment paper, it will be easier to remove from the pan.

Sunday, July 25, 2010

Thank You & A Guest Post

Hi everyone! I just wanted to thank you for all the kind comments and emails that I received over the last couple days regarding the loss of our special furry friend, Sierra. They mean so much to me and my family.

I also wanted to let you know that I have a guest post up at 3 B's- Baseball, Baking & Books if you'd like to come over and check it out.

Thanks for everything,

Monica H

Saturday, July 24, 2010

Sierra

SIERRA

April 1994 - July 22, 2010

It's been a rough couple of days at the LTBG household and we're grieving and missing our sweet furry friend. If you'd like to read more about her, please go here.

Tuesday, July 20, 2010

A Request A Year In The Making

Remember me telling you about my mom's gorgeous birthday cake? Well here it is! I'm not trying to toot my own horn, because I am hard on myself and see all kinds of flaws in the overall cake BUT it is pretty and I love the contrasting colors and flavors. This month the Cake Slice Bakers were to make a Key West Cake with Mango Mousse and Ginger Lime Cream. It sounds delicious but I didn't have time to make this cake as well as all the other birthday treats I had to bake this month. Besides, this is the cake my mother specifically asked for and I was glad to fulfill her request.

If you've been following me long, then you'll know I blogged about this cake exactly one year ago today. If you're new here, then WELCOME to my blog! I had intentions of making my mother cranberry orange scones for her birthday rather than a cake because she loves them and Starbucks changed their recipe and she complains about them every time she gets one. But I asked her what she'd like and without hesitations she said, "I want that lemon blueberry cake you made last year. I've been thinking about it ever since because it was so good." Well alright then, move over scones, hello luscious marble cake. Although I'm pretty sure I'll be making those scones for her sometime soon anyway.

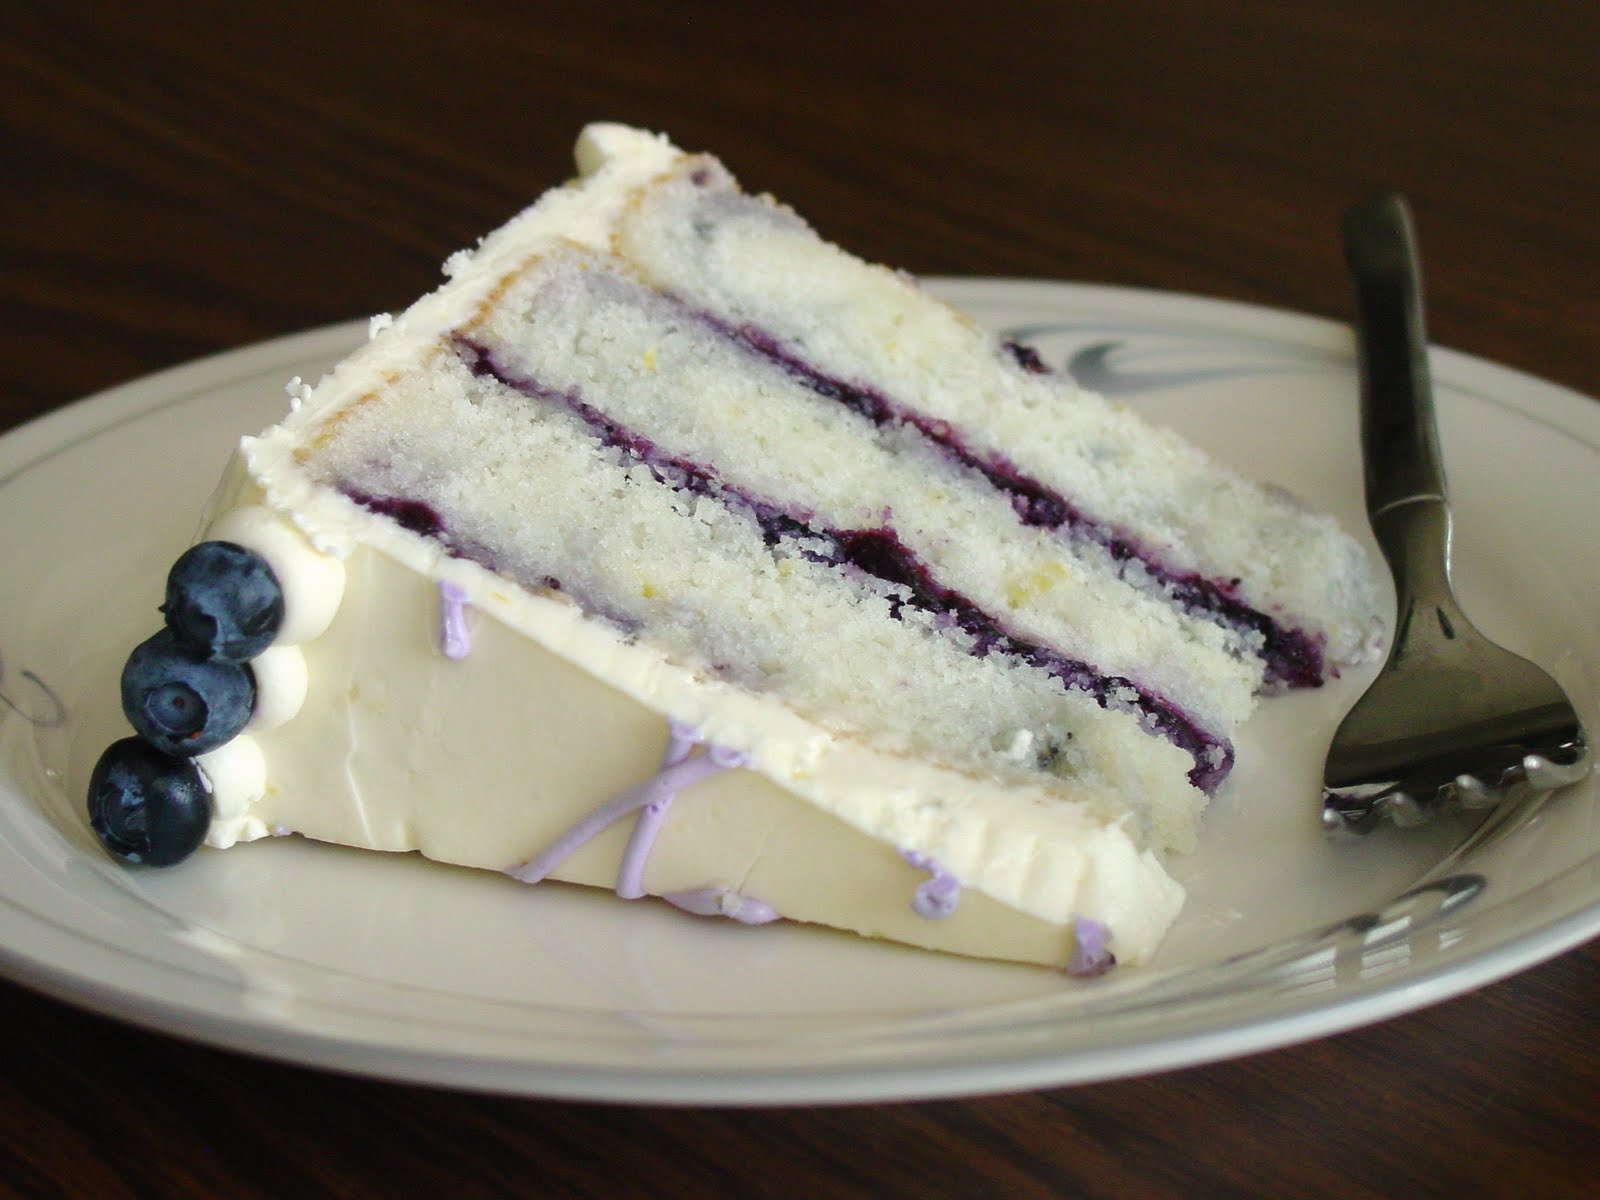
This really is a great cake. I professed my love about it last July 20th (also known as Debby's birthday. Happy Birthday Debby!!!) and this time is no different. I like to eat it at room temperature because the buttercream is soft and creamy and buttery, but my mom likes it cold because the frosting stiffens up. It's great either way. I did decide to take a shortcut and purchase a jar of blueberry jam rather than making the homemade jam. If you have time to make it, then I suggest doing so, if not, spend the extra money for the good stuff. This particular one had lemon juice already in it, but I added a bit more to thin it out and add flavor. The only note I have for you is to puree the jam so you end up with a smoother consistency- I did not do this and my blueberries sunk to the bottom of the cake. Still pretty but not so marbled.

On a different, yet still related note, I get a lot of emails and comments about frosting my cakes and getting them so smooth. So while assembling this cake, I took several pictures of the process and I plan on sharing those with you at a later date- don't worry it will be soon. In the meantime, I hope you'll forgive me for not baking the Key West Cake the other Cake Slice Bakers made. And I hope that you enjoy this cake as much as my mother did.

Lemon Blueberry Marble Cake from Sky High

  • 2 sticks (8 ounces) unsalted butter, at room temperature
  • 2 cups sugar
  • 2 tsp grated lemon zest
  • 1½ tsp lemon extract
  • 7 egg whites
  • 3 cups cake flour
  • 4 tsp baking powder
  • ½ tsp salt
  • 1¼ cups milk

Preheat the oven to 350 degrees F. Butter the bottom and sides of three 8 inch round cake pans. Line the bottom of each pan with a round of parchment or waxed paper and butter the paper.

In a mixer, cream together the butter, sugar, lemon zest and lemon extract until light and fluffy. Gradually add the egg whites 2 or 3 at a time, beating well between additions and stopping occasionally to scrape down the sides of the bowl.

Combine the flour, baking powder and salt, whisk gently to blend. In 2 or 3 alternating additions, beat the dry ingredients and milk into the butter mixture, scraping down the sides of the bowl several times. Beat on medium-high speed for about 1 minute to smooth out any lumps and aerate the batter.

Scoop 1 cup of the batter into a small bowl. Divide the remaining batter equally among the 3 prepared pans, smoothing the tops with a spatula. This gives you a smooth surface to work with. Add 2½ tbsp of the lemon blueberry jam to the reserved batter and blend well. Drizzle heaping teaspoons of this blueberry mixture over the batter in the pans. Use a skewer to swirl the blueberry mixture in short strokes to drag it down through the lemon batter without mixing it in.

Bake for about 25 minutes or until a cake tester or skewer stuck in the center comes out clean and the cake pulls away from the sides of the pan. Let the layers cool for 10 minutes before turning out onto a wire rack, peeling off the paper and leaving to cool completely.

Blueberry Lemon Jam

  • 3 cups blueberries, fresh or frozen
  • ¾ cup sugar
  • 2 tbsp freshly squeezed lemon juice
  • 1½ tsp grated lemon zest
  • 1 tsp grated fresh ginger (optional)

Puree the blueberries with any juices that have exuded in a blender. Pass the puree through a coarse strainer to remove the skins.

In a heavy medium saucepan, combine the blueberry puree with the sugar, lemon juice, zest and ginger (if using). Bring to a gentle boil over a medium heat, stirring often for 20 minutes, or until the preserves have thickened and are reduced to 1 cup.

To check the proper thickness place a small amount of a saucer and put in the freezer until cold. Drag your finger through it. If a clear path is made through the preserve then it is ready. Let the preserves cool before using. (Can be made up to 5 days in advance).

Lemon Buttercream

  • 1 cup sugar
  • ¼ cup water
  • 2 eggs
  • 3 sticks (12 ounces) unsalted butter, at room temperature
  • 2 tbsp freshly squeezed lemon juice
  • 1 tbsp finely grated lemon zest (my addition)

In a small saucepan, combine the sugar and water. Bring to the boil over a medium heat, stirring to dissolve the sugar. Continue to boil without stirring, occasionally washing down the sides of the pan with a wet pastry brush until the syrup reaches the soft-ball stage, 238 (I take it off the heat at 235) degrees F on a candy thermometer. Immediately remove from the heat.

In a large mixer bowl with an electric mixer on medium speed, beat the eggs briefly. Slowly add the hot syrup in a thin stream, pouring it down the sides of the bowl; be careful to avoid hitting the beaters or the syrup may splatter. When all the syrup has been added, raise the speed to medium-high and beat until the mixture is very fluffy and cooled to body temperature. This can take 15-20 minutes.

Reduce the mixer speed to medium-low and gradually add the softened butter 2 to 3 tablespoons at a time, beating well between additions. As you’re adding the last few tablespoons of butter, the frosting will appear to break, then suddenly come together like whipped butter.

Beat in the lemon juice and zest (if using), and the frosting is ready to use.

NOTE: I reserved a small amount of the buttercream and tinted it with Americolor gel colors to pipe the birthday greeting. I piped it with a #3 tip. The border was piped with a #12 tip.

Assembly: To assemble the cake, place a layer, flat side up, on a cake stand. Spread half of the lemon blueberry jam over the top. Place a second layer on top of the first and spread the remaining jam over it. Finally place the third layer on top and frost the top and sides with the lemon buttercream. Decorate with fresh blueberries and serve.

Makes one 8 inch triple layered cake.

To see pictures and learn how to frost a layer cake, click HERE.

Happy 50th Birthday Mom! I love you!

Thursday, July 15, 2010

Lemony Goodness & A Brief Getaway

Mr. H and I are going away for a long weekend. We're not going too far but I'm hoping for some quiet one-on-one time. Well that sounds dirty, but you know what I mean :-) We're going to stay in a nice hotel, relax out by the pool- he developing his tan, me under an umbrella with a book (more than likely a magazine), listen to music, we're going to walk and explore, eat and shop. What every getaway should be like.

In the meantime, I'll leave you with this oh-so-creamy no bake lemon cheesecake. Sound good? Believe me, it was! And it went quick. This was one of the things I made for my mom's 4th of July BBQ. It also served double duty as my cousin's 12th birthday dessert. He and I share the same birthday and I didn't get to see him on his special day so as my birthday gift to him, I promised I'd make a cheesecake for him. He LOVES cheesecake and his parents won't spend the money or the time baking a real cheesecake so they usually buy Sara Lee frozen junk, like he got last year. 2010 brought him a Jell-O no bake cheesecake. Doh! So I felt it was my duty to bake him something homemade, creamy and made with actually cream cheese! Last year I made him Mini Cookies 'n Cream Cheesecakes and he raved about them every time I saw him, this cheesecake was no different. Even my mom couldn't stop talking about how good and creamy it was.

This cheesecake comes from the folks at Cook's Country (America's Test Kitchen) and they don't usually make their recipes available to the public unless you subscribe to their website. So I was glad to find it on Mel's Kitchen Cafe-- she had me at "no bake" :-) This is a no bake cheesecake but you still have to turn the oven on set the graham cracker crust. The filling is loaded with cream cheese, heavy cream and lemon curd, all set up by a little envelope of gelatin. You do have to chill it for a few hours, hence the word "icebox" in the title, but it'll be worth it. You can make it at night like I did and it will be ready for you the next day.

Even though I didn't have to bake this, I wanted this to be quick. I didn't have time to make the homemade lemon curd and allow it to cool, I so used the jarred stuff and it worked out fine. I made a couple changes to the recipe like adding an extra tablespoon of butter to the crust and omitting the zest in the crust and adding it to the filling for an extra zing. I also used graham cracker crumbs instead of crushing up my crackers- it was easier and I didn't have to bring out the food processor. My changes are reflected below. If you want to make your own lemon curd go ahead, if not then use good quality jarred curd and follow the directions accordingly. Either way, you'll be rewarded by a very creamy, almost fluffy, perfectly tart, lemony cheesecake. Enjoy!

Lemon Curd Icebox Cheesecake adapted from Cook's Country via Mel's Kitchen Cafe

Printer Friendly Version

Crust:
  • 9 whole rectangular graham crackers (or about 1 1/2 cups crushed)
  • 6 tablespoons butter, melted

Lemon Curd:

  • 1 large egg plus 1 egg yolk
  • 1/4 cup sugar
  • pinch salt
  • 2 tablespoons fresh lemon juice
  • 1 tablespoon butter
  • 1 tablespoon heavy cream

Filling:

  • 1/4 cup fresh lemon juice, from about 2 lemons
  • 1 envelope (2 3/4 teaspoons) unflavored gelatin
  • 24 oz. (3 bricks) cream cheese, softened to room temperature
  • 1 teaspoon grated lemon zest
  • 3/4 cup sugar
  • pinch salt
  • 1 1/4 cups heavy cream, room temperature

For the crust: Preheat the oven to 350 degrees and adjust an oven rack to the middle position.

In a food processor, pulse the graham crackers until they are finely ground (I used boxed graham cracker crumbs). Add the butter and pulse until combined. Alternately, the graham crackers can be crushed in a resealable bag with a rolling pin and then poured into a bowl where the zest and butter can be stirred in.

Press the mixture onto the bottom of a 9-inch spring form pan. Bake the crust until it is lightly golden brown, about 8 minutes. Cool the crust completely on a wire rack before filling.

For the curd: While the crust is cooling, whisk the egg, egg yolk, sugar and salt together in a small saucepan. Whisk in the lemon juice and cook over medium-low heat, stirring constantly, until the mixture is thick and pudding-like, about 3-4 minutes. Remove from the heat and stir in the butter and cream. Press the mixture through a fine mesh strainer or sieve into a small bowl and refrigerate until needed.

For the filling: In a small bowl, put the 1/4 cup fresh lemon juice. Sprinkle the gelatin over the top and let it stand until the gelatin softens, about 5 minutes. Microwave the mixture until it is bubbling around the edges and the gelatin dissolves, about 30 seconds. Set aside.

In a large bowl with a handheld mixer or in the bowl of a stand mixer, beat the cream cheese, lemon zest, sugar, and salt until smooth and creamy, scraping down the sides of the bowl, about 2 minutes. Slowly add the cream and beat until the mixture is light and fluffy, about 2 minutes. Add the gelatin mixture and 1/4 cup of the refrigerated lemon curd. Beat until the mixture is smooth and airy, about 3 minutes. Pour the filling into the cooled crust and smooth the top.

For the decorative topping: Using a teaspoon, dollop the remaining curd on top of the cheesecake and lightly drag a pairing knife or skewer through the lines to create a marble appearance. Alternately, you could pipe the curd (I put the curd into a Ziploc bag, snipped the corner and piped) into lines or swirls and drag a skewer through it to make other decorative patterns.

Refrigerate the cheesecake until set, at least 6 hours. Remove the sides of the pan, cut into slices and serve.

Serves 12

NOTES: The cheesecake can be made ahead and refrigerated for up to 3 days. To create a clean slice of cheesecake, dip your knife in a glass of hot water, dry it, then slice the cheesecake. Do this for each slice.

*Do NOT substitute the heavy cream for half 'n half or milk. You need the fat in the cream to whip up and provide body and texture to the cheesecake. Milk will just thin out your batter and it won't set properly.

Mmm! See y'all next week!

Monday, July 12, 2010

A Taste Of The Islands

I'm embarrassed to tell you how long ago I made this fudge, so I won't. :-) Does it matter how long ago I made, as long as I'm sharing it with you now? I didn't think so either. I've made a version of this fudge before, last July for my mom's birthday. It was loaded with her favorite flavors- orange, cranberry and macadamia nuts. This version incorporates dried pineapple, coconut and nuts!

This summery concoction was requested by my mom's friend as a paid order. In fact she requested this flavor as well as the cranberry orange version and a semisweet chocolate and walnut fudge. This was my favorite of the three and it's so easy to throw together. You can use the basic recipe (below) and add any kind of flavorings, fruits, nuts, and chocolate to make it your own. Don't like nuts? Don't add 'em. Love dried fruit? Add more. It's that simple.

Pina Colada Fudge. Ever heard of that before? It's sweet and creamy, with a slight taste of rum in the background. The macadamia nuts and pecans add a nice crunch, while the dried pineapple adds a chewy factor. The toasted coconut flakes are kind of a hidden surprise. They add to the overall texture but they don't overwhelm the fudge. And since it's toasted it's not going to be stringy and get caught up in your teeth. You're welcome. Go make this for yourself or as a treat for someone else. You don't even have to turn the oven on, what are you waiting for?!

Pina Colada Fudge adapted from HERE

Printer Friendly Version

  • 1 (12 oz.) package white chocolate chips
  • 1 (16 oz.) tub cream cheese or vanilla frosting
  • 1/4 tsp. salt
  • 1/2 tsp. rum extract
  • 1/2 cup dried pineapple, chopped
  • 1/4 cup toasted flaked coconut
  • 1/3 cup chopped macadamia nuts
  • 1/3 cup chopped pecans
  • more nuts or fruit for garnish (optional)

1. Lightly butter an 8 x 8-inch baking pan or a 9-inch diameter pan*. Set aside.

2. Melt the baking chips in the microwave in a medium bowl.

3. Stir in the frosting, salt, extract, nuts and fruit until well combined.

4. Scrape into the prepared pan and sprinkle with additional nuts or fruit as garnish, if using.

5. Refrigerate for at least 1/2 hour or until firm. Cut it into squares to serve.

NOTE: *I used a silicone pan, so I skipped step one and it made popping out the fudge so easy.

This is the blueprint recipe for this fudge. You can use ANY combination of flavors to make your fudge uniquely yours. Have fun with it.

Easy Fudge from Nancy's Kitchen
  • 1 (12-ounce) package of baking chips
  • 1 (16-ounce) tub of prepared frosting
  • 1/4 teaspoon salt
  • 1/2 teaspoon extract of your choice
  • 3/4 cup nuts of your choice

1. Lightly butter an 8 x 8-inch baking pan or a 9-inch diameter pan. Set aside.

2. Melt the baking chips in the microwave in a medium bowl.

3. Stir in the frosting, salt, extract, and nuts until well combined.

4. Scrape into the prepared pan and refrigerate for at least 1/2 hour or until firm. Cut it into squares to serve.

I heart Pina Colada Fudge!

Friday, July 9, 2010

Annoying Habits

We just finished dinner and I'm snuggled up in my favorite chair with the laptop on my...well, lap. I am listening to Family Guy reruns in the background and waiting for 9pm to strike so I can meet my friend at the bookstore for coffee and chit chat. Sounds ideal huh? Minus the obnoxious cartoon in the background. ha!

You see, Mr. H will take the remote from me, change the channel and put it on something uber annoying. He'll watch it for about 15 minutes then head into the office to full around on the computer or he'll go to the garage to tinker and he leaves the remote on the couch across the room! That drives me batty. He does this ALL the time. Usually I jut ignore it because I'm reading blogs and it's just background noise, but I can't stand Family Guy's rude humor. Or a show about garage makeovers, or tow trucks or the Speed channel, or Vh-1's One Hit Wonders (for the umpteenth time).

My husband has horrible taste in television. It's not all bad but I've been subjected to some awful TV. And as I type this I'm watching Van Wilder's something or another. And the remote? Across the room on the couch far, far away from me (really it's only a few feet away from me but I'm lazy so it feels like miles). But despite this annoying habit, I love my husband and I vowed "for better or worse". And so I made him these pepperoni pizza puffs. They're like bite size pizzas baked into muffin pan. We had them for dinner with a side salad but I'd recommend them for appetizers too. They're kind of like pizza but puffy and a little like a quiche but loaded with pizza flavor. Feel free to make them with your favorite toppings.

Pepperoni Pizza Puffs adapted from Everyday with Rachael Ray and Cassie Craves

  • 3/4 cup flour
  • 3/4 teaspoon baking powder
  • 1 tablespoon Italian seasoning
  • pinch of salt (my addition, optional)
  • pinch of red pepper flakes (my addition, optional)
  • 3/4 cup whole milk
  • 1 egg, lightly beaten
  • 1 cup shredded mozzarella cheese
  • 1/4 cup grated Parmesan cheese
  • 1 cup cubed pepperoni
  • 1/2 cup store-bought pizza sauce

1. Preheat the oven to 375 degrees. Grease a 24-cup mini-muffin pan. In a large bowl, whisk together the flour, baking powder, Italian seasoning, salt and red pepper flakes (if using) ; whisk in the milk and egg. Stir in the mozzarella, Parmesan and pepperoni; let stand for 10 minutes.

2. Stir the batter and divide among the mini-muffin cups. Bake until puffed and golden, 20 to 25 minutes.

3. Meanwhile, microwave the pizza sauce until warmed through. Serve the puffs with the pizza sauce for dipping.

NOTE: All my batter did not fit into the 24-mini muffin pan. So I made a full size muffin with the leftover batter. Some pans are larger than others so you may not have have an issue.

Hope you all have a great weekend!

Wednesday, July 7, 2010

Red, White and Blue

This was a ridiculously simple recipe to make. I feel kinda silly even calling it a "recipe" because it really is that easy. I guess you could call it "semi-homemade" but I hate that phrase, so I won't :-) I made this along with 3 other things for 4th of July BBQ at my mom's this weekend.

I was busy all day Saturday and most of the day on Sunday getting things ready for my mom's birthday (Monday the 5th) and for our holiday BBQ so this needed to be simple. I was going to make a brownie/fruit pizza with a sweetened cream cheese topping but I thought I'd bake it into a rectangular pan and decorate it as a flag, because I'm cheesy like that. ha!

Obviously there are 50 stars and 13 stripes on an American flag so this is NOT up to regulations but it was fun. I got Mr. H rinsing, hulling, slicing and drying the berries while I was mixing up the cream cheese mixture. Thanks Babe! It's important to ensure that your berries are dry when you place them on the frosting or they'll bleed into the white background. We just placed them cut side down on a paper towel to absorb the excess liquid and that worked well.

This brownie dessert was good. It's not a gourmet recipe by any means but sometimes good and simple is just what you need. If you don't want to make a flag on top then use your favorite fruit and scatter it about. The chocolate, cream cheese and the fruit was a nice combination. It was sweet and creamy and tart and would be good any time of year to show your American pride. Speaking of... Janet's son just came home from Afghanistan. Welcome home Brandon!

Berry Brownie Flag from Monica H

Printer Friendly Version

  • 1 box brownie mix (plus water, eggs and oil called for on package)
  • 1 (8 oz) package cream cheese, softened
  • 1/3 cup sugar
  • 1/4 cup heavy cream
  • 1/2 teaspoon vanilla
  • 2 cups sliced fresh strawberries
  • 1/2 cup fresh blueberries

Bake one pouch of brownies in a 9x13-inch pan according to box directions. Or use your favorite brownie recipe. Allow to cool completely and set aside.

In small bowl, beat cream cheese and sugar together with electric mixer on medium speed til creamy and smooth. Add heavy cream and vanilla and mix til fluffy and well incorporated.

Spread mixture evenly over cooled brownie base. Fill in the top left corner with blueberries. Arrange the strawberries in rows over cream cheese mixture. Refrigerate about 1 hour or until chilled. Cut into squares. Store covered in refrigerator.

Related Posts with Thumbnails