Showing posts with label Cake. Show all posts

Tuesday, October 28, 2014

Chocolate Fudge Oreo Bundt for National Chocolate Day!


I had a major craving for chocolate cake one night. It was almost time to start dinner, so I didn't really have time to search for a recipe or bring butter to room temperature so I pulled out one of my favorite baking books- Bundt Classics. I immediately found a recipe that looked good to me and I had all the ingredients on hand. Of course, I added my own touches to it and it took this cake to a whole new level of chocolate deliciousness!


This recipe starts with a chocolate cake mix but you'd never know it. I took the help of the mix and got this cake in the oven in less than 15 minutes. It baked while I made supper then we had it for dessert. Win! I have to be honest, when I was making this, I had no intention of adding Oreos to the batter. I was getting the ingredients from the pantry and Hayden grabbed the Oreos- positioned right at his eye level. He said we needed to add Oreos, so I did! I keep that little genius child around for a reason ;-).


This cake was over the top, a chocolate lovers dream! I mean really, there's the chocolate cake, chocolate pudding, chocolate syrup, chocolate chips and chocolate cookies. Then I had the audacity to top it off with silky ganache and even more chocolate chips. This was fudgy and decadent and cured my cravings. Coincidentally, it's National Chocolate Day, so make this Bundt! 


Chocolate Fudge Oreo Bundt adapted from Bundt Classics

Printer Friendly Version

Cake:
  • 1 (18.25 oz) box chocolate cake mix
  • 1 (3.4 oz) box instant chocolate pudding
  • 1 cup sour cream
  • 1/2 cup warm water
  • 1/3 cup vegetable oil
  • 1/4 cup Hershey's chocolate syrup
  • 1 teaspoon vanilla extract
  • 4 large eggs
  • 1 cup mini chocolate chips
  • 10 Oreos, coarsely broken

Ganache
  • 1/2 cup heavy cream
  • 1/2 cup chocolate chips

Decoration: 
  • Mini chocolate chips or Oreos, optional

To Make The Cake: Preheat oven to 325 degrees F. Generously grease a 12 cup Bundt pan with non-stick baking spray (with flour). Set aside. 

In a large mixing bowl, combine all the cake ingredients except the chocolate chips and Oreos. Blend with a hand mixer over medium speed until well blended. Scrape the sides of the bowl down and stir in the chocolate chips and crushed Oreos. 

Pour the batter into the prepared Bundt pan. Bake for 55-65 minutes or until a toothpick inserted into the center comes out clean. Cool cake in pan for 20 minutes. Unmold cake onto a cooling rack or a serving platter and allow to cool completely. 

To Make The Ganache: In a small mixing bowl, heat cream in the microwave until hot and steamy, about 60 seconds. Add the chocolate chips to the hot cream and let them sit for 5 minutes. With a spatula, gently stir the chocolate chips and cream together until the mixture comes together and becomes shiny and silky. Do not use a whisk or stir too vigorously, this will cause air bubbles in the ganache. If tiny lumps of chocolate remain, let the mixture sit a little longer, then stir again until smooth. 

The longer the mixture sits, the thicker it becomes. Allow ganache to thicken a bit before pouring onto cooled cake. You want it pourable but not so thin that it runs off the side of your cake. 

Immediately top with additional mini chocolate chips or Oreo cookies, if desired. Allow ganache to set before serving. Store leftover cake in an airtight container at room temperature.


Friday, October 3, 2014

Lick The Bowl Good Cookbook- Celebrating The First Year


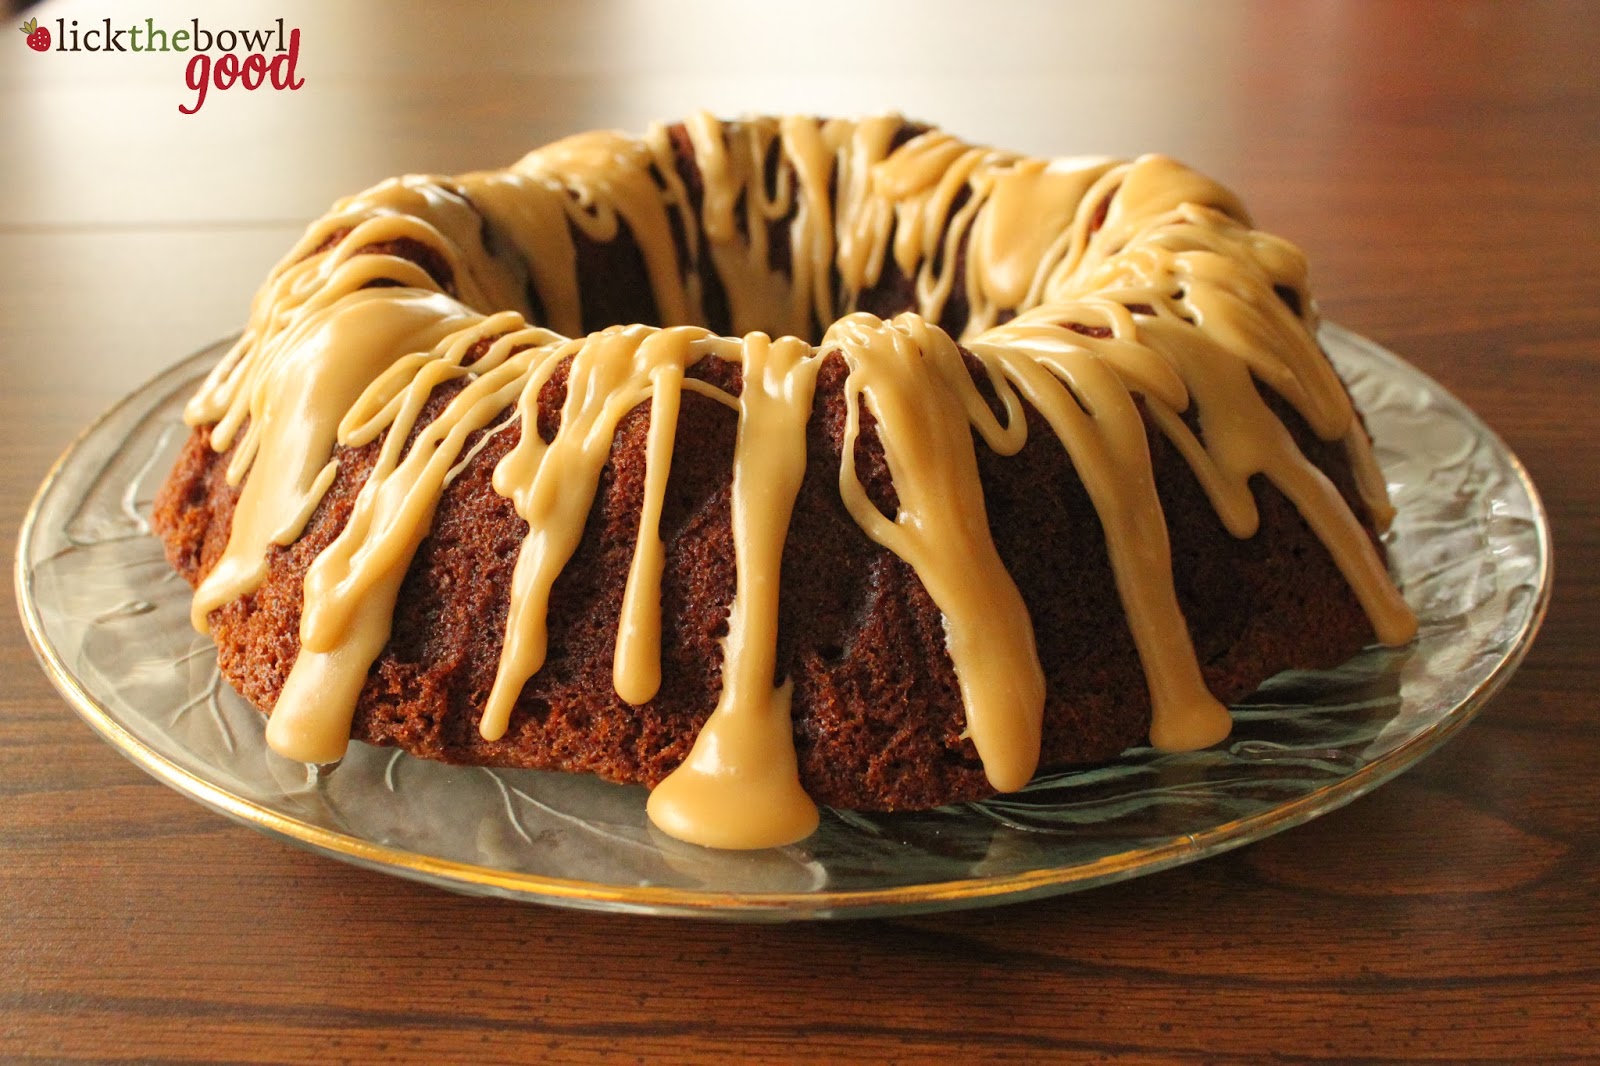
It's been one year since I released my cookbook Lick The Bowl Good so I thought I'd celebrate by sharing one of my favorite recipes from the book- Pumpkin Bundt Cake with Brown Butter Glaze. 

This is an adaptation of the Cinderella Cake that I have been baking for years. I swapped out the cream cheese icing for a deliciously nutty brown butter icing. I have been craving this cake for weeks and now that it's Fall and cooler, today was the perfect day to whip this up. As this cake sits cooling on the counter and the aromas of pumpkin and spice are floating in the air, I'm wishing I could share a slice with you all. 

Thank you all for your continued support of this blog and my cookbook. I hope you enjoy this cake!

Pumpkin Bundt Cake with Brown Butter Glaze

Pumpkin Cake: 
  • 2 cups granulated sugar
  • 4 large eggs
  • 1 cup canola oil
  • 1 teaspoon vanilla extract
  • 2 cups all-purpose flour
  • 2 teaspoon baking soda
  • 2 teaspoon cinnamon
  • 1/2 teaspoon salt
  • 1- 15 ounce can pure pumpkin 

Brown Butter Glaze: 
  • 1/4 cup unsalted butter
  • 1 1/4 cups powdered sugar
  • 2 Tablespoons milk
  • 1/2 teaspoon vanilla extract


For The Cake: Preheat oven to 350 degrees F.

Grease and flour a 9-inch Bundt pan and set aside.

In a large bowl, beat sugar and eggs until well blended and light in color. Add oil and vanilla and continue to beat.

Add the flour, baking soda, cinnamon and salt to the egg mixture and stir to combine.Add pumpkin puree and mix well. Pour into prepared pan.

Bake for 50 to 55 minutes or until a toothpick inserted into the center of the cake comes out clean.

Let stand in pan for 10 minutes, then turn out onto baking rack to cool completely.

Once the cake has cooled, place it on a serving platter and make the glaze.

For The Glaze: In a medium bowl add the powdered sugar and set aside while you make the brown butter.

In a small saucepan, melt the butter over medium heat. Continue to cook, swirling the pot occasionally until the butter boils and becomes foamy. It will turn golden brown and start to smell nutty. Once the butter stops sizzling and the foam subsides, it is ready. Keep an eye on it because you don't want it to burn. This could take 5 to 8 minutes.

Once the butter has browned, remove from the heat and pour the butter and the browned bits over the sugar. Add the vanilla to the butter and sugar and whisk until smooth.

Spoon the warm glaze over the cooled cake and allow the glaze to set before serving.

Store at room temperature.


Friday, May 16, 2014

A Bold Pillsbury Giveaway! (CLOSED)


At the first of the month, I shared with you some fun and pretty flower cupcakes I made for Mother's Day using Pillsbury® bold Funfetti cake mixes and frosting. You're going to get the chance to make these at home because today I'm having a giveaway for a Pillsbury Celebration Starter Kit valued at over $100!


Included in the prize pack from Pillsbury® is: 
  • Funfetti® Aqua Blue Cupcake and Cake Mix
  • Funfetti® Orange All Star Cupcake and Cake Mix
  • Funfetti® Neon Yellow Cupcake and Cake Mix
  • Funfetti® Vibrant Green Cupcake and Cake Mix
  • Funfetti® Orange All Star Vanilla Flavored Frosting
  • Funfetti® Neon Yellow Vanilla Flavored Frosting
  • $100 Visa Gift Card

Learn more about the bold product line by visiting Pillsbury on Facebook, PillsburyBaking.com and Pillsbury on Pinterest.


To enter this fabulous giveaway, simply leave me a comment on this blog post telling me what your favorite kind of cake is. That's it! There are no right or wrong answers, lets just talk cake and maybe even drool a little bit in the process :-)

One entry per person. Open to U.S. residents only. 

*I was provided with product samples and compensation by Pillsbury®, though the opinions I express here are my own. ©/® The J.M. Smucker Company. Pillsbury is a trademark of The Pillsbury Company, LLC, used under license. 

Thursday, May 1, 2014

Spring Bouquet For Mother's Day


I bought these tulip cupcake liners about 3 years ago with the thought that I would make some really pretty Mother's Day cupcakes and that just never happened. Life got in the way, there were other recipes requested and then I misplaced the liners until recently when Hayden was pulling my baking supplies out of a cabinet and playing with them in the living room :-). When Pillsbury® sent me some samples of their new bold Funfetti cake and cupcake mixes, I knew the yellow would be perfect for Spring cupcakes. Sometimes, life just works itself out and things fall into place.


My second mom, Olivia, gave me this Pillsbury Poppin' Fresh doll when she came to visit for Easter. He was the perfect little helper and inspiration in the kitchen and he's just so cute, don't you think? I think he'd approve of my use of  bold Pillsbury flower cupcakes. I'm kind of funny about colored mixes and drinks- I want the flavor to reflect the color so I added some bright lemon zest and juice to the batter along with buttermilk for some extra tang and to provide maximum moisture. So not only do they look like Spring, they taste like it too! The neon pink Funfetti icing was the perfect compliment to the pop of yellow underneath. 


These cupcakes are fun and worthy of a celebration, but they're easy enough that you don't have to stress about making them. They can be decorated any way you want, these flowers are just an idea but you can get more inspiration by visiting Pillsbury on Facebook, PillsburyBaking.com and Pillsbury on Pinterest. Any decorative tips, colors or sprinkles will work. Have fun with it and let everyone help and decorate their own for a truly unique experience. 


Lemon Buttermilk Flower Cupcakes

Printer Friendly Version
  • 1- 8.25 oz. package Pillsbury Funfetti Neon Yellow Cake Mix
  • 2/3 cup buttermilk
  • 1/4  cup vegetable oil
  • 1 large egg
  • 1 Tablespoon lemon zest
  • 1 Tablespoon lemon juice
  • 1 teaspoon vanilla extract
Preheat oven to 350 degrees F. Line cupcake tin with paper liners and set aside. 

Place all ingredients in a large bowl and beat with a hand mixer until batter is smooth and creamy and no traces of cake mix remain. 

Evenly divide the cake mix between the paper liners, filling them no more than 2/3 full. 

Bake for 18-22 minutes or until a toothpick inserted in the center comes out clean. 

Makes 10-12 cupcakes, depending on size. 

Once cupcakes are baked, allow them to cool in pan for five minutes before removing them to a wire rack to cool completely. 

For the Frosting: 

Transfer your favorite colors of Pillsbury Funfetti frosting to a piping bag fitted with your favorite icing tips and decorate the tops of the cooled cupcakes to resemble flowers. Use the sprinkles and colored sugar that come with the frosting to bring your cupcake flowers to life!

I used these Wilton tips for decorating: 
  • leaf tip- #67
  • round dot tip- #12
  • small flower tip- #224
  • swirl tip- #21
Store cupcakes at room temperature, in an airtight container. 


*I was provided with product samples and compensation by Pillsbury®, though the opinions I express here are my own. ©/® The J.M. Smucker Company. Pillsbury is a trademark of The Pillsbury Company, LLC, used under license. 

Friday, December 20, 2013

Celebrating 6 Years Of "Lick The Bowl Good" With A Giveaway! (CLOSED)

Every year my blog anniversary comes and goes and I forget about it. I intend to do something special to celebrate the day (November 3rd) and time escapes me, stuff comes up and then the holidays hit and my blog birthday goes unmentioned again. Well this year, to say "thank you for sticking by me!" I have a giveaway for you. I've been blogging for 6 years and so much good has come out of it. I've connected with some amazing people, made and eaten lots of tasty treats and some not so great ones too. I've learned a lot about baking formulas, food styling and photography and I even wrote my own cookbook, gosh darn it! Such an amazing opportunity and accomplishment that was! Would you like to win a signed copy of Lick The Bowl Good


I'll tell you more about the giveaway in a moment, but first let me tell you about this cake, streusel squares to be exact. The recipe comes from Great Cakes by Carole Walter. The Cake Slice Bakers are baking from this new book. This was a good recipe, the cake had a soft tender center, lightly scented with vanilla. The topping was the best part though- those buttery, cinnamon-y crumbs were hard to resist. This would be a great one to share with a crowd or to give as gifts this Christmas. You can even play up the flavorings a bit and use rum, lemon, or almond extracts in the cake. 


Streusel Squares
Recipe from Great Cakes by Carole Walter
via All That's Left Are The Crumbs

Printer Friendly Version

Streusel Topping:
  • ⅓ cup (⅔ stick) unsalted butter
  • 1¼ cups unsifted all-purpose flour
  • ⅔ cup sugar
  • 1 teaspoon ground cinnamon

Cake:
  • 2¼ cups unsifted all-purpose flour
  • 2 teaspoons baking powder
  • ½ teaspoon salt
  • ¾ cup (1½ sticks) unsalted butter
  • 1 cup superfine sugar
  • 2 large eggs
  • 1 large egg yolk
  • 1½ teaspoons vanilla extract
  • 1 cup milk 
  • 1 large egg white

Position a rack in the lower third of the oven and preheat to 350⁰F. Butter a 9 x 13 x 2” pan.

To Make The Streusel Topping: Melt the butter, then cool slightly.

Add the flour, sugar and cinnamon all at once and stir with a fork until the mixture forms small crumbs. Take a handful of the crumbs and make a fist to press the mixture into a large clump, and then separate into smaller clusters, at least two or three times the size of the original crumbs.

Repeat until all of the crumbs have been reshaped, then set aside.

To Make The Cake: Sift together the flour, baking powder and salt, set aside.

Cut the butter into 1-inch pieces and place in the large bowl of an electric mixer fitted with the paddle attachment to soften on low speed. Increase speed to medium-high and cream until smooth and light in color, about 1½ to 2 minutes.

Add the sugar, 1 tablespoon at a time, taking about 6 to 8 minutes to blend it in well, scraping the sides of the bowl as necessary.

Add the eggs and additional yolk, 1 at a time at 1-minute intervals, scraping the sides of the bowl as necessary.Blend in the vanilla.

Reduce mixer speed to low and add the dry ingredients alternately with the milk, dividing the flour mixture into three parts and the milk into two parts, starting and ending with the flour. Mix just until incorporated after each addition, scraping the sides of the bowl and mix for 10 seconds longer.

Spoon the batter into the prepared pan and smooth the surface with the back of a tablespoon.

Beat the egg white lightly with a fork, and using a pastry brush, spread about half of the beaten egg white over the top of the cake batter. Discard the remainder - the egg white helps the streusel adhere to the top of the cake.

Sprinkle the entire surface of the batter generously with the streusel, gently patting the crumbs into the batter with the palm of your hand; do not press hard.

Center the pan on the rack and bake for 40 to 45 minutes, or until the cake is golden brown on top, begins to come away from the sides of the pan, and the streusel is crisp. A toothpick inserted into the center should come out dry.

Remove the cake from the oven and set on a cake rack to cool. When ready to serve, dust the top with powdered sugar and cut into squares.

Can be stored at room temperature for up to 5 days.


The Giveaway! 

1. A Signed Copy of Lick The Bowl Good
2. Red Striped Paper Straws
3. Kitchen Utensils Magnets
4. Magnetic Note Pad
5. Baker's Twine
6. "For You" Baker's Tags
7. Recipe Cards
8. Sticky Notes for Bookmarking Your Favorite Recipes :-)


Giveaway open to U.S. residents only. You have 4 chances to win. Please leave a separate comment per entry. 

Entry #1 (mandatory entry)- Leave me a comment on this blog post telling me about your favorite holiday traditions.

Entry #3- Follow monica_h30 on Instagram

Entry #4- Share this giveaway with your friends and family and help spread the word about Lick The Bowl Good

Please remember, if you enter more than once to leave me separate comments per entry. 

I will select and announce the winner using random.org on Monday, December 30th. 

~ ~ ~ ~ ~

Best of luck and Happy Holidays to you all. Thank you for your generosity and support over the last 6 years. My family and I are thankful for you.

~Monica Holland

Thursday, November 21, 2013

Apples and Spice


It's almost Thanksgiving, are you all ready? I'm always interested in what people are making. Ham or turkey? Stuffing or dressing? Cranberry sauce- fresh or jellied? Pumpkin or pecan? There are so many different foods, I want a buffet table so I can sample everything! What's on your Thanksgiving menu? Our family does Holiday gatherings pot-luck style so not everyone has to do the work on heir own. Less stress that way. I'm in charge of a side dish and chocolate pecan pies this year. 

I baked my cake in my Autumn Harvest Bundt that my hubby gave me years ago. It's such a pretty pan, but the detail didn't show up as much as I hoped it would. I'm thinking a pound cake would do well in a pan like this, with a light dusting of powdered sugar. 

If you like spice cake, you might like this cake. It was really moist and spicy. A little too spicy for me, if I'm being honest, but if spice is your thing you'll like this. In this applesauce cake was lemon zest too, which was a nice addition. It brightened the flavor and helped cut through the spice. If I made this again, I'd leave out the allspice all together, cut the amount of nutmeg in half and add more chopped apples. The glaze though, was delicious! I could eat the glaze straight out of the bowl with a spoon. Below is the recipe for the cake, as I made it. 

Stay tuned for a holiday pie recipe and a giveaway... coming soon! Click to see the other cakes made by the Cake Slice Bakers.


Apple Sauce Spice Bundt Cake 

  • 2 1/4 cups sifted unbleached all-purpose flour
  • 1 teaspoon baking soda
  • 1/2 teaspoon salt
  • 1 1/2 teaspoon ground cinnamon
  • 1/2 teaspoon ground allspice
  • 1/2 teaspoon ground nutmeg
  • 3/4 cup pecans, lightly toasted finely chopped (optional)
  • 1/3 cup butter, room temperature
  • 1 teaspoon grated lemon zest
  • 1/3 cup vegetable shortening
  • 3/4 cup granulated sugar
  • 2/3 cup light brown sugar, lightly packed
  • 2 large eggs
  • 1 medium sized Granny Smith apple, peeled and diced, about 1 cup
  • 1 teaspoon vanilla extract
  • 1 cup applesauce
Preheat oven to 350 degrees F. utter a 9" fluted tube pan, dust it lightly with flour and invert over the kitchen sink to tap out excess flour.

Sift together flour, baking soda, salt and spices in a triple sifter. Stir in chopped pecans, if using. Set aside.

Place the butter and shortening and lemon zest in large bowl of an electric mixer fitted with the beaters or paddle attachment. Beat over medium-high speed until creamy and smooth, about 2 minute. 

Add the granulated sugar, 1 tablespoon at a time, taking 3 to 4 minutes to blend it in well. Add the light brown sugar over an additional 3 to 4 minutes. Scrape the sides of the bowl occasionally.

Add the eggs, one at a time until well blended. Reduce speed to medium-low. Add the fresh apple and the vanilla. 

Reduce mixer speed to low. Add the flour/nut mixture alternately in three additions with the applesauce in two additions, starting and ending with the flour. Beat just until incorporated after each addition. Scrape the sides of the bowl occasionally.

Spoon the batter into the prepared pan and smooth the top. Center the pan on the rack and bake in the preheated oven for 35 to 40 minutes or until the cake begins to leave the sides of the pan and a toothpick inserted into the center comes out clean.
Remove from oven. Place the pan on a cake rack to set for 10 to 15 minutes, then invert the cake onto the rack and remove pan. While the cake is still warm you may want to pour Brown Sugar Glaze over the top, letting it drip naturally down the sides. Garnish the top with chopped pecans if you wish.


Brown Sugar Glaze
  • 3 Tablespoons butter
  • 3 Tablespoons brown sugar, packed
  • 3 Tablespoons heavy cream
  • 3/4 cup sifted powdered sugar
  • 1/2 teaspoon vanilla
In a small saucepan, melt the butter with the brown sugar over low heat. Then stir in the heavy cream and cook slowly until the mixture comes to a gentle boil. Simmer for 1-2 minutes.

Take the pan off the heat and gradually add the powdered sugar in three additions, whisking until smooth. Add in the vanilla and whisk to combine. 

If the icing is too thick, add another tablespoon of the cream. You want it thin enough to pour but not runny. It sets quickly so get it on the cake as quickly as possible.

My little barefoot donkey on Halloween :-)

Friday, November 15, 2013

Hayden's 2nd Birthday- A Radio Flyer Tricycle Party


My sweet little mischievous boy turned two years old in September. We celebrated with a Radio Flyer red tricycle themed cake and party. I like themed parties but I'm not one to purchase character cups, plates, banners and tablecloths- that's just not my style. So I made a fondant covered tricycle cake, and chose solid red and turquoise accents to bring it all together.  Read on for more details.


I wanted to incorporate some of Hayden's favorite things at his party, which just happened to include cake, cookies, lemonade, milk, hot dogs with ketchup, pretzels and cheese. I made a bunting banner to hang over the table using patterned scrapbook that read "Happy Birthday Hayden". I also set up a lemonade stand and made a bunting for that that said "Lemonade 5 cents" I used this bunting template and Baker's twine to hang it. I loved how they turned out. So much so that I still haven't taken them down :-)

For the buffet I served: 

  1. Hot dogs with mustard and ketchup (served out of a Radio Flyer wagon)
  2. Tortilla chips and pretzels
  3. Veggies with ranch dip
  4. Cheese cubes
  5. Birthday cake (chocolate cake with vanilla buttercream covered in Marshmallow Fondant)
  6. Brown butter and spice rice krispies treats
  7. Fresh fruit cups
  8. Decorated sugar cookies and red and aqua Sixlets
  9. Whole and 2% milk served in glass Frappuccino bottles
  10. Raspberry and regular lemonade
My wonderfully talented friend, Kathia from Pink Little Cake, made the tricycle, cat and star Hayden decorated sugar cookies for me. If you haven't been to her blog, go check her out. She does amazing work. She also made the cute little scalloped tags that I used on Hayden's party favors which included Cheez-its, fruit snacks, raisins, and a drink mix.  My friend Becky from Goods by Gert custom made the letter H for me. I ordered Hayden's "two" shirt from Best Birthday Ever shop on Etsy. Thank you Kathia and Becky!


This was my first time covering a cake in fondant, though I have worked with fondant before. I was a little worried, but in the end it turned out great and the fondant I used was really forgiving. Any mistakes I made, I was able to cover up with a cloud or the green grass. This was really fun to make and this colors were so bright and vibrant. The actual fondant was quite tasty too. 


It was a great day shared with close family and I'm so grateful to have had my Dad and step mom there to celebrate with us along with. Hayden is a truly blessed boy. 


Sunday, October 27, 2013

My First Catered Party and A Spooktacular Halloween Cake


Last week I catered my first party for 40 people. My friend Holly asked if I would make a cake and heavy hors d'oeuvres for her 40th birthday extravaganza. I immediately said "yes!" then began brainstorming recipes and  ideas. Holly said she wanted a Halloween themed chocolate cake and sliders. I pretty much had carte blanche with the menu and decorating and I had so much fun. Here's what I made. 


I made 1). Ham wrapped Asparagus Spears with Boursin Cheese 2). Cream Cheese with Red Pepper Jelly and Spicy Saltine Crackers 3). Sausage, Garlic and Mushroom Pizza Puffs with Herb Red Sauce 4). Pork Tenderloin Medallions on Hawaiian Rolls served with Pesto Mayo.


I also made 7 Layer Dip with a Sour Cream Spiderweb served with corn chips and Sweet and Spicy Smoky Meatballs (that I forgot to take a picture of). And birthday cake!


My friend Holly doesn't actually turn 40 until December but she wanted to celebrate early with a "Happy Hollyween" party. I wanted to play up the "over the hill" theme so I did a graveyard scene and dug an early grave for her. I used Pepperidge Farm Milano cookies and a black edible marker for the tombstones. I used Peeps Marshmallow ghosts, Brach's pumpkins and edible chocolate rocks for decorating. I used melted dark chocolate and Wilton leaf sprinkles to make the tree. I used this Chocolate Cake Recipe, this Vanilla Buttercream Recipe and Chocolate Ganache to make the 2 layer 12-inch cake. It was a success! 


Spicy Saltine Crackers
(recipe given to me by my aunt Melinda)

Printer Friendly Version

  • 1 1/4 cup canola oil
  • 1 Tablespoon caraway seeds
  • 1 Tablespoon cayenne pepper
  • 1 Tablespoon dill weed
  • 3 Tablespoons dry ranch dressing mix
  • 1 box (4 sleeves) Unsalted tops Saltine crackers
In a measuring cup, combine the oil and seasonings. Mix well.

Place the crackers into a 2 gallon Ziploc bag. Pour the seasoned oil over the crackers and shake vigorously until well coated. Let crackers soak up the seasonings for at least one hour or overnight. Leave them in the sealed bag until ready to serve.

Hope you all have a Happy Halloween!

Monday, October 21, 2013

Our Last Vintage Cake


For the past year, The Cake Slice Bakers and I have been baking from Vintage Cakes by Julie Richardson. I missed a baking a few of the recipes when I was writing the cookbook, but the ones I did bake were quite tasty. This is a beautiful book and full of great recipes. If you're a cake fiend like I am, I would recommend you check this book out. 

Next month, we'll be baking from a new cake book so this month, rather than voting on and baking a specific cake, we had the choice to bake any cake we wanted from this book. I narrowed it down to two cakes but eventually decided on Texas Sheetcake because it's my hubby's favorite. The other cake I wanted to make was the Kentucky Bourbon cake. I still intend to make it, I just got busy and ran out of time. My friend Maranda from Jolts & Jollies made it and shared it on her blog if you're interested in the recipe. It looks delicious! 

It's not very often that Hayden falls asleep with Daddy on the couch- he hasn't done that since he was an infant. How sweet is this though? Those curls, my goodness!

This cake was very simple to put together and feeds a crowd. That's the beauty of sheet cakes. I divided the batter between to pans and took some to my mother-in-law. The cake was very moist although it was a little crumbly, in my opinion. Perhaps I could have baked it a couple minutes less or added a tad more oil or an extra egg next time??? There are so many recipes to try though, so I don't feel the need to remake this one. If you make it, I hope you'll let me know how you like it!


Texas Sheetcake from Vintage Cakes


Cake:
  • 1 cup unsalted butter
  • 1/2 cup lightly packed premium unsweetened natural cocoa
  • 3 tablespoons canola oil
  • 1 cup water
  • 2 cups all-purpose flour
  • 2 cups sugar
  • 1 teaspoon baking soda
  • 1/2 teaspoon fine sea salt
  • 2 eggs
  • 1/2 cup buttermilk
  • 2 teaspoons pure vanilla extract
Frosting:
  • 1/2 cup unsalted butter
  • 1/4 cup  lightly packed premium unsweetened cocoa
  • 1/3 cup whole milk
  • 2 teaspoons pure vanilla extract
  • 3 cups sifted powdered sugar
  • 1/2 cup toasted chopped nuts
Center an oven rack and preheat the oven to 375°F. Grease a 15 by 10 by 2-inch baking pan.

To make the cake, melt the butter in a large saucepan over medium heat. Whisk in the cocoa. Add the oil and water and bring to a rolling boil for 30 seconds. Remove the pan from the heat and set it aside to cool slightly. 

Meanwhile, sift together the flour, sugar, baking soda, and salt in a large bowl, then whisk the ingredients by hand to ensure they are well mixed. Pour the warm cocoa mixture into the sifted ingredients and whisk until just combined. In a small bowl, whisk together the eggs, buttermilk, and vanilla. With a rubber spatula, stir the buttermilk mixture into the batter. Pour the batter into the greased pan and place in the center of the oven. 

Bake until the top is firm and a wooden skewer inserted in the middle of the cake comes out with moist crumbs, 32 to 35 minutes.

While the cake is in the oven, make the frosting: melt the butter in a saucepan over medium heat. Whisk in the cocoa and bring the mixture to a rolling boil; boil for 30 seconds. Remove from heat and whisk in the milk and vanilla. Add the powdered sugar 1 cup at a time while whisking continuously. 

Immediately after the cake comes out of the oven, pour the frosting over the hot cake and sprinkle with the nuts. Try not to jiggle the cake before it sets or you'll leave waves in the frosting. Allow to cool before cutting into squares.

Well wrapped and stored at room temperature, this cake keeps for up to 5 days.

Want a bite?

Related Posts with Thumbnails