Showing posts with label Oatmeal. Show all posts

Saturday, September 7, 2013

The S'mores Cookbook and The Novica Giveaway Winner!


I was recently sent a cookbook for review of The S'more Cookbook by fellow blogger Susan Whetzel of the blog Doughmesstic. I'm always thrilled when I see a blogger come out with a cookbook. I know some people think it's kind of overrated, but I know how hard bloggers work and how much time goes into running a website, cooking, baking, photographing, and recipe developing. If you're a blogger then you know it's hard work! 


I like s'mores. I don't love them because I think they can be a little too sweet at times, but I like them just fine. When I was sent this cookbook, I was intrigued, because I was hoping for s'more flavored/s'more inspired desserts and this book is filled with them. Granted, the first chapter of recipes is pretty basic. I wouldn't necessarily call them recipes, as much as they are s'more suggestions- using chocolate grahams with white chocolate instead of regular grahams and milk chocolate isn't that novel of an idea to me. Her recipe's include using different types of candy such as peanut butter cups or chocolate caramels in place of the milk chocolate. Tasty? yes. But I need more substance. Luckily, this book has several chapters of s'more goodness including Cakes and Pies, Cookies, Brownies and even s'mores for breakfast. If that's not you're thing, perhaps a S'mores milkshake will cure your cravings. 


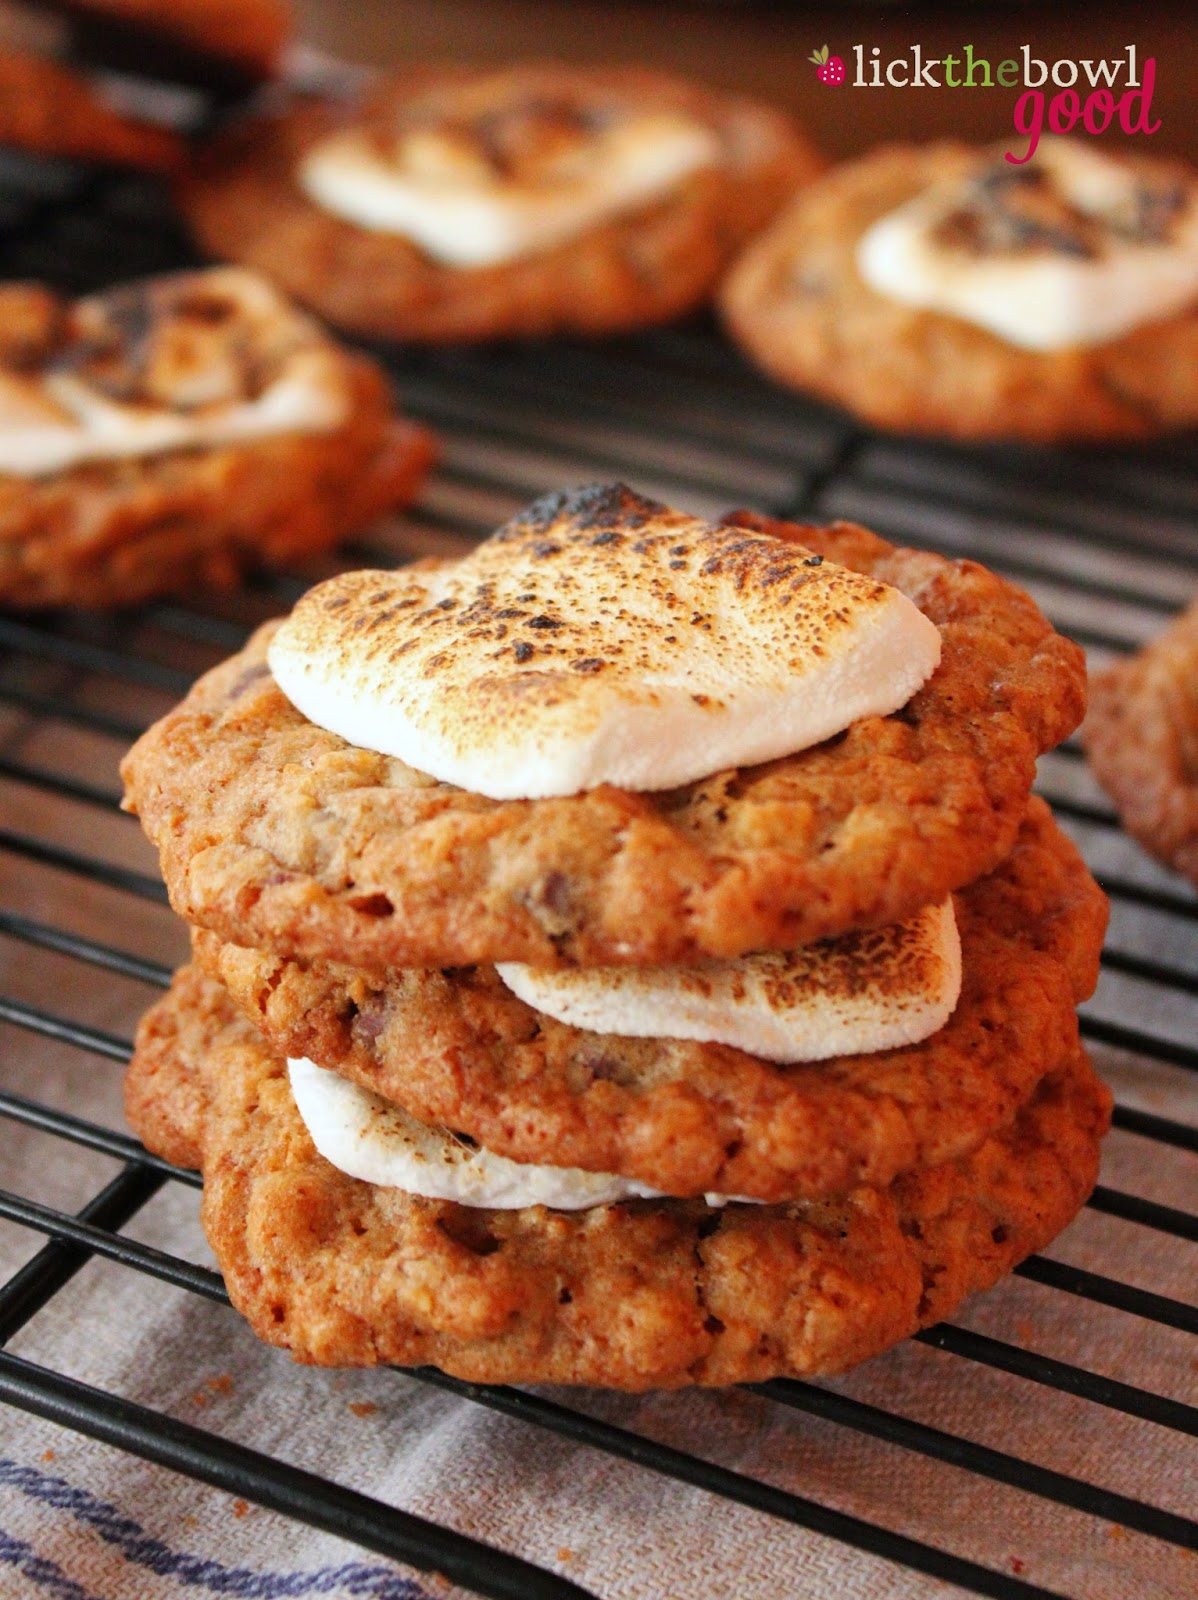
I opted for oatmeal chocolate chip S'more cookies as the first recipe I made. I also wanted to make S'more Frappuccinos but was out of marshmallow cream- that was a sad day. These cookies made it better though. I made a couple minor changes, but it didn't not affect the taste or outcome of the recipe. I used regular sized morsels instead of mini chips and used Stacker marshmallows instead of cutting large marshmallows into thirds. I didn't want to change anything about the recipe so I left it as is and just made my notes in red below. I would definitely make these cookies again because my husband LOVED them. I packed a couple in his lunch box. He's on the road a lot, so he left his cookies on the dash board to warm them and he said they tasted like they had just come out of the oven. They were crispy yet chewy, sweet and gooey. If you like S'mores you'll love these slightly less messy cookies. 

Hayden loves stars so I cut out a few star shaped marshmallows for him. 

Other recipes from this book I'd like to try are Toasted Marshmallow S'more Ice Cream, S'more Frappuccino, S'more Danish and the Chocolate Graham Pancakes. There's even a section on Giftable S'mores and ideas on how to package them. Every recipe has a full size color photo and there are lots of options for the S'more lover. In fact I know someone who would love this book. Hey Heather! I'm talking to you :-)


Oatmeal Chocolate Chip S'mores Cookies 
from The S'mores Cookbook  from Susan Whetzel

  • 1 cup softened salted butter
  • 3/4 cup dark brown sugar
  • 3/4 cup white sugar
  • 2 eggs
  • 2 teaspoons vanilla extract
  • 1 1/4 cups all-purpose flour
  • 1/2 teaspoon baking soda
  • 1/2 teaspoon salt
  • 1/4 cup graham cracker crumbs
  • 2 1/2 cups quick oats
  • 2 cups mini semisweet chocolate chips (I used regular chocolate chips)
  • 12 giant marshmallows, sliced into thirds (I used the small stacker marshmallows)

Preheat oven to 325 degrees F. Prepare a baking sheet with parchment paper; set aside. 

Using a stand mixer fitted with a beater attachment, cream the butter and sugars at medium-low speed until well combined. Add in the eggs, one at a time, beating well after each addition. Add in the vanilla; combine well. 

In a separate bowl, combine the flour, baking soda, salt and graham cracker crumbs. 

Add the dry ingredients to the wet batter. Mix on low until just combined. Stir in the oats and chocolate chips. 

Scoop rounded balls of batter onto the prepared sheets. (The directions don't say what size scoop to use to make the balls of dough. I used a medium ice cream scoop and got 40 cookies). The batter will spread, so be sure to leave ample space between. Bake for 13-15 minutes, or until the edges are very lightly browned. 

Remove from the oven, and immediately top with a slice of marshmallow. Allow to cool on baking sheets. Before serving, place the pan under the oven broiler or use a kitchen torch to toast the marshmallows. (This step was a little strange to me because the recipe makes 36-40 cookies. And it doesn't make sense (to me) to put a pan of cookies under the broiler every time you want a cookie, unless you're serving them to a crowd all at once. It's easier to use your torch, but not everyone has a kitchen torch. So I went ahead and toasted all the marshmallows at once after they were done baking. When we wanted a cookie, I just popped it into the microwave for 10 seconds to warm the chocolate and make the marshmallow gooey, and since they were pre-toasted, they still had that slightly charred toasted flavor.) 

The winner of the $50 Novica Giveaway is commenter #118 The Mommy from Long Daze Short Years. Congratulations! Please email me to claim your prize!


Sunday, December 30, 2012

Sweet Love Child

At the start of the new year, many of you will vow to cut out sweets from your life, go on diets and jump on the treadmill, desperately trying to drop a few holiday pounds. I get very lonely when that happens :-) Since I have a couple more days before 2013 gets here, I thought I'd share one last recipe in 2012 that's full of buttery, sugary goodness. Can I tempt any of you with Oatmeal Raisin Cookie Coffee Cake? There are oats and raisins in it, so don't feel so guilty. 

My very own photo/blog assistant!

I saw this recipe and had to make it, because I love me a good oatmeal raisin cookie. It's such a simple cookie, but it delivers every time- chewy raisins and oats, crunchy and buttery edges...oh, so good! There are oats in the cake batter, in the filling and the top cookie crumble. It's got raisins scattered throughout with spicy cinnamon and nutmeg perfuming the whole thing. It's practically health food. If coffee cake and cookies got together and had a love child, this would be it. And what a sweet love child it would be. While there is no coffee in this cake, a warm cuppa is the perfect accompaniment. 


Oatmeal Raisin Cookie Coffee Cake adapted from Baking Bites

Printer Friendly Version

For The Cake:
  • 2 cups all purpose flour
  • 2/3 cup quick cooking oats
  • 2 teaspoons baking powder
  • 1/2 teaspoon salt
  • 1 1/4 cups brown sugar
  • 1/2 cup unsalted butter, room temperature
  • 2 large eggs
  • 1 cup buttermilk
  • 1 teaspoon vanilla extract
For The Cookie Crumble:
  • 1/4 cup flour
  • 1 cup brown sugar
  • 1 1/2 teaspoon ground cinnamon
  • 4 Tablespoons unsalted butter, cut into pieces
  • 2/3 cup raisins
  • 1/3 cup quick cooking oats

Preheat the oven to 350 degrees F. Butter a 9-inch springform pan.

To make the cookie crumble: In a medium mixing bowl, combine flour, brown sugar and cinnamon. Using your fingertips, rub the butter into the flour mixture until well combined and the mixture is coarse and sandy. Stir in raisins and oats until mixed throughout. Set aside while you make the cake batter.

To make the cake: In a medium mixing bowl, whisk together flour, oats, baking powder and salt; set aside.

In a large mixing bowl, cream together butter and brown sugar until light and fluffy. Beat in eggs one at a time.

Blend in half of the flour mixture until just combined. Add all of the buttermilk and the vanilla and stir until  well mixed, then blend in the remaining flour mixture and mix until just combined, but do not overbeat.

To Assemble: Pour half of the batter into prepared pan. Top with half of the cookie crumble. Pour remaining batter on top and spread carefully to the sides of the pan. Sprinkle the remaining crumble evenly over the batter.

Bake for 45-50 minutes, or until a toothpick inserted into the center comes out clean. Allow cake to cool on a wire rack for 10 minutes, before running a knife around the edge and carefully removing the springform ring. Allow to cool completely before serving. 

Store cake in an airtight container.

Thank you for the support and encouragement you all have shown me here at Lick The Bowl Good. I couldn't do this without each and every one of you. I hope to bring you many new and delicious creations in the upcoming year. Please be safe as you ring in 2013. Cheers!

~Monica H

Saturday, June 23, 2012

"Grace's Sweet Life" Review & A Berry Crumble


I received a cookbook for review from Ulysses Press of Grace's Sweet Life by Grace Massa Langlois. Come to find out, Grace is also a dessert blogger and blogs at La Mia Vita Dolce (My Sweet Life). I was initially intrigued by this book because it's filled with all kinds of authentic Italian desserts from Sicilian cannoli to soft amaretti cookies and panna cotta. I love a good tiramisu and gelato but this cookbook has so much more to offer.


I picked up my book, admired the cover then read the intro about how Grace got her start in blogging. She says, "I spent years coming to terms with an injury that prevented me from returning to my career in business. Then when my husband passed away suddenly, I directed all my energy to my children. I needed to help them deal with the tragedy of losing their father. I had to feel happy not only for my sake but also for theirs. So I turned to cooking, because making and sharing food provided me with so much comfort. The more I cooked, the happier I was." Her daughter encouraged her to do something with her love of food and that led to her blog. I love that something wonderful came from such a devastating loss. 

Click the picture to enlarge it to see recipe details

There are 60 recipes and coordinating color photos in this book. While Grace bakes all the desserts, it's her daughter, Liana, that takes the photos for her blog and her son, Matthew is the champion taste tester- it's a family effort :-). There are so many good looking sweets in this book that it was difficult to decide on what to make first. The recipes are divided up into chapters: Cakes and Cheesecakes, Mini Desserts, Cookies and Confections, Pies and Tarts, Pastries and Fried Desserts, Creams, Custards, Mousses and Souffles, and  lastly Frozen and Fruit Desserts. After reading page by page, I finally settled on a berry crumble. Did you know I don't have a single crumble or crisp recipe on this blog? It's about time I changed that!

One of the first things I noticed about this book is that it is very detailed. Several of the recipes are rather lengthy and go on for several pages which can seem intimidating, but Grace just wants you to succeed so the step-by-step instructions are quite thorough for your benefit. Some of the recipes that caught my eye were: Cannoli Cupcakes with Marsala-Chocolate Whipped Cream, Italian Cream-Filled Doughnuts, Vanilla Cream with Raspberry Coulis and Cheesecake with Brandy-Cherry Sauce. A nice feature of this book is that it has little tidbits of the Italian language in each recipe, so in a way I felt as if Grace was right there alongside me in my kitchen. My one complaint about this cookbook was the font choices, the multi-colored print and the use of italics in each recipe because it made it difficult to read at times. That's a minor issue though and obviously doesn't affect the overall taste of the dessert you're making. 

If you're looking for a cookbook with heart that is a little different than all the rest, then look no further than Grace's Sweet Life. And if  you're looking for a crumble recipe with a ton of flavor in the fruit as well as the nutty crumble, then here it is. It's also patriotic in color and would be a great dessert for any July 4th celebration. This recipe makes a lot of topping so I made a couple extra fruit crumbles. The fruit was perfectly softened and the topping was crunchy, sweet and delicious. Next time, I would decrease the amount of orange zest in the recipe since the orange flavor was more pronounced than I expected, otherwise they were prefect served warm or cold. 

Raspberry, Blueberry & Pistachio-Almond Crumble from Grace's Sweet Life

Printer Friendly Version 

Pistachio-Almond Crumble Topping: 

  • 1 1/4 cups rolled oats
  • 1/3 cup raw pistachios, coarsely chopped
  • 1/3 cup slivered almonds, coarsely chopped
  • 1/2 cup light brown sugar
  • 1 teaspoon ground cinnamon
  • pinch of salt
  • 7 Tbsp. unsalted butter, at room temperature, cut into small pieces

Raspberry and Blueberry Filling: 

  • 2 cups raspberries
  • 2 cups blueberries
  • 1/2 cup sugar
  • 1 teaspoon pure vanilla extract
  • 2/3 cup freshly squeezed orange juice (from about 2 oranges)
  • grated zest of 1 orange
  • pinch of salt
  • 2 Tbsp. all-purpose flour
  • 1/2 teaspoon cinnamon sugar

To Make the Pistachio-Almond Crumble Topping: In a small bowl, stir together the oats, pistachios, almonds, brown sugar, cinnamon, and salt until well combined. 


Rub the butter into the oat mixture with your fingertips until the butter is in pea-sized pieces. Cover and refrigerate until ready to use. 

To Make The Raspberry-Blueberry Filling: Preheat the oven to 350 degrees F. Line a rimmed baking sheet with parchment paper. Butter 4 (6.5 ounce) oven proof dishes (I used 6- 5 ounce ramekins). Transfer to a baking sheet and set aside. 


In a medium bowl, gently combine the raspberries,blueberries, sugar, and vanilla extract until combined. Be careful not to crush the berries. 


Add the orange juice and zest, and the salt. Sift the flour over the mixture and gently stir to just combine. 


Assembly: Divide the filling evenly among the prepared dishes. Sprinkle the cinnamon sugar on top of the filling, then evenly divide the pistachio-almond topping among the dishes. 


Bake until the juices start to bubble and the topping is crisp and golden brown, 25-35 minutes. 

Transfer the baking sheet to a wire rack and allow the crumbles to cool until warm. Serve with a scoop of vanilla ice cream or sweetened whipped cream, if desired. 


Order your copy of Grace's Sweet Life today!

Monday, May 7, 2012

Homemade Granola In Minutes


I have a quickie recipe for you today that would be perfect for Mother's Day or any day of the week. I'm talking about homemade granola. Most granola recipes have you bake the oat mixture in a low oven for about an hour or more, then you have to run to the oven every ten to fifteen minutes to stir it all up. And if you're anything like me you run to the oven when the annoying timer goes off, you open the oven door, pull the rack out being oh so careful to turn the mixture with the spatula only to knock the granola out of the pan and scatter all over your oven. And since it's so dang hot in there, you have to wait til the hour is up before you can clean it and you wind up with burnt little granola crispies on the bottom of your oven. Sounds like fun right? NOT. 


This recipe is easy peasy and made on the stove top in a large skillet in less that 20 minutes. It comes from my bloggy friend Danelle of Let's Dish. I've made several of her recipes and I've never been disappointed in any of them. I've made this recipe three times already and enjoyed it every single time. The first time I made it with dried cranberries, the second time I used dried cherries, blueberries and banana chips for crunch and the third batch I made for my mom. She didn't want coconut so we left that out and added cashews instead of almonds. Basically you can make it any way you want  by switching up the nuts and fruits and have it still turn out delicious. I especially love the unexpected addition of the sesame and sunflower seeds- don't leave those out. 

My favorite way to eat it is standing in the pantry, with the door still open, and scooping out little pinchfuls of the crunchy nuggets and chewy fruit. One nibble, two nibbles, four nibbles later, then I finally dish myself up a proper serving with yogurt and I turn it into a parfait with fresh fruit. The cool and creamy, the crunchy, the chewy, the burst of fresh fruit, the nuttiness. Oh, it's just so good! You can have it as a snack, for breakfast, or dessert anytime of year. One of the best parts is that it makes a healthy amount and stays fresh in the pantry in an airtight container for weeks (if it lasts that long). You can make it now and serve it up this weekend. If you ever have overnight guests it would be a nice addition to a continental breakfast like my friend Heather of Kitchen Concoctions set up. It would also make a thoughtful gift packaged up in a jar with a pretty label and a ribbon. It's certainly not a gift I'd refuse. 

Skillet Granola adapted from Let's Dish

Printer Friendly Version 
  • 4 cups rolled oats (not quick cooking)
  • 1/2 cup butter
  • 1 tsp. vanilla
  • 1/4 tsp. almond extract
  • 4 tablespoons honey
  • 1/2 cup packed brown sugar
  • 1/2 cup sliced almonds
  • 1/2 cup chopped pecans
  • 1 cup shredded coconut
  • 1/4 cup sunflower kernels
  • 2 tablespoons sesame seeds
  • 1/2 - 3/4 cup dried fruit

Melt the butter in a large skillet over medium heat.  Stir in the honey, brown sugar, vanilla and almond extracts.  Add the oats, nuts, coconut, sunflower kernels and sesame seeds to the pan and stir until well coated with the butter/sugar mixture.  

Continue cooking, stirring frequently until granola is a dark golden brown, 10-20 minutes. Remove from heat and stir in dried fruit.  Pour onto a cookie sheet and allow to cool completely.

Sunday, April 15, 2012

Chocolate Monster Cookies from Baking Basics and Beyond- A Review and Giveaway!


A couple weeks ago I shared a recipe for Cowboy Cookies that had crushed cornflakes in them. I really liked that addition so when I was sent this cookbook, Baking Basics and Beyond by Pat Sinclair, for review I knew I'd be making Chocolate Monster Cookies. These cookies were LOADED with flavor from oats to cornflakes to little candy coated chocolates. What makes these cookies different is that there's cocoa in the dough. Why didn't I think of that?


This recipe makes a boat load of cookies- a whopping 8 dozen! I cut the recipe in half and made about 4 dozen large cookies, still quite a bit for sharing. I chose to add Spring colored M&M's to my dough but you could also use chocolate or butterscotch chips. The thing is, the dough is so flavorful I'd be happy without the added bursts of chocolate. And when have you ever heard me say that? These cookies were crisp on the outside and had a slight chew in the center. I liked them a minute or two underbaked for a chewier cookie. They were excellent with a tall glass of ice cold milk.


Baking Basics and Beyond is a great book. It's loaded with all kinds of basic information from how to grease and flour pans, to how to make whipped cream, melt chocolate to how to assemble and frost a layer cake to how to make the perfect pie crust and what "blind baking" means. There's a wealth of knowledge in this book. The recipes are thorough and come with Baker's Notes on how to achieve success with each baked good. There are both sweet and savory recipes in this book and while not each recipe is accompanied with a photo, the ones that are included are great quality and in color. With over 120 recipes in this book, there is something for everyone- most are from scratch but there are a couple that call for boxed brownie mix or jarred caramel sauce. This paperback is perfect for both beginner and skilled bakers and would make a great gift or a nice addition to your cookbook collection.


Chocolate Monster Cookies from Baking Basics and Beyond
Printer Friendly Version 
  • 3 1/3 cups all-purpose flour
  • 1/2 cup unsweetened cocoa
  • 2 teaspoons baking powder
  • 2 teaspoons baking soda
  • 1 teaspoon salt
  • 2 cups butter, softened
  • 2 cups granulated sugar
  • 2 cups firmly packed brown sugar
  • 2 teaspoons vanilla
  • 4 eggs
  • 2 cups quick cooking oats
  • 2 cups cornflakes, lightly crushed
  • 2 cups semi-sweet chocolate chips, butterscotch chips or 12 oz. M&M's
Heat oven to 350 degrees F with oven rack in middle. Lightly grease cookie sheets (I used parchment paper).

Mix flour, cocoa, baking powder, baking soda and salt together in a very large bowl.

Beat butter, granulated sugar and brown sugar in a bowl of a heavy-duty mixer on medium-high speed until creamy, scraping down sides of bowl once or twice. Add the vanilla and eggs and mix well.

Reduce mixer speed to low and add the flour mixture. Scrape down sides of bowl and beat til dough forms.

Scrape dough back into the very large bowl. Add the oatmeal, corn flakes, and chips and stir until well mixed. (I added the fillings to the mixing bowl and stirred them in by hand).

Using a 1/4-cup ice cream scoop, drop dough onto cookie sheets. Drop 6 cookies onto each cookie sheet.
Bake 15-20 minutes or until set in the center and the edges are lightly browned. For softer cookies, reduce baking time slightly. The cookies will still look a little moist in the center. Cool cookies 1 minute on the cookie sheets them place them on wire cooling racks.

These cookies should be stored loosely covered at room temperature.

Makes about 8 dozen cookies.

Reprinted with permission from Baking Basics and Beyond, Second Edition, by Pat Sinclair, Agate Surrey, December 2011.


GIVEAWAY: I mentioned there was a giveaway, right? Agate Publishing is giving away one copy of Baking Basics and Beyond (Second Edition) by Pat Sinclair to one lucky reader. All you have to do is leave me a comment on this blog telling me why you want to win this book. I'll announce a winner on Friday, April 20th. One comment per person, please.

Thursday, March 22, 2012

Cowboys Gone Wild


Seriously, where does the time go? Again, another week has flown by. It seems like it was just Christmas, and now Easter is fast approaching. Like it's just a couple weeks away! How did this happen? It's not like I was sleeping and it it just passed on by, because let's face it, I'm not getting much sleep these days! It's just really hard to believe that a quarter of the year is already gone.


The passing of time, has really nothing to do with these cookies, except that I made these a couple weeks ago back in January and it's almost April. I'm just in shock I think. Anyone else out there feel the same way? Or maybe time is standing still, and in that case you should bake these cookies to help pass the time :-) I have a favorite recipe for Cowboy Cookies that I've shared here before but when I saw this version on Let's Dish that included the addition of corn flakes I knew I had to try them. Mr. h bought a ginormous box of corn flakes awhile back and they seem to be multiplying in the dark corner of my pantry. I've eaten several bowls with milk, used them in Rustic Apple Pie, to coat chicken in and now these cookies and I still have some left.


Somehow while making these, I knocked the bowl of cookie dough off the kitchen island and it fell to the ground and shattered all over the floor. Hayden was in the other room but he, as curious as he is, had to come and see what was going on. Luckily, I had already portioned out most of the batter into balls so I didn't lose too much. The ones that I did bake, were delicious, especially when still warm from the oven. They were chewy, but crispy, and you could really taste the corn flakes when first baked. They next day the corn was more subtle but it definitely added a textural element to the cookies. I think I'd like to experiment with my favorite Cowboy Cookie recipe that has cinnamon in it, by adding crushed corn flakes to it in addition to the coconut, pecans, oats and chocolate chips. yum!


  • 1 cup (2 sticks) butter, softened
  • 1 cup packed brown sugar
  • 1 cup white sugar
  • 1 tablespoon milk
  • 1 1/2 teaspoons vanilla
  • 2 eggs
  • 1 cup crushed corn flakes
  • 2 1/2 cups quick oats
  • 1 1/2 cups all-purpose flour
  • 1 1/2 teaspoons baking soda
  • 1 teaspoon salt
  • 1 cup shredded, sweetened coconut
  • 1 cup chopped walnuts or pecans (optional)
  • 1 1/2 cups chocolate chips
Preheat oven to 350 degrees.

Cream together the butter and sugars until light and fluffy. Add the milk, vanilla and eggs and beat well.
Stir in cornflake crumbs and oatmeal. Add the flour, baking soda and salt and mix. Stir in the coconut, nuts, if using, and chocolate chips.

Place tablespoon-sized balls of dough on a lightly greased or lined cookie sheet and bake for 8-10 minutes until lightly golden around the edges. (I used a medium ice cream scoop and baked them til golden- about 12-13 minutes.)

Makes 3-4 dozen, depending on size

Thursday, December 22, 2011

Cranberry Raisinets and A Shabby Apple Giveaway (CLOSED)

December has flown by and Christmas is quickly sneaking up on me. Stop the time- I'm not ready! I need another 4 weeks to get ready, decorate the house, wraps gifts, send out cards and do my holiday baking. Surprisingly (or not) I haven't made a single cookie this month. Heck, my Christmas tree just got decorated yesterday! True story. Usually by this time of year, I have a stash of baked goods already in the freezer ready to be placed into cookie boxes. This year my freezer holds nothing but cartons of half eaten ice cream, frozen meals and a backstock of breastmilk. haha!

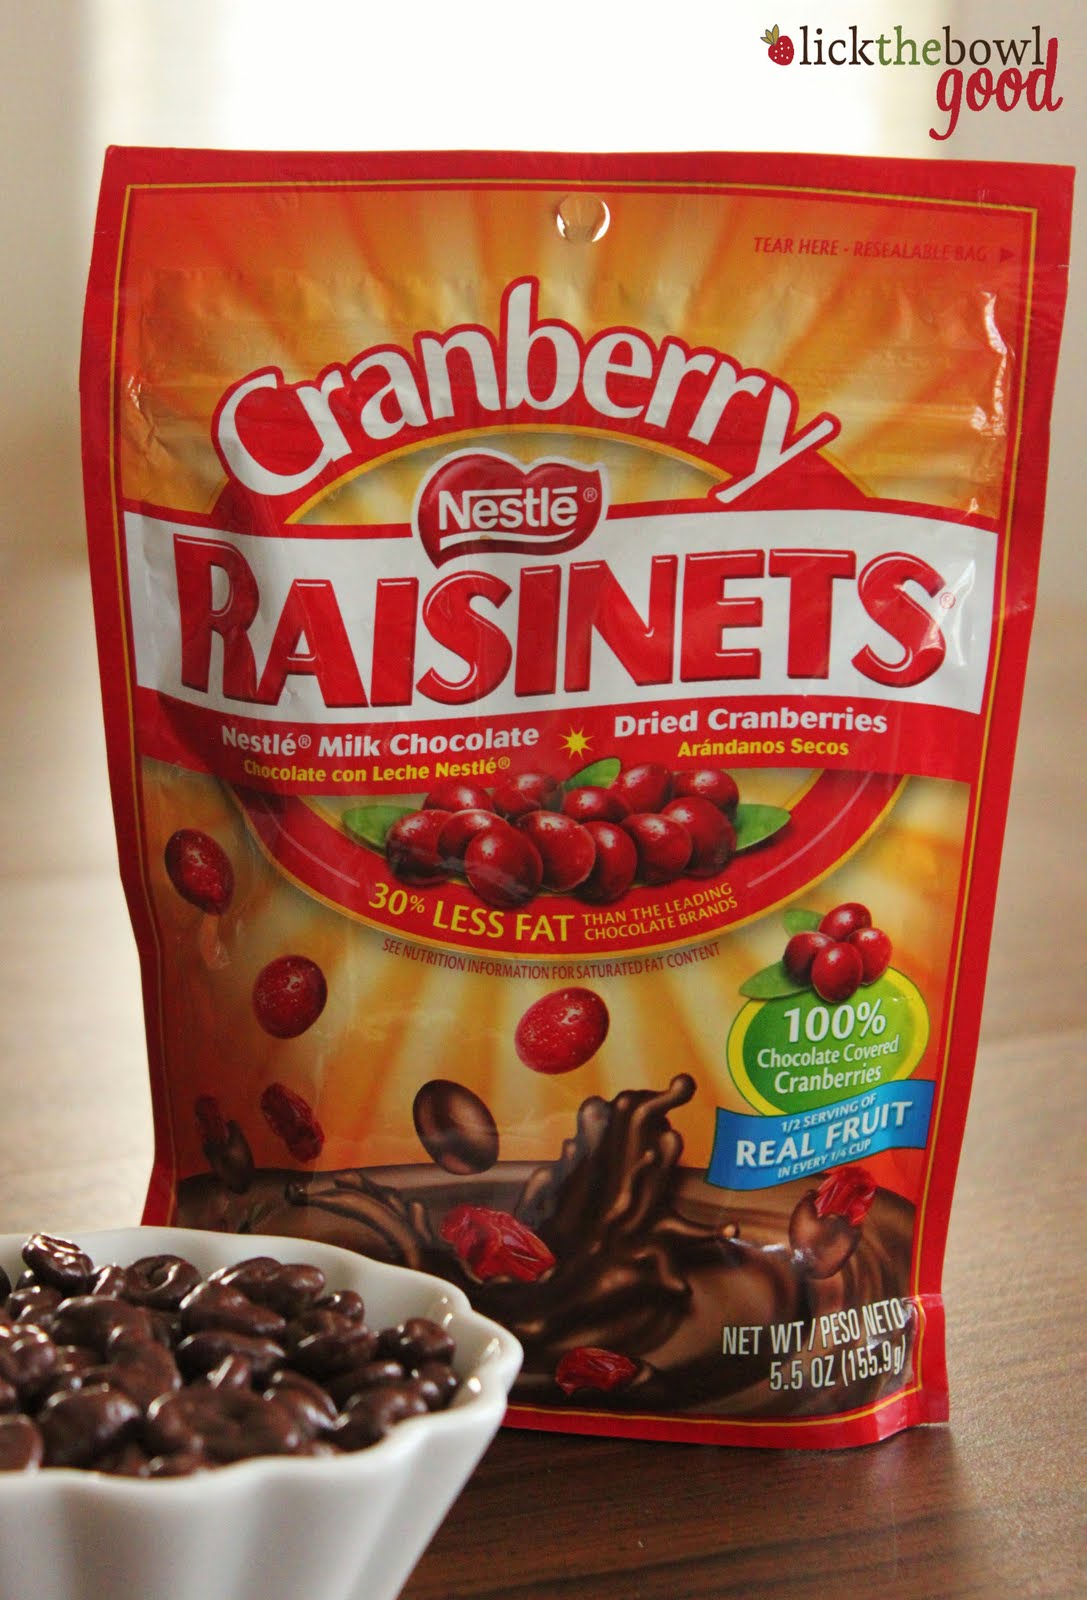
I did, however, make these cookie bars last week to take to my in-laws house for dinner. I discovered that Raisinets now makes a cranberry version and I couldn't wait to bake them into something. Instead of raisins covered in milk chocolate, they're dried cranberries in milk chocolate and they were really good. Very similar to the original, but a little more tart.

I bought a couple bags (found in the candy aisle) and incorporated them into some chewy buttery oatmeal bars. I added a handful of vibrant dried cranberries to the batter for color and added flavor. To say I liked them was an understatement. This entire pan was gone in 2 days. Just looking at the pictures makes me want to make them again. I bet they'd be good warmed slightly with a scoop of vanilla on top too. Good thing, I have some in the freezer. I'll just have to make another batch of these bars!

And the winner of Sugar, Sugar: Every Recipe Has A Story is #45 Jeanette of The Whimsical Cupcake. Congratulations Jeanette! I enjoyed your story about your meatball mishap and hope you enjoy this book. Please email me with your address and this book will be shipped out to you. For another giveaway, head down below.

Chocolate Cranberry Oat Bars adapted from Quaker and Monica h

Printer Friendly Version

  • 1 cup (2 sticks) unsalted butter, softened
  • 3/4 cup firmly packed brown sugar
  • 1/2 cup granulated sugar
  • 2 eggs
  • 1 teaspoon vanilla
  • 1 1/2 cups all-purpose flour
  • 1 teaspoon baking soda
  • 1 teaspoon ground cinnamon
  • 1/2 teaspoon salt
  • 3 cups Quaker Oats (old fashioned, uncooked)
  • 1 cup Cranberry Raisinets
  • 1/2 cup dried cranberries

Heat oven to 350°F.

In large bowl, beat butter and sugars on medium speed of electric mixer until creamy. Add eggs and vanilla; beat well.

Add combined flour, baking soda, cinnamon and salt; mix well. Add oats, Cranberry Raisinets and dried cranberries; mix well.

Press dough onto bottom of an ungreased 9x13-inch baking pan. Bake 30 to 35 minutes or until light golden brown. Cool completely in pan on wire rack.

Cut into bars. Store tightly covered at room temperature.

The generous folks at Shabby Apple would like to offer one of the readers here at Lick The Bowl Good one of their beautiful aprons! How cool is that?! Shabby Apple is an online boutique of women's dresses, aprons and accessories. They have such beautiful things and I could truly spend all day adding things to my cart on their site. But today we're talking aprons so let's get on with the giveaway. Their vintage-inspired cheery aprons are a part of the Boysenberry Pie Collection and each apron comes complete with a recipe for its namesake dessert. Click HERE to see their beautiful aprons. I am partial to the Wildberry Pie apron- so pretty!

In order to enter this giveaway, there are a few things you must do.

  1. You must "Like" Shabby Apple on Facebook- http://www.facebook.com/pages/Shabby-Apple/56291792791
  2. Go to ShabbyApple.com and pick your favorite apron, then come back here and leave me a comment on this post telling me you "liked" them on Facebook and which apron you would like to have.

Winner must have a USA shipping address to be eligible for entry. Winner will be chosen in a few days. Best of luck!

Related Posts with Thumbnails