Tuesday, March 30, 2010

Where Do I Begin?


Oh my goodness. I don't even know where to begin with this pie. It was amazing! Let's see, first it's made with a vanilla wafer crust. Don't buy the premade crust for this, it's so easy to make your own and it's better and fresher. Then it's layered with bananas, homemade vanilla pudding and more vanilla wafers. The original recipe called for a meringue topping, but I opted for whipped cream!

I made this for my father-in-laws 69th birthday a couple weeks ago. We took a day trip to a small town here in Texas and ate at a kitschy cafe supposedly known for their pies. We had lunch then ordered their pie sampler complete with 4 slices of pie and 4 scoops of ice cream. As the waiter brought it out, we started singing and the whole restaurant joined in. It was completely gluttonous but the birthday boy was surprised and happy so that's all that matters.

Look at all those luscious layers!
I was afraid that my father-in-law would be "pied out" and that my little ol' homemade banana pudding pie wouldn't live up to the famous restaurants pie but it did and he wasn't! And I have to say it was much better and way cheaper than their pies. It's really hard to compare though because they didn't have any cream pies on their menu and all their pies were made with traditional pie crust. This one was creamy and dreamy, sweet but not too sweet. The crust still had great texture and the bananas stayed firm, while the wafers in the center softened. All the ingredients just complimented eachother perfectly.

This really was an excellent pie and I will definitely make this pie again. My grandpa is a banana pudding lover and I know he'd love this version too! The recipe may seem long but I broke it down in steps so it would be easier to follow. Please read the notes and the recipe before heading to the kitchen to make this. The original recipe I have was in Southern Living Best Ever Cake & Pies Magazine and it's different than the one online and it's confusing so I've done my best to make it easier for you so you'll make this pie. Like for this weekend, maybe or an upcoming birthday?


Banana Pudding Pie
adapted from Southern Living
  • Vanilla Wafer Crust (recipe below)
  • Vanilla Pudding (recipe below)
  • Whipped Cream (recipe below)
  • 3-4 medium bananas, cut into slices
  • 20 vanilla wafers plus more for decoration (see note)

Vanilla Wafer Crust:

  • 2 1/2 cups (about 30) crushed vanilla wafers
  • 1/2 cup butter, melted
Vanilla Pudding:
  • 3/4 cup sugar
  • 1/3 cup all-purpose flour
  • 2 large eggs
  • 4 egg yolks
  • 2 cups milk
  • 2 teaspoons vanilla extract
Whipped Cream:
  • 1 cup heavy cream
  • 1/4 cup powdered sugar
  • 1/2 tsp. vanilla
For the crust:
In a medium bowl, stir together crushed vanilla wafers and butter until blended. Firmly press on bottom and up the sides of a 9-inch pie plate.
Bake at 350° for 10 to 12 minutes or until lightly browned. Remove to a wire rack, and let cool 30 minutes or until completely cool.
For the pudding: Whisk together sugar, flour, eggs, yolks and milk in a heavy saucepan. Cook over medium-low heat, whisking constantly, 10-12 minutes or until it reaches the thickness of chilled pudding. (Mixture will just begin to bubble and will be thick enough to hold soft peaks when whisk is lifted. It must be thick and slightly bubbly to set up properly!) Remove from heat, and stir in vanilla.
Transfer to a medium bowl and cover with plastic wrap, making sure to press the plastic directly on top of the custard so it doesn't get a "skin" on it. Refrigerate til completely cool. (Can be made up to a day in advance.)
Whipped Cream: In a medium bowl, whip cream on medium high speed til soft peaks form. Slowly add the sugar and vanilla and continue to beat til thick and stiff. Don't overbeat or you'll have butter!
Assembly: Arrange half of the banana slices evenly over bottom of cooled crust. Spread 1/3 of cooled pudding over bananas, then layer with 20 vanilla wafers. Spread 1/3 more pudding over vanilla wafers, then add the remainder of the banana slices and cover them with the last of the pudding. Spread the whipped cream over the entire pie and decorate with more vanilla wafers if desired.
The layers from the bottom up should be: vanilla wafer crust, bananas, pudding, vanilla wafers, pudding, bananas, pudding, whipped cream
Refrigerate at least for 4 hours. Overnight is best. Consume within 2 days.
NOTE: It's best to prepare the pudding in advance to allow it to chill properly. If you prefer this pie be topped with a meringue then there's no need to refrigerate the filling. See the original recipe here.
Also I used an entire box of vanilla wafers for the pie. If you want to decorate with additional wafers then get a second box to be on the safe side.
Make me. Eat me. Be happy.
__________________________________________________
Oh and look at the newest addition to my cake stand collection. I have an obsession but I love them and I use them all. Well, except for one but I will eventually :-) I picked this one up at an antique market after we ate lunch for my FIL's birthday. It's so pretty and I'll be using it this weekend on my Easter buffet! It's the Harp design by Jeanette Glass in Ice Blue. ::sigh::

Thursday, March 25, 2010

Creamy Swirls and Chocolate Winners!

I made these Raspberry Swirl Mini Cheesecakes from Martha's Cupcakes for Valentine's Day. Actually I made them prior to that and I intended to post them for the day of love but we were in DC and then I was having computer troubles and well, I'm just now getting to them. But, they'd make an excellent addition to your Easter buffet, so as far as I'm concerned I shared these just in time.

Now I've made a few other cupcakes from Martha's new book and I have to say these were one of my favorites. They were so creamy and smooth and creamy! Did I mention they were creamy? Well they are because they're baked in a water bath. These cheesecakes really were perfect- a sturdy crust and creamy filling (there I go again!) and just the right amount of fruit. If you're lucky you'll get a pool of puree in the cheesecake. That makes for a nice surprise.

I actually quartered the recipe and made 8 mini cheesecakes instead of 32 because it was just for Mr. h and I. I have posted the recipes for the full amount and the quartered recipe I used below. At first I thought that 8 was too many but then I figured we'd be sharing them so it wasn't so bad. Except that I ATE ALL OF THEM!

Yeah, you read that right. I ate them all by myself over the course of a week. I offered them to Mr. H and he had a bite but cheesecake and raspberries really aren't his thing. He said they were good and were much better than he thought but opted for something chocolate instead. Fine by me! I actually ate a couple of these in the car on the way to work. They're mini and the perfect one handed treat. Make them and see for yourself :-)

Raspberry Swirl Mini Cheesecakes from Martha's Cupcakes

Graham Crust:

  • 1 1/2 cups finely ground graham crackers (about 12 sheets; use a mini chopper or food processor)
  • 3 tablespoons unsalted butter, melted
  • 3 tablespoons sugar

Raspberry Puree:

  • 1 container (6 ounces) fresh raspberries
  • 2 tablespoons sugar

Cheesecake:

  • 2 pounds (32 oz.) cream cheese, room temperature
  • 1 1/2 cups sugar
  • Pinch of salt
  • 1 teaspoon pure vanilla extract
  • 4 large eggs, room temperature

Preheat oven to 325°F.

Line standard muffin tins with paper liners. Stir together ground graham crackers, butter, and 3 tablespoons sugar. Press 1 tablespoon crust mixture firmly into bottom of each lined cup. Bake until set, about 5 minutes. Transfer tins to a wire rack to cool.

Process raspberries in a food processor until smooth, about 30 seconds. Pass puree through a fine sieve into a small bowl, pressing with a flexible spatula to remove as much liquid as possible; discard solids. Whisk in 2 tablespoons sugar.

With an electric mixer on medium-high speed, beat cream cheese until fluffy, scraping down sides of bowl as needed. With mixer on low speed, add remaining 1 1/2 cups sugar in a steady stream. Add salt and vanilla; mix until well combined. Add eggs, one at a time, beating until just combined after each.

Spoon 3 tablespoons filling over crust in each cup. Dollop 1/2 teaspoon raspberry puree in a few dots over each. With a wooden skewer or toothpick, swirl sauce into filling. Place each tin in a roasting pan (bake in batches, if necessary); pour enough hot water into pan to come three-quarters of the way up sides of cups.

Bake, rotating pans halfway through, until filling is set, about 22 minutes. Carefully remove tins from water bath and transfer to wire racks to cool completely. Refrigerate (in tins) at least 4 hours (or out of tins up to 5 days in airtight containers). Remove from tins just before serving.

Makes 32 mini cheesecakes.

Raspberry Swirl Mini Cheesecakes

*(1/4 recipe)*

Graham Crust:

  • 2 1/4 tsp. sugar
  • 1/4 cup + 2 Tbsp. graham cracker crumbs
  • 2 1/4 tsp. butter, melted

Raspberry Puree:

  • 1 1/2 oz. raspberries
  • 1 1/2 tsp. sugar

Cheesecake:

  • 8 oz. cream cheese
  • 1/4 cup + 2 Tbsp. sugar
  • pinch of salt
  • 1/4 tsp. vanilla extract
  • 1 large egg

Follow instructions as listed above but use these amounts.

Makes 8 mini cheesecakes.

Oh yum!

__________________________________________________

And now onto the winners of the chocolate giveaway... Two great lovers of chocolate.

Both were slected at random by my husband in the other room :-)

Ladies send me your addresses and I'll get them out to you!

Monday, March 22, 2010

Nuts About Chocolate! (Giveaway Closed)

Update: These were recently featured on All Things Cupcake!

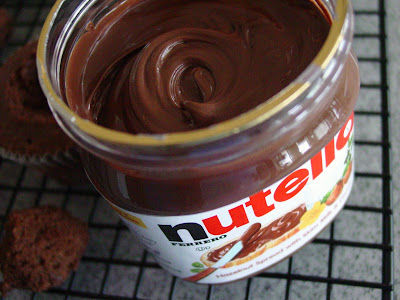
I made these cupcakes for my older brother's birthday. For the last 3 years he has been bugging me to make him these cupcakes and 2010 was finally his year. I've made this cupcake recipe before and topped them off with chocolate ganache. My brother tried them and said the cake part was very good but that he didn't like the ganache. He then suggested that I buy Ferrero Rocher and scoop out the center of them to fill the cupcakes with. I had a better idea. I was going to fill them with Nutella and top them with a whole candy. Thus the Ferrero Rocher cupcake was born!

I used to really love hazelnut and chocolate together. Like it was seriously my favorite thing ever. Then all of a sudden I didn't like it anymore and the smell of the nuts made my stomach churn. Probably because I ate so much of it :-) I haven't eaten Nutella in a long time but I was bound to make these for my brother so I bought a jar. And I have to tell you, I've been missing out all this time. I like it again!

The cupcakes in this recipe are made with Hershey's chocolate syrup so it tastes of chocolate but it's not overwhelming. And since they're made with syrup and not cocoa the cupcakes are somewhat like a cake brownie in texture but a little sticky. In my opinion it's the perfect texture and taste to the chocolatey hazelnuts of the Nutella and Ferrero Rocher. The cupcakes were very simple to make and were a hit! My brother loved them.

Ferrero Rocher Cupcakes by Monica H

  • 1 recipe chocolate cupcakes (recipe below)
  • 1 13 oz. jar Nutella
  • 15 Ferrero Rocher candies

Cut out a small piece out of the top of the cooled cupcake using a small paring knife. Discard or eat the small pieces of cake that are removed from the cupcakes. This will create a well for the Nutella to sit in.

Fill each cupcake with 1 tablespoon of Nutella. Repeat until the Nutella has been evenly divided amongst the cupcakes. Top off each cupcake with a Ferrero Rocher candy, slighting pressing into the Nutella so it stays put.

Store at room temperature in an airtight container.

Makes 15 cupcakes.

Chocolate Syrup Cupcakes from Ina Garten

  • 1 stick (1/2 cup) unsalted butter, at room temperature
  • 1 cup sugar
  • 4 large eggs, at room temperature
  • 11 fluid ounces Hershey's chocolate syrup
  • 1 tablespoon pure vanilla extract
  • 1 cup all-purpose flour

Line muffin pans with 15 paper liners. Preheat the oven to 325 degrees F. Cream the butter and sugar in the bowl of an electric mixer fitted with the paddle attachment until light and fluffy. Add the eggs, 1 at a time. Mix in the chocolate syrup and vanilla. Add the flour and mix until just combined. Don't overbeat, or the cupcakes will be tough. Scoop the batter into the muffin cups and bake for 30 minutes, or until just set in the middle. Don't overbake! Let the cupcakes cool thoroughly in the pan.

Makes 15 cupcakes.

And since this is a chocolate post, I have a giveaway for you too! 2 winners will receive the chocolate confections below for a total of 7 chocolate bars per person.
  • Nestle Abuelita Cocoa (Cinnamon and Chocolate)
  • Ghiradelli White Chocolate Baking Bar
  • Chocolove Dark Chocolate Bar
  • World Market Dark Chocolate with Sea Salt
  • Green & Black's Milk Chocolate Bar with Almonds
  • Green & Black's Maya Gold- Orange and Spices
  • Ritter Sport Cornflake and Milk Chocolate Bar

All you have to do is leave me a comment on this post. Be sure to leave your email address so I can contact you if you win. One comment per person please. Two winners will be selected at random using Random.org later in the week.

ETA: Oops, I forgot to mention that this giveaway is open to continental US residents only. Simply because the chocolate would melt before it reached you. Sorry!

Good luck!

Saturday, March 20, 2010

A Ring Around The Rosy

This month's cake for The Cake Slice Bakers is another Southern classic- Pineapple Upside Down Cake. I love pineapple upside down cake and I've never come across one I didn't like. It is cake after all :-) So when the bakers chose this cake from Southern Cakes by Nancie McDermott I was giddy. But it's been a busy month and I didn't think I was going to have time to make it but I managed to squeeze it in by the hair of my chinny chin chin. I don't really have a hair though, quit looking!

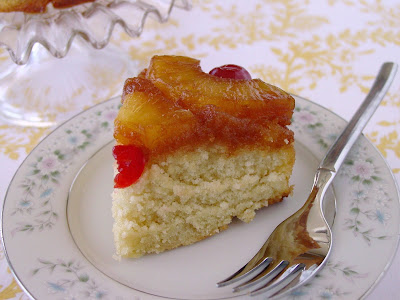
This cake didn't get the greatest reviews. Some people really liked it and others thought the cake part could have been better. I fall somewhere in between. Because of the reviews I was hesitant to make it but I decided to bake a half batch in a smaller pan that way if I didn't like the cake it wasn't a total loss. It turns out, I did like the cake but it's not the best pineapple upside down cake I've ever had. The cake topping was buttery and sweet and the fruit softened and caramelized from the heat. The part where the syrup meets the cake gets a little gooey and sticky, which is fine by me. The cake itself had a good flavor but was a little heavy and ever so slightly gummy.

I think it could have been lighter, maybe the addition of another egg would help? I say this because I halved the recipe but I used the whole egg and it wasn't as dense as some others claimed. Also I think the method in which this cake is made also results in the texture of this cake. You add the butter to the dry ingredients instead of creaming the butter and sugar together. Maybe it doesn't have enough air incorporated into it? I don't know, I still thought it was good but this one was better in my opinion.

In other news, I was having a bad day when I made this cake and I thought I'd go drown my sorrows in the cake batter but it's cheery appearance and sticky cherries actually turned my frown upside down. So if you need a lift, make this cake. It's cheaper than a therapist :-)

Pineapple "Turn Your Frown" Upside Down Cake adapted from Southern Cakes

Printable Version (unadapted version)

Pineapple Topping:

  • One 20-ounce can pineapple rings (save the juice)
  • 4 Tbsp butter
  • 2/3 cup firmly packed brown sugar
  • 10 maraschino cherries

Cake:

  • 1 1/2 cups all purpose flour
  • 3/4 cup sugar
  • 1 1/2 tsp baking powder
  • 1/2 salt
  • 1/2 cup milk
  • 4 Tbsp butter, softened
  • 1 egg (I would suggest 2 eggs for a lighter batter)
  • 1 tsp vanilla extract
  • 2 Tbsp. pineapple juice

Heat the oven to 350F.

Drain the pineapple well but save 2 tablespoons of the juice for the cake batter. Melt the butter in a 10 inch cast iron skillet over medium heat. Or, put the butter in a 9 inch round cake pan and put it in the oven for a few minutes as the heat melts the butter.

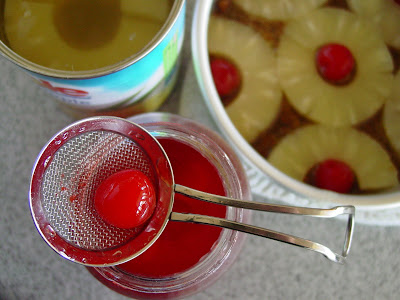
Remove the pan from the oven or stove and sprinkle the brown sugar over the buttery surface. Place the pineapple rings carefully on top of the scattered brown sugar and melted butter, arranging them so they fit in 1 layer. (You may have a few left over). Place a cherry in the center of each ring, and set the pan aside.

In a large mixing bowl, combine the flour, sugar, baking powder and salt. Use a fork to mix them together well. Add the milk and butter and beat well with a mixer, scraping down the bowl once or twice until you have a thick, fairly smooth batter, about 1 to 2 minutes.

Add the egg, reserved pineapple juice and the vanilla. Beat for 2 minutes more, stopping once or twice to scrape down the sides.

Carefully pour the batter over the pineapple arranged in the skillet or cake pan and use a spoon to spread it evenly to the edges of the pan. Bake for 35 to 40 minutes until the cake is golden brown and springs back when touched lightly in the center. Cool in the skillet or pan for 5 minutes on a wire rack.

With oven mitts, carefully turn out the warm cake onto a serving plate by placing the plate upside down over the cake in the pan and then flipping them over together to release the cake onto the plate. Serve warm or at room temperature.

NOTE: I halved this recipe and baked it in a 6 inch cake pan. I also used 1 whole egg in the cake and used a whisk to mix it all together as to not overbeat it.

Please show some love to the other Cake Slice Bakers!

Tuesday, March 16, 2010

Get Your Green On

The kind folks at Duncan Hines contacted me a couple weeks ago and asked if I'd like to try one of their recipes using their mixes. I, of course, said yes and a few days later a package arrived on my doorstep! I had the choice of two recipes and I chose to make their Leprechaun Key Lime Cake just in time for St. Patrick's Day.

This cake starts off with a Lemon Supreme Cake Mix, then you add a box of lemon pudding and key lime juice. I didn't have key limes, but I had a bag of Persian limes so that's what I used. This cake was so simple to put together-- you combine all ingredients in a bowl and mix then into the oven it goes. After the cake has baked and is still warm, it's soaked with a buttery lime glaze while it's still in the pan. That glaze penetrates the cake throughout and makes it's ultra moist and a little sticky. After it cooled I opted to glaze the top of the cake with a lime glaze that I came up with that tasted like a limeade. You don't have to glaze it a second time but that glaze was so good, I could drink it!

This cake is really equal parts lemon and lime flavor but it's not too tart and it's not too sweet. You could always use lemon juice in place of the limes if you prefer. It's light in texture and fluffy on the inside, while the outside develops a sugary crust on it from the glaze.

I really liked this cake and so did my neighbors. Even Mr. H, who isn't a huge fan of citrus, ate it and didn't complain :-) It's refreshing and easy enough to make anytime of year, not just on St. Patrick's Day. Would be great for Easter and you can call it Lemon Lime Cake if you prefer. Might also be good for breakfast....I'm just saying.

Lemon Lime Cake adapted from Duncan Hines

Cake:

Glaze:

  • 2 cups powdered sugar
  • 1/3 cup lime juice
  • 2 tbsp water
  • 2 tbsp butter, melted

Preheat oven to 350°F. Grease and flour 10-inch Bundt or tube pan.

For cake, combine cake mix, pudding mix, eggs, oil, 3/4 cup water and 1/4 cup lime juice in large bowl. Beat at low speed with electric mixer until moistened. Beat at medium speed 2 minutes.

Bake 50 to 60 minutes or until toothpick inserted in center comes out clean.

Cool in pan 25 minutes. Remove cake from pan onto cooling rack then immediately return cake back to pan. Poke holes in top of warm cake with toothpick, wooden skewer or long-tined fork.

For glaze, combine 2 cups powdered sugar, 1/3 cup lime juice, 2 tablespoons water and melted butter in medium bowl.

Pour slowly over top of warm cake and allow it run along the sides of the pan. Cool completely while still in pan.

Invert onto serving plate. Dust with additional powdered sugar or glaze (recipe below). Garnish with lime slices, if desired.

Lime Glaze by Monica H

  • 1 cup powdered sugar
  • zest of 1 lime
  • juice of 1 lime

In a small bowl, combine powdered sugar and zest. Squeeze lime juice into bowl a little at a time. Stir until there are no lumps and continue to add more lime juice until the glaze is thin enough to drizzle. Pour over cooled cake and allow to set.

Be sure to stop by Duncan Hines and check out their recipe index. You may find a new recipe to make for your family that starts off with a mix you already have in your pantry.

Thank you Duncan Hines and Happy St. Patty's Day to you all!

Sunday, March 14, 2010

How 'Bout Them Apples?

My little blog has experienced quite the drama lately and frankly, I'm a little tired of it. Why can't I just be? Why can't I just make what I want to make, say what I want to say and not have to worry about people being dishonest or people sending me hate mail? I try not to let those things get me down but I'm "tender hearted" and these things do bother me.

I got an email from a lady who thought it was her duty to call me names and tell me that I overreacted and that the woman who was running this bunk blog was not stealing from me or anyone else. That she was merely sharing what she thought were good recipes with her friends and family. Here's the deal, and I know I don't have to explain this to you, but that's not what she was doing. If I came across that blog and I saw that she gave proper credit to those who did all the leg work, then I might not have been so bothered. But she knew what she was doing. And she knew it was wrong. That's why she changed the name of the recipes and why she didn't allow comments and why there was no contact info for her.

I couldn't understand how she was benefiting from this though. It's not like anyone can encourage her and tell her how great she was doing. Someone tried to convince me that maybe these were just a collection of recipes that she liked and wanted to try. Maybe that could be right, but why copyright them? Aren't all of our blogs just a collection of recipes? Why do something illegal and claim that it's yours just to have a collections of recipes on a blog? I'll tell you why. She thought she could get away with it, that's why. The blog has been taken down but I'm not sure if it was because of her doing or if Google removed it. I just worry that it will reappear somewhere else at another time. I'm taking safeguards against protecting myself and this blog but that is a work in progress.

I thank each and every one of you who supported me and didn't think I overreacted. I do this because I love it. I love to cook and bake and take photos of my work, and mostly I want to share with you. I appreciate that you respect my hard work and don't take advantage of what I'm offering. Not all of these recipes are my own creation, in fact, very few of them are. I encourage you to read them, and make them. I hope that you like them. But please don't take my photos and claim them as your own.

Now on to these muffins. I saw them on Christy's blog- The Girl Who Ate Everything. She got them from a reader who shared this recipe with her. I made them almost immediately after seeing them because I knew they were something Mr. H would love. He really enjoys cinnamon and apples in baked goods but I don't bake with them enough. I cut some of the fat from the original recipe by substituting cinnamon apple sauce for the oil and reducing the sugar a bit. They are moist and tender and very flavorful. They have a nice crunchy topping on them which is nothing more than a sprinkling of brown sugar- don't skip this step! I made the full batch of muffins, ate what we wanted and froze the rest. They reheat nicely.

Apple Cinnamon Muffins
  • 1 1/2 cups sugar
  • 2 eggs
  • 1/2 cup oil
  • 1/2 cup cinnamon applesauce
  • 1 Tablespoon vanilla
  • 3 cups flour
  • 1 teaspoon salt
  • 1 teaspoon baking soda
  • 1 1/2 teaspoons cinnamon
  • 3 cups peeled, cored, diced apples (around 3 small apples)
  • 1/4 cup. brown sugar

Preheat oven to 350 F.

In a large bowl cream together the sugar and eggs. Add the oil, applesauce and vanilla. Add dry ingredients to creamed mixture. The batter will be very thick. Add the diced apples.

Butter & flour muffin tins or use paper liners. Fill muffin tins to the top. Sprinkle with brown sugar, about 1/2 tsp. brown sugar per muffin. Bake for 20-25 minutes. Makes 22-24 muffins.

Related Posts with Thumbnails