Thursday, August 30, 2012

Summery Birthday Cupcakes & A Winner!


My sweet angel boy Sam would have turned 6 years old this past August 15th. It's hard to believe that that much time has passed. Every year we celebrate by baking him up a cake or cupcakes, and going to the cemetery for a balloon release. This year was no different only Hayden was with us and he sent the balloons up to his big brother. He will always be my first born even if he's not here. And I will always celebrate his life as long as I'm his momma. This year it was with strawberry lemonade cupcakes. 


Strawberries and lemons just scream summer to me and these were the perfect refreshing treat. They were sweet and tangy, bright and loaded with lemon zest in the cupcake, in the filling and in the buttercream. I found the recipe at Four Points Foodie and adapted it to my liking. I can't say that I've seen a cupcake filled with fresh diced lemony strawberries before so I was definitely intrigued. These were delicious and perfect for celebrating a sixth birthday. 


There are a few more days of Summer left and if you're looking for a seasonal recipe to whip up for your Labor Day weekend, these might be the cuppies for you! For the winner of the "Whatever Happened To Sunday Dinner?" cookbook head to the bottom of this post. 
Strawberry Lemonade Cupcakes adapted from Four Points Foodie

Printer Friendly Version

For The Cupcakes:
  • 1/4 cup (1/2 stick) unsalted butter, room temperature
  • 1/2 cup sugar
  • 1 egg
  • 1/2 tsp vanilla bean paste
  • 3/4 cup flour
  • 1/4 cup milk
  • 1/8 tsp of salt
  • 1/2 tsp baking powder
  • 1 Tbsp fresh lemon juice
  • Zest of 1 lemon
For The Strawberry Lemon Filling:
  • 1/4 cup diced strawberries
  • 1 1/2 tsp sugar
  • Zest of 1 lemon
For The Lemon Buttercream:
  • 1/4 cup (1/2 stick) unsalted butter
  • 1 tsp lemon zest
  • 1 cup powdered sugar
  • 2 tsp lemon juice
For The Cupcakes: Preheat oven to 350 degrees and line 8 cupcake tins with paper cups.  

In a mixer, cream butter until light and fluffy then add the sugar and mix well. Add the egg and the vanilla  then stir.  Alternately add the flour and the milk, mixing well after each addition. Add the salt and baking powder then scrape down the sides of the bowl. Add the lemon juice and zest then stir well.   

Scoop into cupcake papers filling no more than 3/4 full. Bake for 20-22 minutes or until a toothpick inserted into the centers comes out clean.  Remove from oven and allow to cool completely on a wire rack. 
For The Strawberry Filling: In a small bowl, mix the strawberries, lemon zest and the sugar and let sit for 10 minutes.   

For The Buttercream: In a medium bowl, cream butter until light and fluffy. Add lemon zest then slowly add the powdered sugar til well combined. Mix well then add the lemon juice and beat until fluffy.

To Assemble The Cupcakes: Cut the center of each cupcake out with a sharp paring knife. Spoon strawberry lemon filling into hole then using a large tip, frost over the filling on each cupcake.   

NOTE: Makes 8 cupcakes. Recipe can be doubled. 


The winner of "Whatever Happened To Sunday Dinner?" by Lisa Caponigri chosen by random.org is my friend Heather of Kitchen Concoctions. Yay! 

Thursday, August 23, 2012

Zebra Stripes and Instagram

Last month, The Cake Slice Bakers made White Chocolate Espresso Icebox Cakes. It had been on my list to make since I got The Cake Book by Tish Boyle last Fall, but last month was such a busy time for me that I just didn't get to it. And then this month, the cake of choice was a lemon roll and that didn't get baked either. It seems the 20th of every month (when we're supposed to share our cakes) comes and goes and I end up cakeless. Well being cakeless is never a good thing, so I decided to make the Icebox Cake- perfect for this hot weather we're having because I didn't even have to turn the oven on!


I've made an icebox cake before and while it was tasty, this one was so much better because it's frozen. The white chocolate espresso mousse that gets sandwiched between the chocolate wafers is so darn creamy and smooth. It's almost like a giant ice cream sandwich but with a hint of espresso and obviously way better than those fake vanilla novelties you get from the grocery store. Another great thing about this cake is that is can be made up to 2 weeks in advance, so all you need to do is pop it out of the freezer, cut off a slice or three and pop it back in the freezer. The first bit was as good as the last. Are you supposed to feed this kind of sugar laden espresso dessert to an almost one-year old? Probably not, but Hayden loved it! 

Speaking of Hayden, his first birthday is in 8 days! Where does that time go? I am so unprepared and have nothing planned for his big day. NOTHING. There will be cake, that I know. What kind? How big? What color? no clue! We may do something small for him on his actual day then have family over the following weekend for a celebration. I can't believe he has grown up so fast. I just started playing around on Instagram and am addicted already! I'm having so much fun sharing pics of Hayden on there. My Instagram name is Monica_h30 if any of you are insterested!


White Chocolate Espresso Icebox Cake adapted from The Cake Book

Printer Friendly Version
  • 1/4 cup water
  • 1 1/2 tsps powdered gelatin
  • 2 1/4 cups heavy cream, divided
  • 1 teaspoon instant espresso powder
  • 8 oz. high quality white chocolate, finely chopped
  • 2 tsps vanilla extract
  • 1 Tbsp Kahlua or Frangelico liqueur 
  • 1 box Nabisco Famous Chocolate Wafers  (you may not use the entire box)
Line a 9x5-inch loaf pan with plastic wrap, letting it extend a few inches over each short end. 

Pour the water into a small heatproof cup. Sprinkle the gelatin over the water and let it soften for 5 minutes. 

In a small saucepan, combine 1/2 cup of the heavy cream along with the instant espresso powder and bring the cream to a boil over medium-high heat. Stir until espresso dissolves. Remove the pan from the heat and let mixture infuse for 15 minutes. 

Meanwhile put the cup of gelatin in the microwave and heat for 8-10 seconds. Stir until the gelatin granules have completely dissolved. Reheat for 5-10 more seconds if necessary. 

Place the white chocolate in a large bowl. Pour the hot cream  and the hot gelatin over the white chocolate. Let the mixture stand for about 30 seconds to melt the chocolate, then whisk gently until the chocolate is completely melted and smooth. Whisk in the vanilla extract and the liqueur (if using). Set aside to cool to tepid, about 15 minutes. 

In the bowl of an electric mixer, using the whisk attachment, beat the remaining 1 3/4 cups heavy cream to soft peaks. Gently whisk about one-third of the cream into the cooled white chocolate mixture. Using a rubber spatula gently fold in the remaining whipped cream in tow additions. 

To assemble the cake: Scrape about 1 1/2 cups of the mousse into the lined pan and smooth it into an even layer. Using a small spatula spread a chocolate wafer with about 1 tablespoon of the mousse. Stand the wafer upright in the mousse about 1/4-inch from the short end of the pan, with the coated side of the wafer pressing lightly against the long side of the pan. 

Spread another wafer with the same amount of mousse and position it so that it forms a sandwich with the first wafer. Repeat until you have created a row of wafers and mousse. (I used 15 chocolate wafers per row x 3 rows = 45 chocolate wafers). Make two more rows of sandwiched wafers to fills the pan. Scrape the remaining mousse on top of the wafers, letting it fill all the gaps between the wafers and the sides of the pan, and spread the mousse into an even layer with a spatula. Cover it with plastic wrap, pressing it gently against the mousse. Freeze thee cake for at least 4 hours, or until firm. 

To Serve: Peel off the plastic wrap, invert it onto a platter, slice and serve. 


Saturday, August 18, 2012

"Whatever Happened To Sunday Dinner?" Cookbook Review & Giveaway


Two savory recipes in a row! No, I'm not sick and yes, I have more sweetness coming your way, but first I have a cookbook to share with you- Whatever Happened To Sunday Dinner? by Lisa Caponigri. This is such a clever book. The concept behind this book is bringing back Sunday dinner. "Fifty-two menus are presented in the Italian tradition: an antipasto (usually a crostini to pass at the table), a primo (first course: almost always a pasta), a secondo (call it the main course) served with a single contorno (side dish) and finally, dessert. Every menu is different; not a single repeated."


Sunday dinner according to Lisa is not just about eating. It's about getting the family together in the kitchen and dividing up the tasks so that everyone is involved and contributing to the family meal, whether it's by chopping, baking, stirring or setting the table. "Sunday dinner doesn't have to be elaborate, just delicious." There are 260 recipe in this book to choose from. Obviously you don't have to follow each menu as written; you can mix and match recipes from different menus to create your perfect meal. The idea is to get comfortable in the kitchen, eat, linger at the table, relax and share the highlights of your week. "Sunday dinner is irreplaceable, the meeting place of memories that will last a lifetime."


You can feel Lisa's passion for Sunday dinner through her family photos, words and menus. As I read about her love of food and family, I started planning my own Sunday dinners. We often have Sunday dinner at my mom's house, but that usually means my mom does most of the cooking and I provide dessert. We all sit down together, share stories and laughter and enjoy a great meal. But I realized after reading Lisa's stories that we could all help out a little more and make it more of a family activity.  


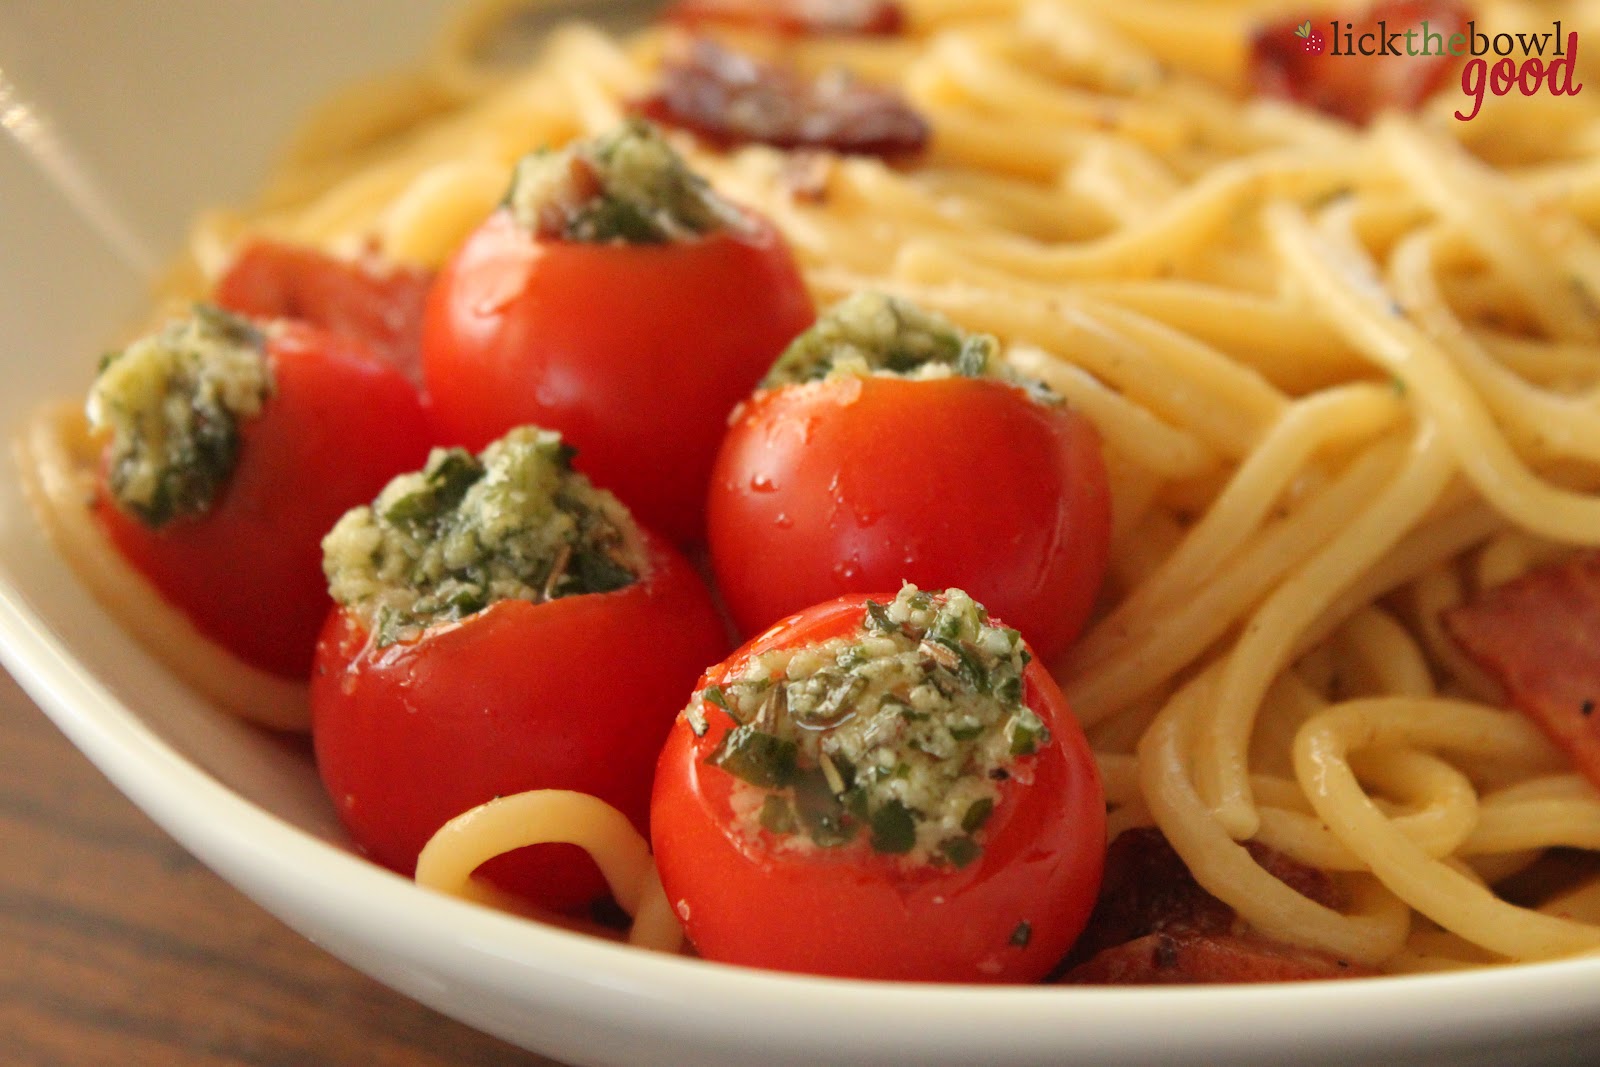
I flipped through page after page of this book. The recipes are enticing and the photos are gorgeous. This really is a handsome book, and hefty at that. And because there is so much variety, you could cook through it all throughout the week, not just on Sundays. I chose to make Pasta alla Carbonara and Pesto Stuffed Cherry Tomatoes, only to simplify things I used store bought pesto because it's what I had on hand. I made the pasta recipe as written but I added my thoughts and notes below. Both were delicious and easy enough to make on a  busy weekday. To win a copy of "Whatever Happened To Sunday Dinner?" scroll down. 


Pasta Alla Carbonara- Pasta with Eggs and Bacon

Printer Friendly Version 

Recipe serves 8, but can easily be halved-
  • 8 Tbsp. (1 stick) unsalted butter* (see note)
  • 1/4 cup extra-virgin olive oil
  • 1 pound thick-sliced bacon or pancetta, cut into 1-inch pieces
  • head of garlic, separated into cloves and chopped
  • 2 pounds of spaghetti
  • 6 large eggs
  • 2 cups grated pecorino romano 
  • freshly ground pepper
Bring a large pot of salted water to a boil. 

Meanwhile, melt the butter in a large skillet. Add the olive oil. Add the bacon and garlic and cook until the bacon is very crisp, taking care not to burn the garlic* (see note). Remove the bacon and garlic from the skillet, using a slotted spoon, and drain on paper towels. 

Add the pasta to the boiling water and cook until al dente, about 8 minutes. 

Meanwhile, in a large serving bowl, beat together the eggs, cheese, and pepper to taste. Stir in the bacon and garlic. 

Drain the pasta and add to the bowl. Toss until the pasta is well coated with the eggs and cheese mixture and serve immediately. 

NOTE: I didn't find that cooking the bacon and garlic in butter and olive oil was necessary. It just resulted in a lot of grease in a pan that had to be thrown away. The bacon yields a lot of fat on it it's own- next time, I'd crisp up the bacon then just before it's done, add the garlic. I found cooking the garlic along with the bacon just overcooked it.


Pomodorini Ripieni Di Pesto- Cherry Tomatoes Stuffed with Pesto

Printer Friendly Version 
  • 1 cup fresh basil leaves
  • 3-4 cloves garlic, peeled
  • 5 Tbsp. pine nuts
  • 1/2 tsp. sea salt
  • 1/2 cup extra-virgin olive oil, plus more if needed
  • 1/2 cup grated pecorino romano
  • 1 pound cherry tomatoes
Place the basil leaves, garlic, pine nuts, salt, olive oil, and Pecorino in a food processor or blender and process until smooth. If the pesto is too thick for your taste, add a little more olive oil. 

Cut the tops off the tomatoes. With a small spoon scoop out the seeds and pulp, taking care not to puncture the skin. Fill the tomatoes with the pesto and serve at room temperature. 

NOTE: Don't use grape tomatoes to make this- they won't stand upright and the filling will spill out.


To win a copy of "Whatever Happened To Sunday Dinner?" by Lisa Caponigri all you need to do is leave me a comment below telling me about your family meals. It doesn't have to be Italian, it can be anything. Do you have a tradition of getting the family together on a regular basis, cooking and eating? Tell me about it! 

Be sure to leave your contact info so if you win I know how to get a hold of you. I'll announce a winner next week and ship the book out. One comment per person, please. Giveaway open to US residents only. Good luck!

My little helper!
Related Posts with Thumbnails