Showing posts with label Graham Crackers. Show all posts

Saturday, September 7, 2013

The S'mores Cookbook and The Novica Giveaway Winner!


I was recently sent a cookbook for review of The S'more Cookbook by fellow blogger Susan Whetzel of the blog Doughmesstic. I'm always thrilled when I see a blogger come out with a cookbook. I know some people think it's kind of overrated, but I know how hard bloggers work and how much time goes into running a website, cooking, baking, photographing, and recipe developing. If you're a blogger then you know it's hard work! 


I like s'mores. I don't love them because I think they can be a little too sweet at times, but I like them just fine. When I was sent this cookbook, I was intrigued, because I was hoping for s'more flavored/s'more inspired desserts and this book is filled with them. Granted, the first chapter of recipes is pretty basic. I wouldn't necessarily call them recipes, as much as they are s'more suggestions- using chocolate grahams with white chocolate instead of regular grahams and milk chocolate isn't that novel of an idea to me. Her recipe's include using different types of candy such as peanut butter cups or chocolate caramels in place of the milk chocolate. Tasty? yes. But I need more substance. Luckily, this book has several chapters of s'more goodness including Cakes and Pies, Cookies, Brownies and even s'mores for breakfast. If that's not you're thing, perhaps a S'mores milkshake will cure your cravings. 


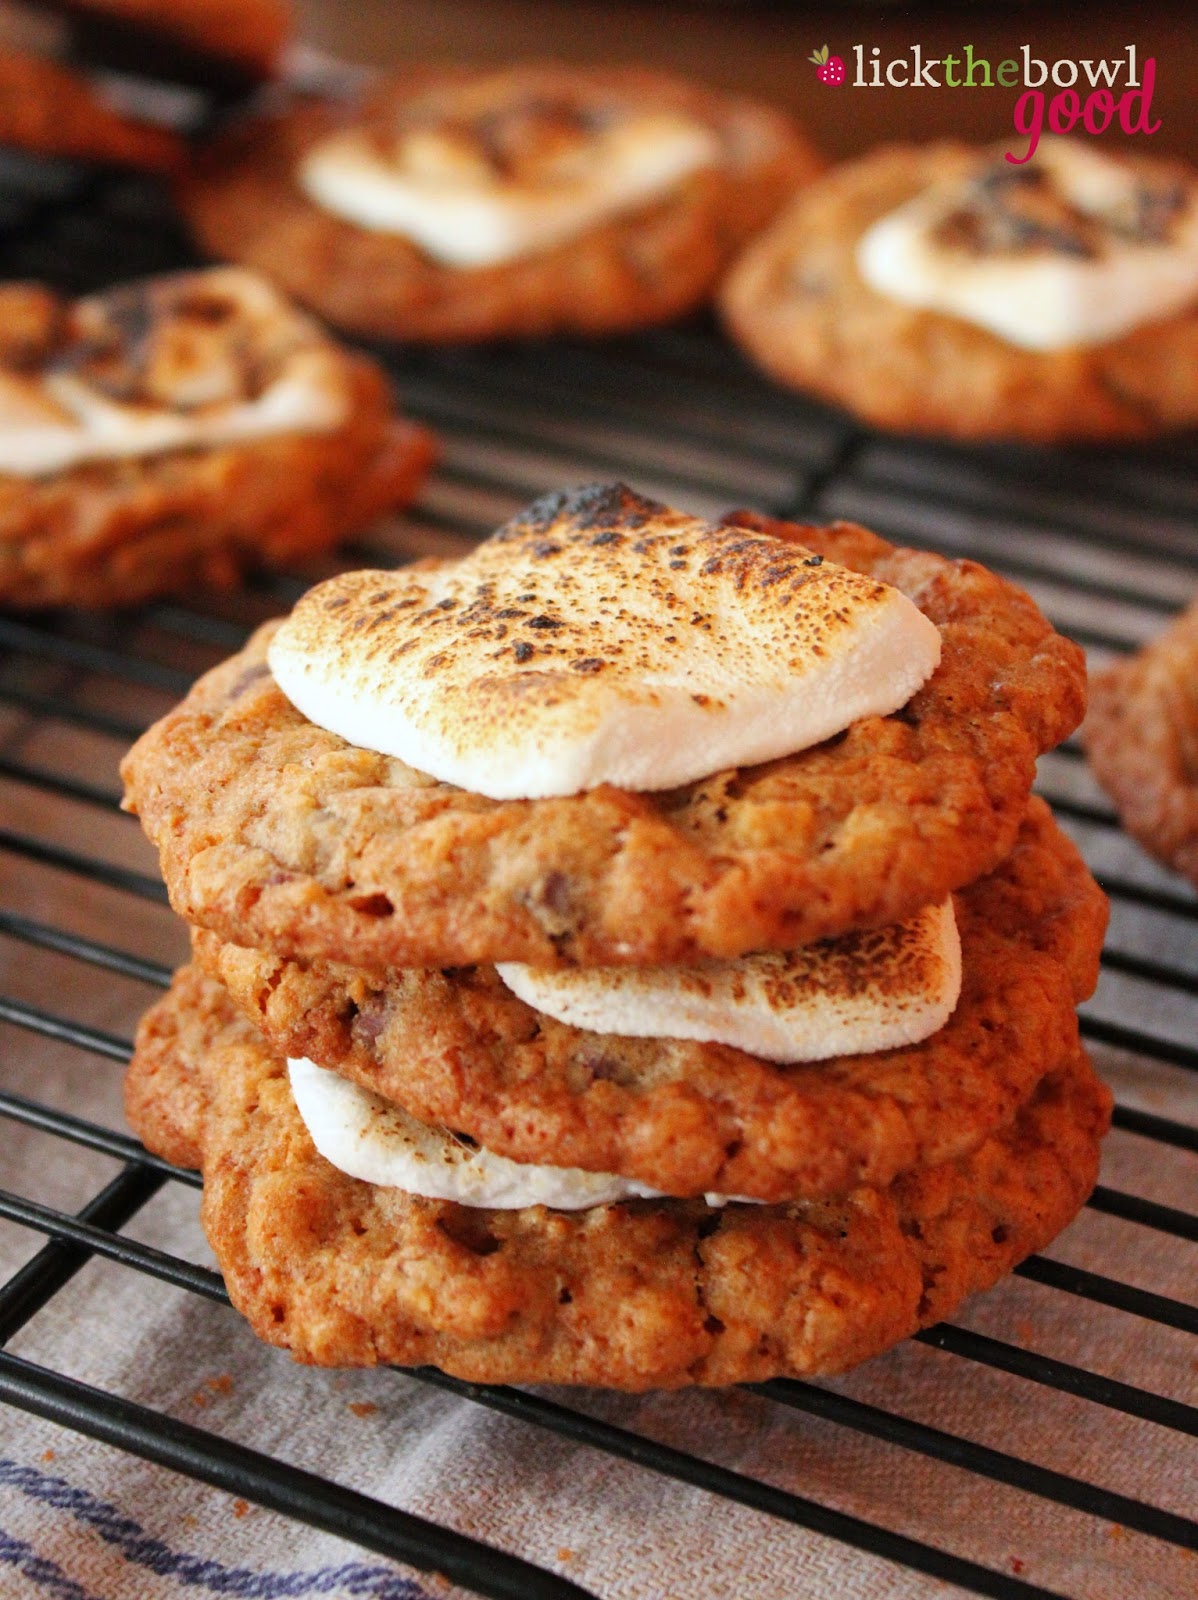
I opted for oatmeal chocolate chip S'more cookies as the first recipe I made. I also wanted to make S'more Frappuccinos but was out of marshmallow cream- that was a sad day. These cookies made it better though. I made a couple minor changes, but it didn't not affect the taste or outcome of the recipe. I used regular sized morsels instead of mini chips and used Stacker marshmallows instead of cutting large marshmallows into thirds. I didn't want to change anything about the recipe so I left it as is and just made my notes in red below. I would definitely make these cookies again because my husband LOVED them. I packed a couple in his lunch box. He's on the road a lot, so he left his cookies on the dash board to warm them and he said they tasted like they had just come out of the oven. They were crispy yet chewy, sweet and gooey. If you like S'mores you'll love these slightly less messy cookies. 

Hayden loves stars so I cut out a few star shaped marshmallows for him. 

Other recipes from this book I'd like to try are Toasted Marshmallow S'more Ice Cream, S'more Frappuccino, S'more Danish and the Chocolate Graham Pancakes. There's even a section on Giftable S'mores and ideas on how to package them. Every recipe has a full size color photo and there are lots of options for the S'more lover. In fact I know someone who would love this book. Hey Heather! I'm talking to you :-)


Oatmeal Chocolate Chip S'mores Cookies 
from The S'mores Cookbook  from Susan Whetzel

  • 1 cup softened salted butter
  • 3/4 cup dark brown sugar
  • 3/4 cup white sugar
  • 2 eggs
  • 2 teaspoons vanilla extract
  • 1 1/4 cups all-purpose flour
  • 1/2 teaspoon baking soda
  • 1/2 teaspoon salt
  • 1/4 cup graham cracker crumbs
  • 2 1/2 cups quick oats
  • 2 cups mini semisweet chocolate chips (I used regular chocolate chips)
  • 12 giant marshmallows, sliced into thirds (I used the small stacker marshmallows)

Preheat oven to 325 degrees F. Prepare a baking sheet with parchment paper; set aside. 

Using a stand mixer fitted with a beater attachment, cream the butter and sugars at medium-low speed until well combined. Add in the eggs, one at a time, beating well after each addition. Add in the vanilla; combine well. 

In a separate bowl, combine the flour, baking soda, salt and graham cracker crumbs. 

Add the dry ingredients to the wet batter. Mix on low until just combined. Stir in the oats and chocolate chips. 

Scoop rounded balls of batter onto the prepared sheets. (The directions don't say what size scoop to use to make the balls of dough. I used a medium ice cream scoop and got 40 cookies). The batter will spread, so be sure to leave ample space between. Bake for 13-15 minutes, or until the edges are very lightly browned. 

Remove from the oven, and immediately top with a slice of marshmallow. Allow to cool on baking sheets. Before serving, place the pan under the oven broiler or use a kitchen torch to toast the marshmallows. (This step was a little strange to me because the recipe makes 36-40 cookies. And it doesn't make sense (to me) to put a pan of cookies under the broiler every time you want a cookie, unless you're serving them to a crowd all at once. It's easier to use your torch, but not everyone has a kitchen torch. So I went ahead and toasted all the marshmallows at once after they were done baking. When we wanted a cookie, I just popped it into the microwave for 10 seconds to warm the chocolate and make the marshmallow gooey, and since they were pre-toasted, they still had that slightly charred toasted flavor.) 

The winner of the $50 Novica Giveaway is commenter #118 The Mommy from Long Daze Short Years. Congratulations! Please email me to claim your prize!


Sunday, September 23, 2012

Lemons, Limes and Oranges. Oh My!


I made these a few weeks ago and I forgot to share them. Forgive me. I got wrapped up in Hayden's birthday extravaganza that they got lost in the shuffle. I realize Fall is officially upon us but when you have a dessert with this much citrus zest, you just have to share them. Am I right? Besides you have all season long to bake with apples, pumpkins and comforting spices, so today it's all about lemons, limes and oranges. Hooray!


I got this recipe from my friend Memoria of Mangio da Sola. She made these over two years ago and they've been in the back of my mind ever since (Hi Memoria! We miss you!)I love key lime pie and could eat a whole pie by myself, as embarrassing as that is to admit. While I was pregnant with Hayden, I craved it all the time so I was pleased to discover that these bars were very similar. But these are a little different because they have a touch of cream cheese in them that makes these a bit more like cheesecake. 

Busted! Someone discovered toilet paper roll!
Part key lime pie, part cheesecake bar, all goodness. They were creamy, tart, tangy and loaded with flavorful citrus zest atop a buttery golden crust. I misread the directions and baked them in a 9x13-inch pan instead of a square dish so mine were thinner than expected but still great. If you want a thicker, taller bar to sink your teeth into just use a smaller pan. Either way, they're sure to satisfy. Thanks for sharing the recipe with us Memoria. I hope you're enjoying Italy! 


Triple Citrus Bars adapted from Mangio da Sola via Cook's Illustrated

Printer Friendly Version


Crust:

1 1/4 cups graham cracker crumbs
3 Tbsp packed brown sugar 
5 Tbsp. butter, melted
pinch of salt


Filling:
2 ounces cream cheese, room temperature
1 1/2 tsp grated lime zest 
1 1/2 tsp grated lemon zest
1 1/2 tsp grated orange zest
1 14-oz can of condensed milk
1 egg yolk, room temperature
6 Tbsp lime juice 
2 Tbsp lemon juice 
2 Tbsp orange juice 


Adjust oven rack to middle position and heat oven to 325 degrees. Butter an 8x8-inch pan (for thicker bars) or a 9x13-inch pan (for thinner bars) and set aside. 

To make the crust: In a medium bowl, mix graham cracker crumbs, brown sugar and salt. Drizzle butter over crumbs and stir until crumbs are evenly moistened with butter. Press crumbs evenly and firmly into bottom of prepared pan. Bake until deep golden brown, 18 to 20 minutes. Cool on wire rack while making filling. Do not turn off oven.

To make the filling: While the crust cools, in medium bowl, stir cream cheese with the lemon, orange and limes zests with a rubber spatula until softened, creamy, and thoroughly combined. Slowly add sweetened condensed milk and whisk vigorously until incorporated and no lumps of cream cheese remain; whisk in egg yolk. Add juices and whisk gently until incorporated (mixture will thicken slightly).

To assemble and bake: Pour filling into crust; spread to corners and smooth surface with rubber spatula. Bake until set and edges begin to pull away slightly from sides, 15 to 20 minutes. Cool on wire rack to room temperature. Cover with foil and refrigerate until thoroughly chilled, at least 2 hours.

Cut into squares and serve chilled. Will keep in the refrigerator for up to 3 days. 

Tuesday, July 10, 2012

Summer Fun At The Pool


Whew! It has been a week, let me tell you. Hayden caught a virus that gave him a high fever for several days. He was okay until Wednesday night when he couldn't keep food down. Then he stopped eating and drinking and started to get dehydrated so we took him to the ER Thursday afternoon. The doctor there gave him some anti-nausea medicine that helped settle his stomach, which in turn allowed him to eat and drink and keep it down. It worked, he took a nap, drank milk, felt better then started flirting with the nurses. The doctor was happy with his progress so he didn't have to be hooked up to an IV afterall. Thank goodness. After the fever broke, he got a rash for a few days and that is finally going away. He is just about back to normal and acting like his silly self again. 


Over the weekend we went swimming at a family friends' house. Hayden has never been in a swimming pool before but we hoped he would like splashing in the water. He loved the water and was so relaxed by it. Instead of splashing around and having fun, he took a nap- twice! The water was so soothing and he was so relaxed in my arms that he just drifted off. He did have fun lounging in his floaty too. And I have to tell you, he is so darn cute in swim shorts and a cap :-)

I made these bars about a week before my birthday and they were freaking delicious. If you like key lime pie, you will love these. It's essentially the same recipe but in bar form and it uses lemon juice in stead of lime. These bars also have the summery addition of blueberries too, but raspberries or blackberries would be just as good. Heck if you want to use lime juice, go ahead and make them your way. These bars are the epitome of summer- they're bright and citrusy, fruity, tangy and creamy. I made them on an ordinary day but they're the perfect treat to enjoy poolside to beat the heat. 


Blueberry Lemon Bars slightly adapted from Two Peas and Their Pod

Printer Friendly Version 

For the crust: 
  • 1 1/2 cups graham cracker crumbs
  • 6 tablespoons butter, melted
  • 1/4 cup granulated sugar
  • Zest of one lemon
For the filling:
  • 2 large egg yolks
  • 1 (14 ounce can) sweetened condensed milk 
  • 1/2 cup fresh lemon juice
  • 1 teaspoon lemon zest
  • 1 cup fresh blueberries
Preheat the oven to 350 degrees F. Spray an 8x8 inch baking dish with cooking spray. Set aside.
In a medium bowl, combine the graham cracker crumbs, melted butter, sugar, and lemon zest. Stir until graham cracker crumbs are moist. Press crumbs firmly into the bottom and slightly up the sides of prepared pan. Bake the graham cracker crust for 10 minutes. Remove from oven and allow to cool to room temperature.
To make the filling, combine the egg yolks and condensed milk in a medium bowl. Stir in the lemon juice and lemon zest. Stir until mixture is smooth and begins to slightly thicken. Gently fold in the 3/4 of the blueberries, reserving some for the top. 
Pour the lemon blueberry filling evenly over the graham cracker crust then top with the remaining blueberries. Bake for 15 minutes, or until just set.
Cool for 10 minutes at room temperature, then refrigerate until completely chilled. Cut into bars and serve. 

Thursday, May 3, 2012

A (No-Bake) Cheesecake Redux


Mother's Day is a week from Sunday. That's only 10 days away- can you believe that?! Last Mother's Day, I took my mom out to lunch and a day of shopping when I felt a strange movement in my lower abdomen- a tickle that I hadn't felt before. It happened a couple more times then it finally donned on me that it was Hayden kicking me! It was such an awesome feeling and a moment I will never forget. I love that that was the first time I felt him moving inside me. From then on, he just kicked, kicked, kicked and he still does. He loves moving his little feet. 


This Mother's Day will be a special one too because it's the first one as a mother to a living, breathing, beautiful baby boy. I don't care if I get breakfast in bed, whether or not we go out to eat or if I get any gifts wrapped in bows. Hayden is my gift and he's all I need. Well, him and his Poppa. I need him too :-)


I made this no-bake cheesecake a couple years ago with lemon curd and I made it again last month for Easter, only this time I used a jar of Key Lime Curd that I picked up from a Williams-Sonoma Outlet awhile back. You can certainly make your own from scratch if you prefer, I just think a jarred curd is easier. This cheesecake would be a welcome addition to any Mother's Day menu. You bake the crust to set it, but the cheesecake filling is set up with gelatin in the refrigerator so you don't have to worry about overbaking it which means no cracks! and there are no water baths to fool around with. It's also ultra creamy and fluffy and it can be made a couple days in advance. It was light and mousse like and reminded me of key lime pie, but without all the pucker. 


Make this cheesecake for a special Momma in your life, or heck, treat yourself for being so awesome. You could also pass this recipe onto one of your kids and have them make it for you. Yup, that's what I'd do :-). 


 Lime Curd Icebox Cheesecake adapted from HERE
Printer Friendly Version

Crust:
  • 1 1/2 cups graham cracker crumbs
  • 6 tablespoons butter, melted
  • 3 Tbsp. sugar
Filling:
  • 1/3 cup prepared lime or lemon curd
  • 1/4 cup fresh lime or lemon juice
  • 1 envelope (2 3/4 teaspoons) unflavored gelatin
  • 24 oz. (3 bricks) cream cheese, softened to room temperature
  • 1 teaspoon grated lime or lemon zest
  • 3/4 cup sugar
  • pinch salt
  • 1 1/4 cups heavy cream, room temperature
Garnish: 
  • 1/3 cup prepared lime or lemon curd (more or less depending on your preference)
  • whipped cream
For the crust: Preheat the oven to 350 degrees and adjust an oven rack to the middle position.

In a medium bowl, combine graham crackers, sugar and butter. Mix until combined. 

Press the mixture into the bottom of a 9-inch spring form pan. Bake the crust until it is lightly golden brown, about 8-10 minutes. Cool the crust completely on a wire rack before filling.

For the filling: In a small bowl, put the 1/4 cup fresh lime or lemon juice. Sprinkle the gelatin over the top and let it stand until the gelatin softens, about 5 minutes. Microwave the mixture until it is bubbling around the edges and the gelatin dissolves, about 30 seconds. Set aside.

In a large bowl with a handheld mixer or in the bowl of a stand mixer, beat the cream cheese, lime or lemon zest, sugar, and salt until smooth and creamy, scraping down the sides of the bowl, about 2 minutes. 

Slowly add the cream and beat until the mixture is light and fluffy, about 2 minutes. Add the gelatin mixture and 1/3 cup of the prepared lime or lemon curd. Beat until the mixture is smooth and airy, about 3 minutes. Pour the filling into the cooled crust and smooth the top.

For the decorative topping: Using a teaspoon, dollop the remaining curd on top of the cheesecake and lightly drag a pairing knife or skewer through the lines to create a marble appearance. Alternately, you could pipe the curd (I put the curd into a Ziploc bag, snipped the corner and piped) into lines or swirls and drag a skewer through it to make other decorative patterns.

Refrigerate the cheesecake until set, at least 6 hours. Remove the sides of the pan, cut into slices and serve.

Serves 12

I mentioned that I made this cheesecake for Easter but I also wanted to show you what my Mom made. She made a Pineapple Angel Lush and served it with fresh berries. It was really light and tasty. Click HERE for the recipe if you're interested. 


Tuesday, January 31, 2012

Pie Party Recipes: Key Lime Pie

Here's one of the recipes I made this past weekend at my Pie Party. I can't decide if I liked this key lime pie or the banana cream pie best. I think I need another slice of each in order to decide. I chose this pie to make because I craved it while I was pregnant with Hayden. I had several slices while pregnant with him and I never tired of it. For some reason though, I never made it, I just ordered it out at restaurants. And at $5 a slice, it's much cheaper to make your own!

This pie could not be simpler to make either. The filling is made up of 3 ingredients- sweetened condensed milk, egg yolks and lime juice. That's it! The combination is like magic. I think it's a great recipe to start out with if you're a beginner baker or just want to get into baking pies because it is so easy and fast. You can purchase your own premade crust or make one like I did. Of course, homemade tastes better, but do what you like. The end result will still be creamy, tangy and delicious.

Key Lime Pie from Nellie & Joe's

Printer Friendly Version

  • (1) 9-inch graham cracker pie shell (recipe below)
  • 14 oz. can sweetened condensed milk
  • 3 egg yolks
  • 1/2 cup key lime juice

Combine milk, egg yolks and lime in juice in a medium bowl. Blend til smooth, then pour filling into prepared pie shell.

Bake at 350 degrees F for 15 minutes.

Allow to stand at room temperature 10 minutes before refrigerating. Refrigerate until completely chilled. Just before serving, top with freshly whipped cream and garnish with lime slices.

Graham Cracker Crust from Keebler

  • 1 1/4 cups graham cracker crumbs
  • 3 tablespoons sugar
  • 1/3 cup butter, melted

Combine crumbs and sugar in medium sized bowl. Stir in the melted butter until thoroughly blended.

Pack mixture firmly into a 9-inch pie pan and press firmly to bottom and sides, bringing crumbs evenly up to the rim.

Bake in a 350 degree oven for 8 minutes, cool, fill and chill.

Monday, December 19, 2011

"Sugar, Sugar" Book Review and Giveaway (CLOSED)

I was contacted a couple months ago and asked if I'd like to receive a complimentary copy of a new dessert cookbook called Sugar, Sugar: Every Recipe Has A Story by Kimberly Reiner and Jenna Sanz-Agero. Well I love sugar so I said yes!

I was excited to get my hands on this book because it reminded me of a modern version of my favorite community cookbook. The book is broken up into 7 chapters- the first telling you about the book and the "sugar momma" authors and how the book came about, and then came the recipes categorized by type of dessert- Cakes, Tarts and Pies, Cookies, Bars, Confections and Recipe Legacies. You see, each recipe is contributed by someone else, much like a community cookbook. Because the recipes are submitted by other people, they are not all from scratch, some of them contain shortcut ingredients, such as boxed cake mix and canned pie filling. But this book is more than just a collection of recipes because each entry also has a short story accompanying it. The stories were funny, sweet and sentimental. Some were about the celebrations in which they were served, some were about the people and hands that made them. The one constant is that this books bring life to the recipes.

Another thing I liked about this book was that the authors leave you "Sugar Momma Tips" about the recipes, like how to turn these bars back into a pie, or how to how to make the recipe your own by swapping out ingredients. They also give you tips on how to speed up the recipe if you're pressed for time. On top of all that, there is a section for note taking, so you can jot down comments or changes you made to the recipe, much like grandma would have done in her own handwriting on a recipe card.

When it came down to deciding what to make for this review, I decided on a caramel cake. As you can see, that is not what I have here. I found the cake to be cloyingly sweet and just couldn't eat it. I tried to pass it off onto others and they all said the same thing. It had great buttery caramel flavor, just way too much sugar. But then again, it comes from a book where the word "sugar" appears twice in the title. I turned to these Kentucky Pie Bars, because we love Derby Pie and I liked that these could be made in bar form with a graham cracker crust. These were just like the pie I make and not too sweet. They were like a cross between a magic cookie bar and Derby Pie. I would definitely make these bars again, but I would add more Bourbon to the filling (I added the lesser amount) and add a bit more butter to the crust to help bind it together since I found them to be a little crumbly. I also have my mind set on making the cover recipe as well as a pie and another bar cookie recipe, so stay tuned.

Kentucky Derby Pie Bars slightly adapted from Sugar, Sugar

Printer Friendly Version

Graham Cracker Crust:

  • 2 cups graham cracker crumbs
  • 1/2 cup (1 stick) butter, melted

Filling:

  • 1 cup granulated sugar
  • 1/2 cup (1 stick) butter, melted and cooled
  • 2 large eggs
  • 1 teaspoon vanilla
  • 3-4 Tablespoons Bourbon, optional
  • 1/2 cup all purpose flour
  • 1 cup chopped pecans
  • 1 cup semi-sweet chocolate chips

Preheat the oven to 325 degrees F. Butter a 9x13-inch baking dish (or use non-stick cooking spray).

To make the crust: Place the graham crackers and the melted butter in a medium bowl and mix together until the crumbs are thoroughly moistened. Press mixture firmly and evenly on the bottom of the baking dish and set aside.

To make the filling: Place the sugar and butter in a large bowl. With an electric mixer, beat mixture on medium speed until well combined. Reduce the mixer speed to low and the eggs ones at a time, add the vanilla and Bourbon, if using. Gradually add the flour until just combined. Use a wooden spoon or spatula to fold in the pecans and chocolate chips. Pour the filling on top of the crust and spread it evenly.

Bake for 33-38 minutes, until the bars begin to turn a light golden brown. Remove from the oven and let them cool before cutting. Or eat them while still warm and gooey.

Now for the giveaway. The publishers and I want you to have your very own copy of Sugar, Sugar: Every Recipe Has A Story. To enter, all you have to do is leave a comment on this post. For a second entry and in the spirit of this book, leave a seperate comment telling me a brief story about one of your favorite recipes. That's it!

I'll pick a winner in a couple days and the folks at Andrews McNeel Publishing will send a book straight out to that individual. Good luck and happy story telling!

Wednesday, November 23, 2011

Giving Thanks

Creamy pumpkin layered with maple soaked graham crackers and whipped cream, topped with buttery maple pecans. Yes please! A few weeks ago I hosted a Pampered Chef party with a few friends and close family. We fooled around in the kitchen, played with our food and ate this maple pumpkin trifle for dessert while flipping through catalogs. This trifle was simple to put together and would be a nice and different addition to your Thanksgiving meal, if you're still looking for a special dessert. It can be assembled the night before or even the morning of the big day, if you can find time to put this together :-)

As the family baker, Thanksgiving is a fun time for me. I love that I can bake anything and multiple things and it all goes. This year I'm making a pumpkin cheesecake, chocolate chip pecan pies and an apple cake with brown sugar glaze. My sister is making pumpkin crunch cake and my aunt is making not yo mama's banana pudding. We will be eating well and finishing it off with sweets galore. We are not doing without and we are extremely thankful for our bounty. Now I want to know what YOU are baking up for turkey day?

Pumpkin Maple Trifle adapted from Pampered Chef via Jolts & Jollies

Printer Friendly Version

  • 2 Tablespoons butter
  • 1 cup chopped walnuts or pecans
  • 1/2 cup plus 6 Tablespoons pure maple syrup
  • 1 box (14.4 ounces) whole graham crackers
  • 1 package (3.4 ounce) cheesecake instant pudding
  • 1/2 cup milk
  • 1 can (15 ounces) pumpkin puree
  • 2 teaspoons ground cinnamon
  • 1 container (12 ounces) frozen whipped topping, thawed or equal amounts of whipped cream

Make the maple pecans: Combine butter and 3 Tablespoons maple syrup in a saucepan. Cook on medium heat until butter melts. Add nuts and stir constantly about 5-7 minutes or until pecans are evenly toasted. Place on parchment paper and allow to cool.

Break up graham crackers and place in a large mixing bowl.

Pour 1/2 cup of maple syrup into a microwave safe bowl and heat in the microwave for 60 seconds. Pour syrup over graham crackers and toss to evenly coat. Set aside.

In a medium mixing bowl, whisk together pudding mix and milk until well combined. Add pumpkin puree and cinnamon. Mix to combine. Fold in 2 cups of whipped topping or whipped cream until there are no more white streaks. Set aside.

In a small bowl, combine the remaining whipped topping and remaining 3 Tablespoons maple syrup and fold until well blended.

Fill a decorator bag with 2/3 cup of the maple cream and set aside.

Assemble trifle: Place 1/3 graham crackers evenly in the bottom of a trifle bowl. Top graham cracker layer evenly with 1/2 the pumpkin filling. Top with 1/3 graham crackers. Top with remaining maple cream. Top with final 1/3 graham crackers. Top with remaining pumpkin filling. Break up maple nuts. Decorate the top of the trifle with the decorator bag of maple cream and the maple walnuts.

Refrigerate trifle for 4 hours or overnight.

I'm grateful and thankful for many things this year. But 2011 is different since we were blessed by the birth of Hayden. We prayed, hoped and waited for him for 6 years and lost 2 beautiful sons in the process. Hayden will never replace his angel brothers, Sam and Jack, but he more than makes up for the heartache and countless tears we shed along the way. I love him more than I ever thought possible.

What are you especially grateful for this year?

Friday, July 29, 2011

Baby Shower: Mini Cheesecakes

This is baby shower recipe #2! I thought twice about sharing this recipe with you guys, not because it wasn't tasty, but because I had a few technical difficulties with it. But I had a few requests from guests as the shower to "please post it on your blog" so here it is. There is nothing majorly wrong with it, I'm just a little OCD and was bothered by it's appearance. You see, my cheesecakes sunk in the middle. Some of them weren't so bad, while others had major craters in them and were just plain ugly. I didn't have the heart to serve those to my guests, so we ate those at home and served the better looking ones at the shower.

This recipe comes off the box of my mini cheesecake pan I got from Williams-Sonoma Outlet last year. They were originally $32 each, but were on sale for $14.99, then were marked down another 50%. So I got two pans for half the price of one- score! I've been waiting for just the right occasion to use them, and my baby shower just happened to be it. Of course, you don't really need a special occasion to enjoy mini cheesecakes.

One of my other issues with this recipe was that it made way more than the recipe stated. Normally that's not an issue, but when you have a specialty pan and way too much batter, how are you supposed to bake them? The recipe was supposed to make 12 cheesecakes, but I could have easily gotten 18 out of them. Unfortunately and fortunately, I doubled the recipe. One batch came out fairly decent, the other sunk horribly and the remaining batter got turned into cookies and cream cheesecakes with a whole Oreo acting as the crust. I made those in cupcake liners, which was far easier than using the pan, only not as pretty. It turned out to be a good thing there was extra batter though, because in the end I still had a substantial amount of cheesecakes to serve at the shower.

They actually sunk a lot more than that after they cooled!

As I've mentioned, oh I don't know about 500 times already, my cheesecakes sunk in the middle. Note To Self: I think a way to combat the "souffle" action of the cheesecakes would be to not overbeat the batter and to bake them at a lower temperature for longer. To make up for this, I decided to dollop a little lemon curd in the center and top with fresh berries. No one was the wiser and the little divot actually created a little cup to hold all the toppings in. The Oreo ones were topped with a little sweetened whipped cream. The ones topped with berries disappeared rather quickly so I didn't get to taste those, but the cookies and cream version was creamy and tasty. The sunken ones we had at home were eaten plain, but would have been great with a little pie filling. I also turned a few stragglers into a cheesecake milkshake. Yes, it was good!

Mini Cheesecakes adapted from Williams-Sonoma

Printer Friendly Version

Crusts:
  • 1 cup chocolate cookie, vanilla wafer or graham cracker crumbs
  • 2 tablespoons sugar
  • pinch salt
  • 3 tablespoons unsalted butter, melted

Filling:

  • 16 ounces cream cheese
  • 2 eggs
  • 1/4 cup heavy cream
  • 1/2 cup sugar
  • pinch salt

Have all ingredients at room temperature. Preheat oven to 350 degrees F. Lightly coat cups of 12-cup mini cheesecake pan* with nonstick cooking spray.

To make crusts: In a small bowl, stir together the cookie crumbs, sugar and salt. Add the melted butter and stir until combined. Divide the mixture among the cups and, using your fingertips, press it evenly into the bottom. Bake until the crusts are set, about 10 minutes. Transfer the pan to a wire rack and let cool completely. Reduce the heat to 300’.

To make the filling: In the bowl of an electric mixer fitted with the flat beater, beat the cream cheese on low speed until smooth, 2 to 3 minutes. Increase the speed to medium-low and add the eggs one at a time, beating well after each addition. Add the cream and beat until incorporated, about 1 minute. Add the sugar and salt and beat until incorporated, about 2 minutes, stopping the mixer occasionally to scrape down the sides of the bowl.

Pour the batter into the crusts, dividing it evenly among the cups. Bake until the cheesecakes are set, about 20 minutes. Transfer the pan to a wire rack and let cool completely. Refrigerate for at least 2 hours before unmolding.

To unmold, insert the dowel into the hole in the bottom of each cup. Gently push up to remove the cheesecake from the cup. Use a small spatula or butter knife to remove the cake from the metal bottom. If the cheesecakes are sticking to the pan, gently run a toothpick around each cheesecake to loosen it before pushing it out of the cup. Makes 12 mini cheesecakes.

NOTE: This recipe makes more than it states. It should make 12 mini cheesecakes, but I got about 18. So plan accordingly.

*If you want to make these but don't have a mini cheesecake pan, line a standard size muffin tin with paper liners. Proceed with recipe as written above, but bake for 30 minutes or until set. Allow cheesecakes to cool completely in the pan before refrigerating for at least 2 hours or overnight. Served chilled or at room temperature. Makes 12-18 mini cheesecakes.

For Oreo Cheesecakes: Line a standard size muffin tin with paper liners. Place a whole Oreo cookie on the bottom to act as the crust. Pour cheesecake batter over the top of the cookie. Top each (unbaked) cheesecake with about a half teaspoon of crushed cookie crumbs. Bake for 30 minutes or until set. Allow cheesecakes to cool completely in the pan before refrigerating for at least 2 hours or overnight. Served chilled or at room temperature. Makes 12-18 mini cheesecakes.

Related Posts with Thumbnails