Wednesday, September 29, 2010

Going Ape For Grapes

I know this recipe will never win an award for Beauty Queen, but I promise you it is delicious! I saw this recipe for Sweet Grape Salad on Cassie Craves in late May and I've made it a handful of times since then. It makes a great potluck dish since it can be made ahead of time, a light side dish and even a dessert. Everyone who has ever tasted this, raves over it and tries to hoard it (no joke). And that's why I think you should make it too!

Are grapes a seasonal fruit? If so, then get them before they leave your grocery store! This bowl of goodness starts off with a combination of cream cheese, sour cream, vanilla and sugar. Then you fold in the red grapes and top it with a sprinkling of brown sugar and chopped toasted pecans. The end result is like eating a fruit dip with grapes, but you get the added crunch from the nuts. The textures and flavors in this salad are something I never would have thought of, but it really works.

I have another Summery recipe coming your way, then I promise I'll start adding some Fall flavors to this blog. I just don't want to get burnt out on eating pumpkin so early in the game, know what I mean? Although I did make some killer pumpkin pancakes yesterday :-)

I also wanted to thank you all for the supportive and encouraging comments regarding my first recipe video. I'm glad you all liked it and with every comment I read, I become a little more confident and a little less nervous and critical of myself. So thank you, thank you, thank you!

Sweet Grape Salad from Food.com via Cassie Craves

Printer Friendly Version
  • 2 lbs. red seedless grapes
  • 1 8-ounce package cream cheese, softened
  • 1 8-ounce carton sour cream
  • 1/2 cup white sugar
  • 1 teaspoon vanilla
  • 2 tablespoons brown sugar
  • 2 tablespoons pecans (I like to double this amount and I like them toasted)

Combine cream cheese, sour cream, white sugar and vanilla in a large bowl. Gently fold in grapes.

Sprinkle with brown sugar, then pecan pieces.

Cover and refrigerate overnight or until well chilled. Serve very cold.

NOTE: This recipe is easily halved or doubled.

Don't forget to enter my giveaway, you have a couple more days to enter!

Monday, September 27, 2010

Welcome To My Kitchen- My First Recipe Video!

Look what I won! A couple weeks ago I opted in to receive a sample of Pace Picante Sauce from The Tastemaker Program on Foodbuzz. Along with that, was the opportunity to win a Flip Video Camera. In order to enter the giveaway, I had to submit a recipe in which I would use the Pace Picante Sauce and the first thing I thought of was our family recipe for Santa Fe Stacked Enchiladas. Well, wouldn't you know that they chose me?! A few days later, I received two packages on my doorstep.

I was thinking that this Flip Camera was indeed a camera, but it's not. It's an HD video camera and I had to record a video of my recipe featuring Pace to share with you. The Flip was so easy to use, you just turn it on, push the red button to start filming and again to stop. The clarity is really great too. The hardest part was actually uploading it to the Internet so that I could post it on here. The video only took me two attempts and I think it turned out pretty well. Mr. H was a perfect camera man and I think I'll use him again in the future. tee hee!

I was a nervous wreck for days just thinking about having to be on camera! I tend to giggle a lot (just ask Ingrid) and I still have a minor cough so I was worried that I'd start choking or laughing my butt off, but I didn't :-) When I cook or bake, I'm usually in jammies and my hair is in a messy ponytail. So today you're in for a treat- I have clothes on, I'm wearing make-up and my hair is brushed. Lucky you! I do sincerely hope that you enjoy my first video. Please be kind and don't judge too harshly.

Thank you Foodbuzz for the opportunity!

For the step by step process in pictures, and for the original recipe, please see Mr. H in the Kitchen.

I also want to say thank you to Ingrid for letting me know about the opt-in on Foodbuzz. Without her, I wouldn't have entered and won. Thanks dear!

Santa Fe Stacked Enchiladas adapted from Monica H

serves 8

  • 2 lbs. lean ground beef
  • 1/2 onion, diced
  • 2 garlic cloves, minced
  • 1/2 tsp. kosher salt
  • 2/3 cup Pace Picante sauce, optional
  • corn tortillas (2-3 per person)
  • vegetable oil for frying
  • 2 small cans (10 oz.) enchilada sauce
  • 3 small cans (15 oz.) Ranch Style Beans, drain 2 of the cans
  • 2-3 cups Cheddar Cheese, grated
  • Green leaf lettuce, cut into wide shreds
  • 2 medium tomatoes, diced

Over medium high heat, cook onion til soft and translucent. Add the minced garlic and whirl around the pan til fragrant. Then add the ground beef and cook til no longer pink; breaking up any large bits as you go. Season with kosher salt and stir it in. If you're using a fattier mix of ground beef, drain off any excess fat. Stir in Pace Picante sauce if using. Set aside.

In a medium pan, generously coat the bottom of the pan and heat til shimmery. Fry the tortillas, one at a time, on each side for about 20 seconds. You don't want them to be crispy, you just want them to be a little more pliable so they don't break apart. But you really can't skip this step because the tortillas will become soggy when you bake them. Repeat til done. Place on a paper towel lined plate. Set aside.

Heat sauce til warm in a small sauce pan. Heat beans in a pot til warm. You want them warm not hot.

Dip one tortilla in the warmed sauce and place on a sheet pan. Top with a bit of ground beef, then beans, then cheese. Repeat for a 2 stacker. If you're really hungry make 3 layers. Repeat as necessary until you have the amount of enchilada stacks as needed.

Bake in a preheated 350 degree F oven until cheese is melted. Allow the enchiladas to cool for a few minutes before transferring each stack to a plate. Place lettuce and tomatoes around each stack to resemble a wreath. Dig in!

Sunday, September 26, 2010

Crème Brûlée and My Torch!

Eeek! I'm running late in posting this! My cheeseball girlfriends Ingrid and Michelle were waiting on me to get this crème brûlée up- sorry to have you waiting ladies! Michelle chose this crème brûlée recipe to make together this month and it comes from Dorie Greenspan's book: Baking From My Home To Yours.

I've wanted to make crème brûlée for years! I even bought vanilla beans ages ago at Costco and never made it. I think I was waiting for a special occasion or maybe I was intimidated by the whole water bath thing. I'm not really sure, but I'm kicking myself now for waiting so long. This recipe could not be more straight forward and simple. You don't need a water bath, since it's baked in a low oven and you don't need expensive vanilla beans since it uses extract. And did I mention it's delicious?

Here's my torch- I named her Cali, short for Caliente! ha!

I've tried many crème brûlée in my life and I can't say it was the best one I've ever had, but it was right up there. This version was very silky and lighter than I expected. Most of the time, they're very thick and custardy, but this was pleasantly different. Don't get me wrong, it's loaded with calories but it doesn't feel as heavy going down :-). I made this twice, a vanilla version, with and without chocolate chunks on the bottom as well as an espresso version (I just added a couple teaspoons of instant espresso powder to the custard). I don't really have a favorite as they were all good, but I can tell you that the brûléed sugar on top is the best part!

Crème Brûlée from Dorie Greenspan

  • 1 1/4 c. heavy cream
  • 1/2 c. whole milk
  • 3 large egg yolks
  • 1/3 c. granulated sugar
  • 2 tsp. pure vanilla extract
  • granulated sugar for topping

Preheat the oven to 200 degrees F. Put the six baking dishes (gratin dishes or ramekins) on a baking sheet lined with parchment or a silicone mat.

Bring the cream and milk just to a boil. In a 1- or 2-quart glass measuring cup or in a medium bowl, whisk the egg yolks, sugar, and vanilla together until well blended but not airy. Still whisking, drizzle in about one quarter of the hot liquid to temper the yolks. Whisking all the while, slowly pour in the remainder of the cream and milk. Strain the custard into the baking dishes.

Bake the custards for 50 to 60 minutes* (see note), or until the center are set. Lift the dishes onto a cooling rack, and let the custards cool until they reach room temperature. Cover each custard with plastic wrap, and refrigerate for at least 3 hours, but up to 2 days.

To Caramelize the Sugar: Sprinkle the top of each custard with approximately 1 tablespoon (I used just enough sugar to coat the top of the custard) of sugar, or enough to cover the custard nicely. Brown the sugar with a torch until it bubbles and colors. Allow the bubbles to subside before serving.

NOTE: I used four larger ramekins rather than 6 smaller ones, so they took longer to bake. Rather than 50-60minutes, my crème brûlée took about 75 minutes to bake.

Autumn liked it! Go see how Michelle and Ingrid did!

Thursday, September 23, 2010

Fall and Baking with Kids

Today is officially the first day of Fall. Ah, I'm so excited it's finally here. I did a little cleaning up and organizing this weekend. I rearranged my China cabinet to accommodate more of the cake stands I keep buying. It's an addiction, I tell you! I rearranged my cookbooks and bookshelves and while I was at it, I set out all of my Autumnal decorations. Now if only I could find someone to put my laundry up and dust for me, I'd be all set :-)

Look for the Lucky Leaf Premium. It's made with real sugar rather than corn syrup.

I'm a nanny and on Mondays, Wednesdays and Fridays, I pick the little guy up from school. He's only 3 years old so he goes to a Montessori preschool and they're teaching him about Fall. He kept saying that he couldn't wait for Thursday so the leaves could start falling. If only it worked that way. I told him that first the leaves had to change from yellow to orange to red or brown before they turned brown and fell. He was so excited to go to the window and see that the leaves were turning yellow. Then he declared that he wanted to bake a pie for Fall (I love this kid!). When I told him that he'd have to wait til we got all the ingredients to make the pie he started crying, "I want to baaake. I want to baaake." I couldn't help myself, but I laughed :-)

ooh, so pretty!

He then took a deep breath and wiped his crocodile tears. I cut him a healthy slice of chocolate birthday cake and we sat at the kitchen table to read through cookbooks- Joy of Cooking and Deceptively delicious, if you're curious. We read through the pies and tarts sections in which we found pumpkin pies, pecan pies and several fruit tarts and galettes. None of those were good enough. He went to the fruit basket, grabbed a plum, a peach and a couple limes and said that's all we needed, no pie crust necessary. We didn't bake today but we might tomorrow.

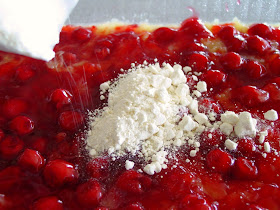
I made this dessert a couple weeks ago, alone in my own kitchen, but it's simple enough for your little helper to make it on his/her own with a little supervision. It's called dump cake, which is rather gross if you ask me so I'm calling it crunch cake. There is no mixing required, just layering ingredients in a pan, pouring on some melted butter and baking it. It's surprisingly good and if you use the Duncan Hines Butter Recipe cake mix, it tastes a little less artificial. It's sweet, fruity and crunchy, very similar to a fruit crisp. It's good warm with ice cream or cold straight from the fridge. I used cherry pie filling, but blueberries, blackberries or peaches would be good too. Get your kids in the kitchen and bake- Fall is here, so celebrate! And if you don't have kids of your own, invite the neighbors kids over or go rent some for the day :-)

If you're interested in a pumkin crunch cake, click the link.

Pineapple Cherry Crunch Cake adapted from Paula Deen

  • 3/4 cup butter, plus more for dish
  • 1 (20-ounce) can crushed pineapple, in juice
  • 1 (20-ounce) can cherry pie filling
  • 1 (18.25-ounce) box yellow cake mix
  • 1 cup chopped pecans (optional)

Preheat oven to 350 degrees F. Butter a 13 by 9-inch casserole dish.

Melt 3/4 cup butter in saucepan over low heat.

Pour the pineapple with juice into the casserole dish and evenly spread cherry pie filling on top.

Cover with dry yellow cake mix and top with pecans, if using. Drizzle with melted butter and bake for 35 to 45 minutes.

NOTE: I was reading the reviews for this recipe, and someone complained because she was expecting a cake, not a fruity crisp. So please note that this is not your typical fluffy iced cake, it's a cake mix used to make a crisp topping :-)

If you haven't already, go enter my giveaway sponsored by Novica!

Monday, September 20, 2010

Caramelly. Appley. Delicious.

This is the last cake that The Cake Slice Bakers are baking from Southern Cakes by Nancie McDermott and boy was it delicious. Scratch that...it was DELICIOUS. I've been baking with the cake slice bakers for 17 months. I did miss a couple months, but overall I have baked 15 cakes with this group and this one tops my list. I'm not quite into the pumpkin baking mode just yet, but I ain't got no problem with apples. We eat apples year round (Fuji's are our favorites) but I don't bake much with them. This was a nice treat and I'll definitely be making this one again. I'm sure my mother-in-law wouldn't mind either.

Ooh, by the way, I was asked to redesign The Cake Slice Bakers badge and this is what I came up with. What do you think?

I did make a couple of changes to the recipe. Firstly, I cut the recipe in half because between the two of us, we can't finish off a 9x13-inch cake. I baked this in an 8-inch Pyrex, reduced the amount of oil, omitted the nuts and added cinnamon, because that's how I roll. I was afraid this cake would be too sweet with the glaze, but after it cooked it was almost caramel-like. Be sure to save yourself a spoon of the glaze and eat it while it's still warm-- awesome. After the cake set, the glaze did set up as a glaze and not a caramel, but it wasn't overly sweet. In fact it was so buttery despite there only being 3 Tbsp. of butter in there. This cake was so moist and not the least bit oily. The glaze settled into the cake and the whole thing tasted like a caramel apple. Insanely good. I shared half of this cake with the in-laws and we managed to stretch this cake out to three days. The good thing? It gets better with age. And is awesome warmed slightly with a scoop of vanilla.

When I first joined The Cake Slice Bakers, we baked from Sky High Cakes, then Southern Cakes and starting next month, we're moving on to a new cake book. Since we're baking from a new book (it's a secret for now) we're inviting new members to join us. If you're interested in baking along with The Cake Slice Bakers and can commit to baking one cake a month and posting it on your blog on the 20th, then please email Katie at Apple & Spice 1). your name 2). blog name 3). blog URL to appleandspice[AT]hotmail.co.uk with ‘Cake Slice Member’ as the subject and she will contact you with the details of how to join. You have until October 20th to sign up. I hope to be baking with some of you next month!

Fresh Apple Cake w/ Brown Sugar Glaze adapted from Southern Cakes

Printer Friendly Version

Apple Cake:
  • 1 1/2 cups all purpose flour
  • 1 cup sugar
  • 1/2 teaspoon baking soda
  • 1/2 teaspoon salt
  • 1/2 teaspoon cinnamon
  • 2 eggs
  • 1/2 cup canola oil
  • 1 teaspoon vanilla
  • 1 1/2 cups finely chopped apples
  • 1/2 cup pecans or walnuts, chopped (optional)

Brown Sugar Glaze:

  • 1/2 cup packed light brown sugar
  • 3 Tablespoons butter
  • 1/2 teaspoon vanilla
  • 1 Tablespoon heavy cream

For the cake: Heat the oven to 350 degrees F. Grease an 8-inch pan (round or square) and set aside.

In a medium bowl, combine the flour, sugar, baking soda, salt and cinnamon.Stir with a whisk to mix everything together.

In a large bowl, mix the eggs with a hand mixer til light in color and foamy. Add the oil and vanilla and beat well.

Stir in the flour mixture with a spoon and continue stirring the batter til the flour disappears. Add the apples and nuts (if using) and stir to mix them into the batter.

Scrape batter into prepared pan and bake for 40-45 minutes, or until a toothpick inserted in the center comes out clean.

Place the hot cake on a wire cake. While it's still hot, prepare the glaze.

For the glaze: Combine all the ingredients into a saucepan. Cook over medium heat, stirring often, until the mixture comes to a gentle boil. Cook for 3-5 minutes.

Spoon the hot glaze over the still hot-from-the-oven cake. Let the glazed cake cool completely before serving straight from the pan.

Please don't wait til the weekend to make this!

Sunday, September 19, 2010

Novica Review & Giveaway (Closed)

I was contacted by Novica a few weeks back and they asked if I'd like to order from their website, write a review and host a giveaway. I was given a gift certificate code to place an order for anything on their website, but I was not paid to write this. The opinion of their products and website are purely my own. I'm just now getting to share with you my purchases because it took me forever to decide on what I wanted. They have so many wonderful and unique gifts that it was hard to narrow down. Seriously, I spent hours searching through all the treasures Novica has to offer.

Before I tell you about my goodies, I wanted to tell you a bit about Novica. Ever heard of them before? I hadn't until I saw a review done by Barbara Bakes and as soon as I went to their website I found a beautiful amethyst pitcher in their corporate gifts section. When it was actually time to place my order that pitcher was no where to be found, but that's okay because I still got some things that I'm happy with. I'm not generally a fan of ordering online because I like to support local businesses and I'm cheap and don't like to pay shipping, but Novica is different. Novica is associated with National Geographic and they don't have run of the mill stuff. They offer one-of-a-kind handmade gifts, eco-friendly green gifts, jewelery, clothing and home decor all made by over 2000 artisans from all over the world. How cool is that?

What I liked about this website and company and what made me feel good about ordering from them was that you know who you're ordering from. When you view an item, the website shows you a picture of the artist as well tells you a bit of their history. It's personal. It's almost like shopping at a world market and these talented artists are offering you the fruits of their labor. It's a beautiful concept and I wish there were more websites like Novica. And it gets better... Novica offers a program called microfinance that helps people like you and me support their artisans. Microfinance allows anyone around the world to give their artists loans at 0% interest so that they can keep on creating, building and crafting. It's a perfect scenario, because it's people helping people, and that's a company I can get behind.

Now onto the goodies I ordered. I got the Contempo Tray and Pineapple Spoon Rest from artist Luis Martinez in Mexico, and my favorite, Silver Plated Coffee Bean Earrings from artist Danai from Thailand. The tray and pineapple arrived in about a weeks time and were gift wrapped in thick paper and tied with a raffia bow. The earrings were tucked into a little pillow in a handmade paper box. Both came with postcards from their respective countries as well as a handwritten note from the artisans. I continue to be impressed by them. The only drawback was that the spoon rest wasn't quite big enough to accommodate my spoonulas, but I'm using to cradle my jewelery instead. Not only are they beautiful, but they're quality too- you can see and feel it.

Novica has kindly and generously offered to give one of you a $50 gift certificate to use on their website. Anyone and everyone is eligible for this giveaway. Here's what you need to do in order to qualify for this giveaway:

  1. Go to Novica's Corporate Gifts section and find something you'd like to have.
  2. Leave me a comment on this post (one comment per person please) telling me what you'd like to have and who the artist is. Make sure both of those details are in your comment or your entry will be void.
  3. Please make sure you leave your contact info if you should win.

A winner will be chosen and revealed on October 1st. Best of luck!

Thank you Novica!

Thursday, September 16, 2010

Summer and Autumn

I'm still in that Summer Is Still Here You Can't Talk Me Into Baking With Pumpkin Until Fall Is Here Mode. You're either with me or you're throwing gourds at me :-) According to my calendar, Autumn officially starts on September 23, but I've heard others say it's the 22nd, and most recently someone said it was the 21st. So I decided to do a little search and this is what I came up with: According to Suite 101, the first day of Fall is September 22, 2010 at precisely 11:09 pm EDT (for the Northern Hemisphere). There, it's settled.

That being said, I do have to admit to picking up two cans of Organic pumpkin puree at the grocery store this evening. Why? Am left me a comment asking if I had heard of a pumpkin shortage. I had not, but I also heard the same thing last year and I didn't have any problems finding any. That being said, I was going to stock up on a few cans for my Fall baking and I had a hard time finding it. When I found it (next to the canned pie filling) there were only two small cans on the shelf, so I snagged them up. I'm not sure if there really is a shortage or if it's still early in the season and it's not quite delivered to the stores yet. After all it is still Summer, have I mentioned that yet? :-) If you're worried about not having enough, just be sure to grab a can or two whenever you see some, where ever you see it. Am, I hope you find some!

Speaking of Fall, My sweet girl, Autumn, turned 6 years old yesterday.

While there are a few days left of this season, I thought I'd share with you a no-bake cookie recipe. I remember having these as a kid, though I am certain no one in my family made them, so I'm not sure where that memory comes from. You know when you taste something it just transports you back? Well that's how these cookies were for me. They're not really cookies, they're kinda fudgey and sweet, have great chocolate taste and they're loaded with oatmeal. When you first make them, they're somewhat soft and after a couple days they get harder and sandier, almost like a sugary praline. They were delicious and required very little effort. They'd also be great tucked into your kids lunch box.

No Bake Cookies- Favorite Recipes For Our Friends

  • 2 cups sugar
  • 1 stick oleo, margarine or butter (I used butter)
  • 3 Tbsp. cocoa powder
  • 1/2 cup milk
  • 1/2 cup crunchy peanut butter
  • 1 tsp. vanilla extract
  • 3 cups oatmeal (old fashioned rolled oats, not instant)

Mix the sugar, butter, cocoa, and milk in a medium saucepan.* Boil for 1 minute.

Add the peanut butter and vanilla. Mix quickly until peanut butter melts, then add the oatmeal and mix til well blended.

Drop spoonfuls on tin foil, wax paper or parchment. Allow to set and cool completely.

Makes 2 dozen 3 inch cookies.

NOTE: *I opted to pour the chocolate mixture into a large bowl before adding the oatmeal.

P.S. I love old cookbooks. This recipe comes from the bank in our (former) hometown, published in 1975. It has some of the best recipes. And I love that it calls for Oleo, instead of butter. Seriously, LOVE that.

Monday, September 13, 2010

Summer Is Still Here

Hope you all had a wonderful weekend! I know I sure did. Saturday I treated my mom to breakfast at The Original Pancake House (she loves their Dutch Baby pancakes), then we went and got pedicures (and a brow wax for me), had Starbucks and did a little shopping. While at Starbucks I enjoyed a Pumpkin Spice Latte- yum! I wait all year for those. That's the closest I've gotten so far to Fall flavors this year but I can't bring myself to start baking with pumpkin just yet. Believe me I want to, but it's still SUMMER!

It's still Summer and I'm still drinking limeade and eating grilled meats and hot dogs. It's still in the mid-90's here (high 80's when we're experiencing a "cold" front- ha!) and I'm still enjoying baking with zucchini- a summer favorite. I know a lot of you make jokes about having a surplus of the green veggie growing by the ton in your garden, but I can barely keep my indoor plants watered, so I don't have that problem. I happily buy my zucchini at the grocery store 4 at a time and I used 2 of them in this delicious cake. There's nothing like eating your veggies with a little chocolate :-).

I found this cake at The Cutting Edge Of Ordinary- Lisa has a beautiful blog (go check her out). I was intrigued by it because Chocolate Zucchini cake is one of my absolute favorites. I have a tried and true recipe that I usually bake it into a Bundt pan that my mom requests quite often but I liked this one because it's baked into a 9x13-inch pan and topped with chocolate chips that add a subtle sweetness. It's a great snack cake, simple to throw together and stays moist for days. If you've never tried zucchini cake before, don't be afraid- it adds moisture the way carrots do in carrot cake, but you can't taste it. Promise. It's also a good way to get some veggies into your kids (or you). Relish in the last few days of summer and make this cake!

Chocolate Zucchini Cake from Bon Appetit via The Cutting Edge Of Ordinary

Printer Friendly Version

  • 2 ¼ cups sifted all-purpose flour
  • ½ cup unsweetened cocoa
  • 1 teaspoon baking soda
  • 1 teaspoon salt
  • 1 ¾ cups sugar
  • 1 stick unsalted butter, room temperature
  • ½ cup vegetable oil
  • 2 large eggs
  • 1 teaspoon vanilla extract
  • ½ cup buttermilk
  • 2 cups grated unpeeled zucchini (about 2 medium)
  • 1 cup semi-sweet chocolate chips
  • ¾ cup chopped walnuts (optional)

Preheat oven to 325 F. Butter and flour a 9x13 inch baking pan.

Sift the flour, cocoa powder, baking soda & salt into a medium bowl.

Beat the sugar, butter and oil in a large bowl until well blended. Add the eggs 1 at a time, beating well after each addition. Add the vanilla extract.

Mix in the dry ingredients alternating with the buttermilk in 3 additions. Mix in grated zucchini.

Pour into prepared pan. Sprinkle with chocolate chips and nuts (if using).

Bake 50 minutes or until toothpick inserted into the center comes out clean. Cool cake completely in pan.

Would you like a piece?

This post linked to:

Thursday, September 9, 2010

Ground Turkey: Then and Now


The first time I ever cooked with ground turkey was a disaster. Mr. H, my aunt and I went to the beach and rented a condo for a week during the summer of 2003. I was set on making foil packets since they were simple and required little effort. So while we went to lounge on the beach, build sand castles, fight the waves and pick up sea shells, I set the frozen package of ground turkey in the fridge to thaw. I was afraid I'd get food poisoning if I set it out on the counter to thaw, so the fridge it was.


After about 4 hours we came back in, covered in sand and sunscreen. We all showered and got ready to make dinner only to find that the ground turkey was still frozen! I let it sit out for about another 30 minutes but we were starving so I proceeded on. Since I was making foil packets and I needed 3 portions, I broke the the frozen meat into three hunks of meat. I think about this now and it makes me cringe and laugh at the same time, but back then it sounded like a good idea :-) I placed the turkey atop thin slices of potato and onion, seasoned it with salt and pepper and wrapped it up in double sheets of foil. Into the oven it went. An hour later, it was smelling good. We dove in, took our first bite and practically spit it out. It was SO dry and bland and not even a mound of ketchup could save it, though we tried. Note to self: A hunk of frozen, unseasoned turkey thrown into the oven can't perform miracles on it's own.


Many years later, turkey and I have become friends. We have an understanding of eachother. I have promised to treat it with respect, season it nicely and not over cook it, and it in return has always been moist and flavorful. These burgers are simply flavored with a little steak sauce (trust me!), salt, pepper and a little parsley, dried or fresh. They're topped with buttery sauteed mushrooms and a slice of muenster or provolone cheese to hold them in place. Sometimes I serve them 'as is' if I'm watching my carbs and other times I like them between a bun with a little ketchup. It's become one of my favorite burgers and as long as I don't overcook it, it turns out perfect everytime unlike that hunk of meat back in 2003.


Turkey & Mushroom Burgers
from Monica H
Printer Friendly Version
  • 1 lb. ground turkey
  • 3 Tbsp. A-1 steak sauce
  • 1/2 tsp. dried OR 1-2 tsp. fresh chopped parsley
  • salt and pepper to taste (use the salt sparingly since the steak sauce can be salty)
  • sauteed mushrooms (recipe below)
  • cheese slices
  • buns
  • condiments
Mix up all ingredients but be careful not to over handle the meat. Mix just until combined. Form into 3 or 4 patties.

Cook in a saute pan with a little butter over medium high heat. Cook on one side til golden brown, then flip over and cook the other side til browned, about 4 minutes on each side. Cook just until done, once they're over cooked they will become dry.

Top with sauteed mushrooms (recipe below) and a slice of white melty cheese. We like muenster or provolone. Allow to melt then place on burger bun of choice with desired toppings.

Sauteed Mushrooms from Monica H
  • 1 container fresh white or brown mushrooms, sliced
  • 3 Tbsp. unsalted butter
  • salt and pepper to taste
In a medium saute pan, melt butter over medium high heat. Add sliced mushrooms and saute til slightly golden brown. Stir mushrooms a couple times and cook until tender. Season with salt and pepper after they've been cooked.

What kitchen Disaster to Success stories do you have?