Friday, February 26, 2010

Do You Believe In Magic?

Before I tell you about this recipe, I wanted to tell you about another blog I started. I know. The new blog is a photo blog called Natural Lighting where I'll post a new photo a day of the things around me. I just started it a couple days ago so don't expect too much :-) I hope you'll go check it out!

When I first starting dating Mr. H in high school, I would go to his house and his mom always had containers of these Magic Cookie Bars. She would make a large batch and once they were cool, she'd cut them into one inch cubes and freeze them. We'd eat those frozen little nuggets right out of the recycled Country Crock container while watching TV together.

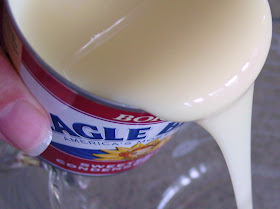
We haven't had them in a long time since his mom hasn't made any but I started to think about them and remembered how sweet, sticky and good they were. I also remembered how much my husband loved them and how much more he'd love me if I surprised him with these. And I just so happened to have all the ingredients in my pantry. Brownie points :-)

If you've never had them, you must make them. You start out with a graham cracker base, pour sweetened condensed milk on top of the crust, then layer the coconut, chocolate chips and nuts on top. Bake and you're done. They're a little sticky and gooey in spots. They're sweet but not too sweet and they have great texture. The nuts are crunchy, the crust is buttery, it's just good. You could always add dried fruit or omit the nuts and switch out the chocolate of your choice.

Magic Cookie Bars from Eagle Brand
  • non-stick cooking spray
  • 1 1/2 cups graham cracker crumbs
  • 1/2 cup butter, melted
  • 1 (14 oz.) can sweetened condensed milk
  • 2 cups (12 oz. pkg.) semi-sweet chocolate chips
  • 1 1/3 cups flaked coconut
  • 1 cup chopped nuts

Heat oven to 350°F. Spray 13 x 9-inch baking pan with non-stick cooking spray.

Combine graham cracker crumbs and butter in small bowl. Press into bottom of prepared pan. Pour sweetened condensed milk evenly over crumb mixture. Layer evenly with chocolate chips, coconut and nuts. Press down firmly with fork.

Bake 25 to 30 minutes or until lightly browned. Loosen from sides of pan while still warm; cool on wire rack. Cut into bars or diamonds.

After looking at these pictures, I want to make them all over again!

_________________________________________________

Here are a few furry and feathery friends that we saw in snowy DC.

These pigeons were seen at the White House.

This bird was seen at The Lincoln Memorial.

This bird and the squirrel below were both seen in front of The Smithsonian's Natural History Museum.

This little girl in her cute sweater is named Sophie. She looked up at me but when I took the picture she looked down. She was so cute and made me miss my little girl. The snow was frozen in her little ringlets...so cute.

How can you resist those eyes? Her brother was around but he was too busy playing in the snow and wouldn't slow down enough for me to take this picture.

Wednesday, February 24, 2010

They Just Go Together

Sunday was my sweet boy Jack's 3rd Heavenly birthday and yesterday was Mr. H's 30th birthday so I've been busy and haven't had a spare moment to visit your blogs. So if I haven't visited you and I regularly do then please bear with me while I get caught up. I hope it's sooner than later but I'm also experiencing difficulty with my laptop. It started right before we left DC and it freezes on me every 15 minutes and stalls until I restart it. Very frustrating.

Last week I was chatting back and forth through email with Coleen from Coleen's Recipes and she mentioned that she had a holiday issue of Sweet Cakes from Fine Cooking that she was really enjoying and making a lot of recipes out of. Like her yummy almond cheesecake apple bars, doughnut muffins and upside down pear cake just to name a few. Well I realized I had the same magazine and also loved it but I had only made one recipe from it, the Easy No Yeast Cinnamon Rolls. That was about to change. Coleen mentioned the next cake on her list to bake was the Coffee Cocoa Cake, and it just happened to be one that I was wanting to try as well so we baked it "together" last week and we have both our versions to share with you today!

Most of the time I pour with one hand and take pictures with the other to get those action shots but this time my honey volunteered to hold the bowl for me. I think he just wanted a slice of it as payment later on :-)

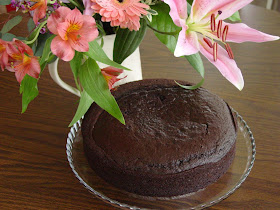
This cake was really simple to put together. The hardest part is brewing the coffee and waiting for it to cool down enough to add it to the other ingredients. It's made in one bowl and packs an ample amount of cocoa and coffee giving it a rich, slightly fudgey cake that is good enough on it's own without frosting or a sprinkling of powdered sugar. The coffee wasn't totally apparent on the first day but it intensified the chocolate flavor in the cake. On the second and third day the coffee flavor shone through and it was still delicious and moist. I served it with a scoop of Starbucks Java Chip ice cream and a cup of hot coffee. I was bouncing off the walls later that day :-)

Coffee-Cocoa Cake from Fine Cooking

  • 10 Tbs. very soft unsalted butter; more for the pan
  • 1-2/3 cups granulated sugar
  • 2 large eggs, at room temperature
  • 1 tsp. pure vanilla extract
  • 1/2 tsp. table salt
  • 1-1/2 cups plus 2 tablespoons all-purpose flour; more for the pan
  • 1/2 cup plus 1/3 cup unsweetened natural cocoa powder (not Dutch-processed)
  • 1 tsp. baking soda
  • 1 tsp. baking powder
  • 1-1/2 cups good-quality brewed coffee, cooled to warm

Position a rack in the center of the oven and heat the oven to 350°F. Generously butter a 9-inch-square baking pan. Line the bottom of the pan with parchment, butter the parchment, and then flour the bottom and sides of the pan. Tap out any excess flour. (I used cocoa powder instead of flour to coat the buttered pan).

If mixing by hand, put the softened butter and sugar in a medium bowl. Using a wooden spoon, cream them until smooth, about 1 minute. Switch to a whisk and blend in the eggs one at a time. Stir for another 30 seconds, until the batter is smooth and the sugar begins to dissolve. Mix in the vanilla and salt. Sift the flour, cocoa, baking soda, and baking powder directly onto the batter. Pour in the coffee. Gently whisk the ingredients until the mixture is smooth and mostly free of lumps.

Pour the batter into the prepared pan, spreading it evenly with a rubber spatula. Bake until a skewer inserted in the center comes out with only moist crumbs clinging to it, 40 to 43 minutes. Set the pan on a rack to cool for 20 minutes. Carefully run a knife around the edges of the pan, invert the cake onto the rack, and remove the pan. Invert again onto another rack and let cool right side up until just warm.

NOTE: This can be made in any 9-inch pan just make sure the sides of the pan are at least 2 inches high since this is a pretty substantial cake with a lot of batter. A Pyrex dish would work as well.

Be sure to go check out Coleen's version of this yummy cake! __________________________________________________ And here's something fun that Michelle of One Ordinary Day passed on to me. It's a Creative Writer Blogger Award and it's perfect since I placed 3rd in a Creative Writing contest when I was in elementary school. I even won a medal :-) Thanks Michelle!

  • Thank the person who gave you the award.
  • Copy the logo and place it on your blog.
  • Link to the person who nominated you.
  • Tell us up to six outrageous lies about yourself and at least one outrageous truth.
  • Allow your readers to guess which one or more is true.
  1. I placed 2nd in a Spelling Bee in 4th grade. TRUE
  2. I took naughty photos for my husband one year ;-) TRUE
  3. St. Patty's Day is my favorite holiday! FALSE
  4. Chocolate and PB is my favorite sweet/salty combination. FALSE
  5. I learned to cross stitch when I was a kid. TRUE
  6. Groundhog Day is my favorite movie of all time! SO FALSE

Hint: There are 3 true and 3 false statements above. Guess which ones are which!

Saturday, February 20, 2010

Mud, Monuments and Memorials

Mississippi Mud Cake. What is that? Mississippi mud cake has a pecan studded brownie like base, then a layer of marshmallows and then it's covered in a layer of sweet chocolaty frosting that is similar to the frosting on a chocolate sheet cake. Sounds good huh? This cake was baked by The Cake Slice Bakers and comes from Southern Cakes by Nancie McDermott.

This is the recipe that made me want to buy this book. I remember browsing through it at Borders and drooling over the photo in the cookbook. It lingered in my mind and eventually I went back to get it. So I was thrilled when The Cake Slice Bakers voted it as their cake of choice for February. I made this for Valentine's Dinner at my mom's last week. One slice is so rich and sweet we didn't even eat a 1/4 of the recipe between 7 of us. So I would suggest baking half the recipe in an 8x8 inch pan.

This cake wasn't as spectacular as I hoped it would have been. It was good but I did not care for the cake aspect of this recipe. It was essentially an unleavened chocolate cake, similar in form to a brownie (not fudgey) but dense and somewhat dry and wasn't very flavorful. In all fairness I did cut back on the sugar a bit in the cake since the frosting was so sweet. I would try this again with a brownie base or a different cake recipe and I would halve the amount of frosting. This cake was firm but gooey, sticky and sweet. If you're a fan of SUGAR, chocolate and marshmallows then this cake is for you!

Mississippi Mud Cake from Southern Cakes Printable Version

For the Cake:

  • 1 cup (2 sticks) butter, cut into big chunks
  • ½ cup cocoa powder
  • 4 eggs, beaten well
  • 1 tsp vanilla extract
  • 2 cups sugar
  • 1½ cups all purpose flour
  • ¼ tsp salt
  • 1 cup chopped pecans or walnuts

For the Frosting:

  • 16 oz. or 3 1/4 cups powdered sugar
  • ½ cup cocoa powder
  • ½ cup (1 stick) butter, melted
  • ½ cup milk
  • 1 tsp vanilla extract
  • 4 cups mini marshmallows

Heat the oven to 350F. Grease and flour a 13x9 inch pan. In a medium saucepan combine the butter and cocoa powder and cook over medium heat, stirring now and then, until the butter is melted and the mixture is well blended, about 3 – 4 minutes (I did this in the microwave). Stir in the beaten eggs, vanilla, sugar, flour, salt and pecans and beat until the batter is well combined and the flour has disappeared.

Quickly pour the batter into the prepared pan and bake for 20 to 25 minutes until the cake springs back when touched gently in the center and is beginning to pull away from the sides of the pan.

While the cake bakes, prepare the frosting so it is ready to pour over the hot cake. (I suggest doing this right before the cake is done so the frosting doesn't set up in the bowl).

In a medium bowl combine the powdered sugar and the cocoa powder and stir to mix well. Add the melted butter, milk and vanilla and beat everything together well. Set aside until the cake is done.

Remove the cake from the oven, scatter the marshmallows over the top and then return the cake to the hot oven for about 3 minutes to soften the marshmallows.

Place the cake, still in the pan, on a wire rack. Pour the frosting all over the marshmallow dotted cake and eat right away or allow to cool to room temperature. Cut the cake into squares and serve.

_________________________________________________

Here are more pictures of Memorials and Monuments in the DC area. It snowed all day Friday and Saturday that we were there, but on Sunday (Superbowl Sunday!) it was a gorgeous day. We called a cab to take us to brunch but he never showed up so the hotel called a private driver who was close by to drive us around. It just so happens that he does private tours so he drove us around DC for 4 hours! He was so knowledgeable and such an intelligent man. He was an amazing tour guide and we're glad our paths crossed. I'm also glad we went on such a beautiful day. There were clear sunny skies and the snow glistened like glitter. Someone said it sparkled like diamonds and I think I like that analogy much better :-)

This is the Washington Monument. Notice the difference in color in the stone about a quarter of the way up? Well that's because they ran out of money when they were building it! When they later had enough funds to finish the monument they returned to the same quarry and purchased the same kind of stone only later to realize that the newer batch did not quite match so they're different colors.

* * * * * * * * *

This is the Jefferson Memorial. We did not get to get up close and personal with President Jefferson since the memorial was closed. The pathways leading up to it were covered in snow but we admired it from afar. The picture above is the front and the picture below is the backside. There is a huge statue of Jefferson that stands in the center of the monument that we could see as we drove around it but it's not visible from these views.

* * * * * * * * *

This is the Lincoln Memorial. We were able to get pretty close to the memorial but we weren't allowed to walk up the steps that led to the famous President sitting in a giant chair since they were also covered in snow. Imagine that?! At the top of the memorial above the columns are all the 50 states. Texas is on the front side on the left, right next to Florida. Ingrid we're neighbors after all :-)

* * * * * * * * *

This is the Supreme Court, which is right across from the Capitol. It has a gorgeous golden door at the entrance.

And finally the US Capitol. We were able to walk up the steps all the way up to the front, then across and back down. There were people on the lawn in skis going down the hill as well as families on sleds. They looked like they were having fun. why not? BTW, did you know that the Texas Capitol is the only state capitol that is taller than the US capitol by about 15 feet? You know what they say...Everything is bigger in Texas!

I have more photos for you that I'll share over time unless you're getting bored already :-) Enjoy!

Tuesday, February 16, 2010

Oranges and More Snow

When we were in DC we ate at a few different restaurants when we were able to travel but we also ate at the hotel restaurant- Palette, which was surprisingly good albeit expensive! We ate at Georgia Brown's, which is supposed to be Southern. I ordered the fried turkey which was very dry and tough but the sides were good. Mr. H ordered the steak and eggs. It was interesting and not at all what you'd expect. I'll leave it at that. We went to Clyde's for Sunday brunch (I had the crab cake benedict) which was tasty but had bad service. We ate at their sister restaurant, Old Ebbitt Grill (I ordered their cannelloni) which was also very good, Hee Been (Korean buffet- the spare ribs were delish!) and Polo India Club (I had malai chicken tikka which was dry but Mr. H's lamb and pea dish was great. So was the naan bread! I think it was my favorite part.

Where am I going with all this? Well as good as the meals were, the desserts were lousy! Now don't start sending me hate mail and leaving me rude anonymous comments (he he!) because I didn't like the desserts in DC. That's not to say that the entire city had bad pastry chefs but there was clearly nothing special about what I had. While there I had a creme caramel, a dry cheesecake (yuck), saffron ice cream (double yuck) a slice of bourbon chocolate chip pie which was nothing more than cookie dough pressed into a pie plate and a fruit platter with the most unripe fruit I've ever tasted. It really was pathetic. My favorite dessert had to have been the complimentary bowl of freshly spun, melt in your mouth, cotton candy that the hotel restaurant brought to us after our meal. One night it was grape and another night we had lime. I've got to get me a cotton candy machine. so fun and billowy!

So to say that I was itching to get back into my own kitchen and bake something was an understatement. I found comfort in a Snickers bar and that's sad when there was so much good food around. The first thing I made when I got home was a pineapple upside down cake- yum! I didn't take pictures of that since I was wanting to get it in the oven and in my tummy quick! But I will share with you an orange cake that I made a few weeks ago since citrus is still in season. It had a great texture. It was dense but melted in your mouth. It was sweet and rich and Mr. H said it smelled and tasted like Fruit Loops :-). The only change I'd make next time is to use sweeter oranges as they were a little lack luster. I'd also use zest in the glaze to up the orange flavor.

I adapted this recipe from grams to cups. The measurements aren't exact but this is the formula I used. I also halved the recipe and baked it in a 9-inch pan rather than a 9x13 or a larger springform pan. If you want a larger cake, you can find the original unedited recipe here.

Orange Cake adapted from Jill Dupleix via Technicolor Kitchen

Cake:

  • 1 cup (2 sticks) unsalted butter, room temp.
  • 1 cup granulated sugar
  • 4 eggs
  • 1 1/2 tsp. grated orange zest
  • 2 cups all purpose flour
  • 1 Tbsp. baking powder
  • 1 tsp. salt
  • 7 Tbsp. fresh squeezed orange juice

Glaze:

  • 2 cups powdered sugar
  • 3 Tbsp. fresh squeezed orange juice

Heat the oven to 350F. Butter a 9-inch cake pan and line the bottom with parchment paper. Then butter the paper and set aside.

Cream the butter and sugar well, until it is very pale and thick - this will take quite a while.

Add the eggs one by one, beating well after each addition, then add the zest. Add the flour, baking powder and salt all at once, and beat well, then slowly add the orange juice until it is incorporated.

Pour the batter into the prepared cake tin, and bake for 35-40 minutes - or until an inserted skewer comes out clean (slow is best, so don' t be afraid to cook it longer. If it starts to brown too much on the top, cover loosely with a sheet of buttered foil.)

Allow cake to cool in pan for 15-20 minutes on a wire rack. Then invert onto a plate, remove the parchment paper and allow to cool completely before glazing.

To make the icing, stir the orange juice into the icing sugar until you have the right spreading consistency. Pour the icing onto the cake and spread with a spatula or butter knife, allowing the icing to drip down the sides of the cake.

Leave the icing to set before cutting the cake into wedges or storing in an airtight container.

NOTE: I thought the glaze was rather sweet and needed more orange flavor so I suggest adding some grated orange zest to the glaze for more intense flavor.

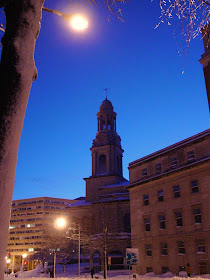
Here are a few more pictures from our trip to Washington DC. This was the second day of the snow and the photos were taken around Thomas Circle. It was just starting to get dark when we went out so you may notice the change in the sky as the photos progress. enjoy!

I like this church, can you tell?

Ah, so pretty! I love the snow. (sigh).

Sunday, February 14, 2010

Happy Valentine's Day!

These are some candies that Katie sent me a few months ago. Aren't they the cutest?!

And these lovely handmade Valentine's are from Laura of Hey What's For Dinner Mom? and Christina of Dinner at Christina's. Thank you both so very much!

Hope you all have a wonderful day.

xoxo, Monica